I love fun fold cards and thoroughly enjoyed making this fun panel pop-up card along with my lovely ladies in my free Craftalong this week. I first saw this card made by the lovely Connie Stewart, a US demonstrator. I’ve adapted it a bit and worked out the UK measurements. (If you want the US measurements, please go to Connie’s website at SimplySimpleStamping.com and search for pop-out panel flash cards.)
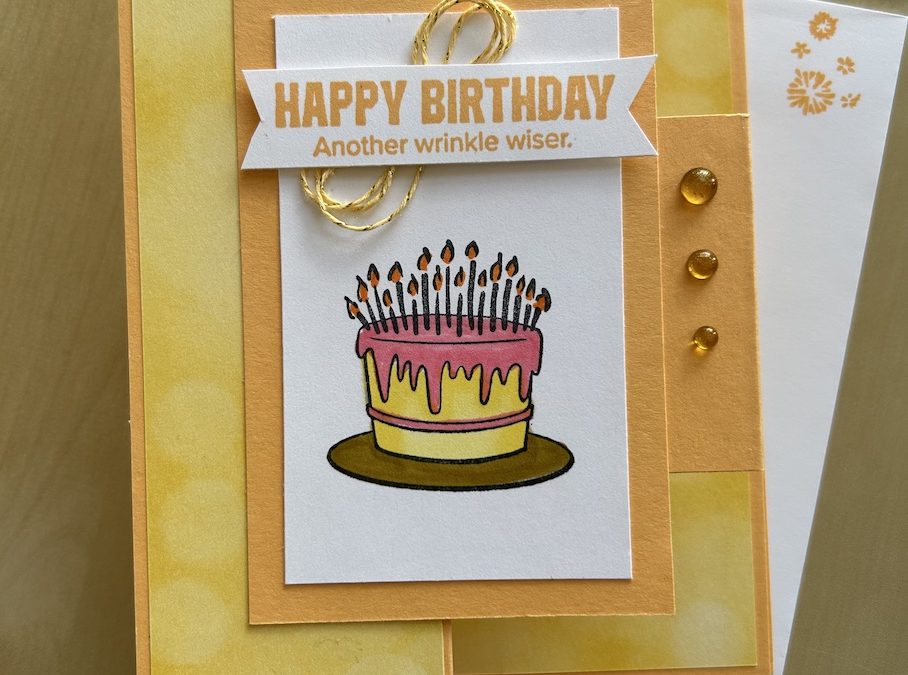
I used Peach Pie cardstock as the base for this panel pop-up card. The One More Year stamp set provided the image and sentiments on the front and back. The DSP used is Beautiful Bokeh.
For this panel pop-up card you will need:
- Base card colour card: 21cm x 14.8cm
- Back panel colour card: 10.5cm x 14.8cm
- Front panel colour card: 7cm x 10.5cm
- Basic White panel: 6.5cm x 10cm
- Coordinating colour DSP: (2 sheets of 6″ x 6″ or 1 sheet 12″ x 12″)
- Back piece 10cm x 14.3cm
- Front piece 4.8cm x 14.3cm
- Middle panel pieces (x2): 4cm x 4.8cm
- Scrap of Basic White for sentiment
- Coordinating gems and ribbon or twine to finish
- Paper trimmer
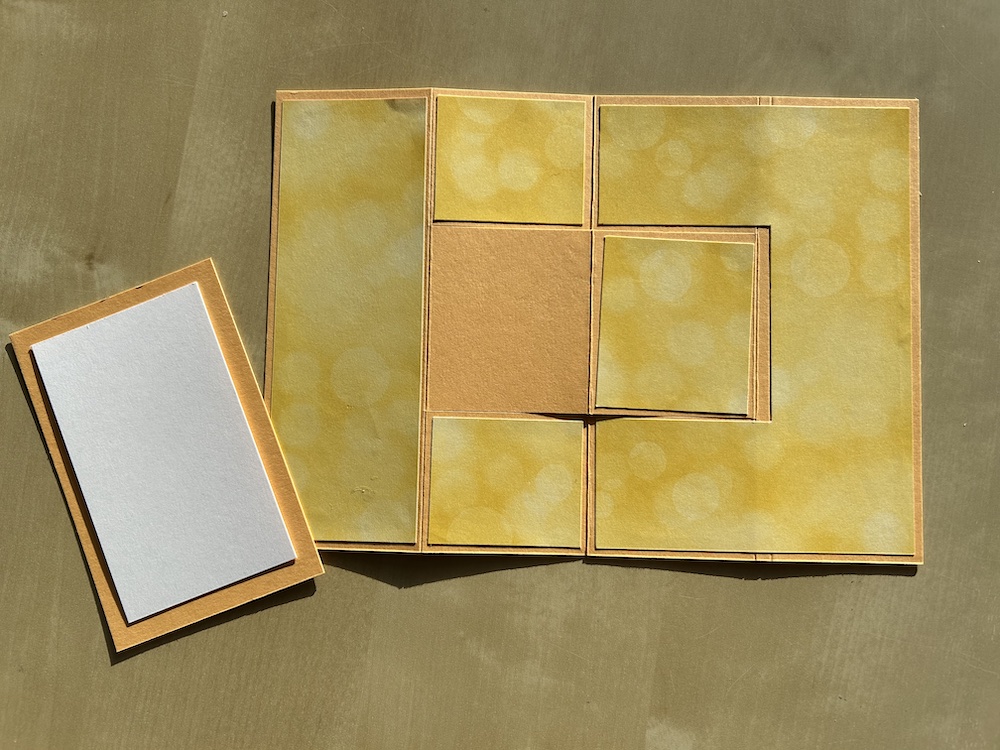
Here are all the pieces. It looks complicated but it really isn’t!
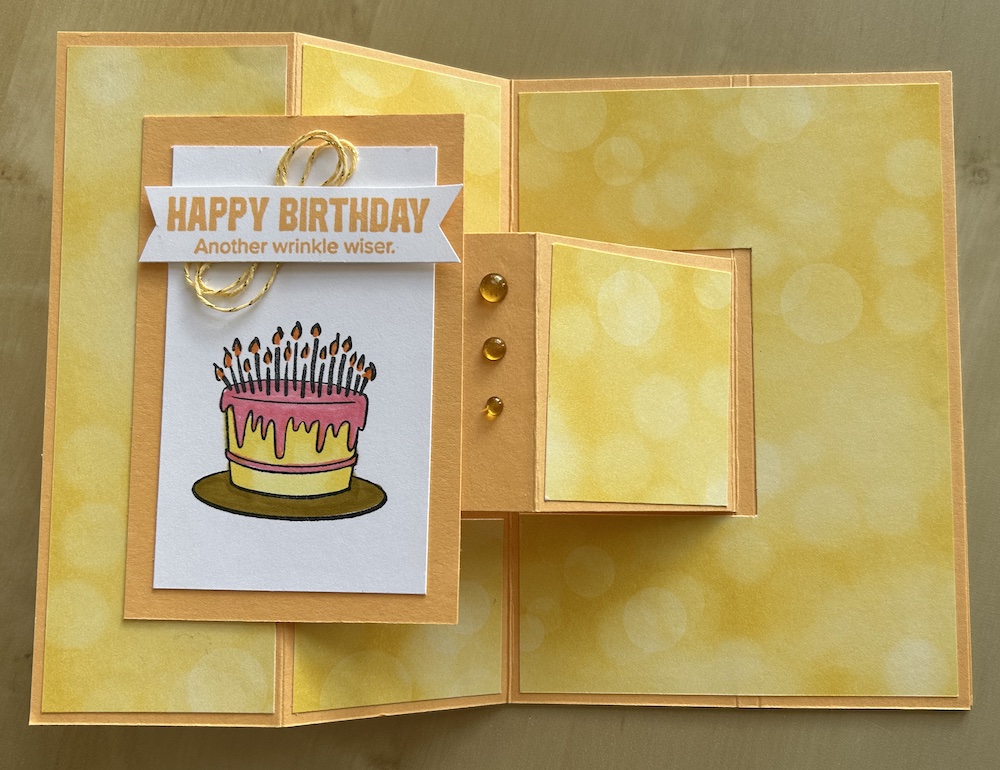
To make the panel pop-up card, score the base on the long side at 5.25cm, 10.5cm and 15.75cm.
Measure and mark 4.5cm from both the top and bottom of the card on both the two side score lines. Use your trimmer and cut between these marks to create slits at the top and bottom of the card – yiuc an see these in the photo above.
Mark the DSP back piece at 4cm from top and bottom on the long side. Measue 5.5cm in from both the 4cm marks and cut out the section between these marks.
This cut out piece can then be turned sideways and used to decorate the centre panel as shown in the photo above by trimming it to 4.8cm wide. (Alternatively if you prefer not to add a back to the card, you could add a Basic White panel there for writing a message.)
Stick the other DSP panels to the front and inner top and bottom panels of the card as shown in the picture.
Stamp your image onto the Basic White panel and colour using Blends.
Stick this panel to the colour front panel piece. Adhere centrally to the front of the card on the left hand panel adn centre panel only – be careful! I suggest adding the adhesive to the left hand side only of the panel, then adding some to the left hand side of the centre panel before sticking down.
Complete the front by stamping and cutting out/die-cutting a suitable sentiment. Wrap some twine in a figure of eight and stick behind your sentiment. which should be added with dimensionals.
Finish by adding a few gems on the unused area of the centre panel.
I added a back panel as well. It adds some weight to the card so it stands up well and gave me a place to add a space for writing a message.
Stick the back panel to the back of your panel pop-up card being careful not to get any glue on the pop-up panel. (Note: I added another piece of DSP 4.8cm x 5.5 cm on the piece of the back panel that shows through the cut-out, but this is not essential.)
Stamp your sentiment and any decoration in coordinating ink onto the Basic White panel then stick to the back of your card.
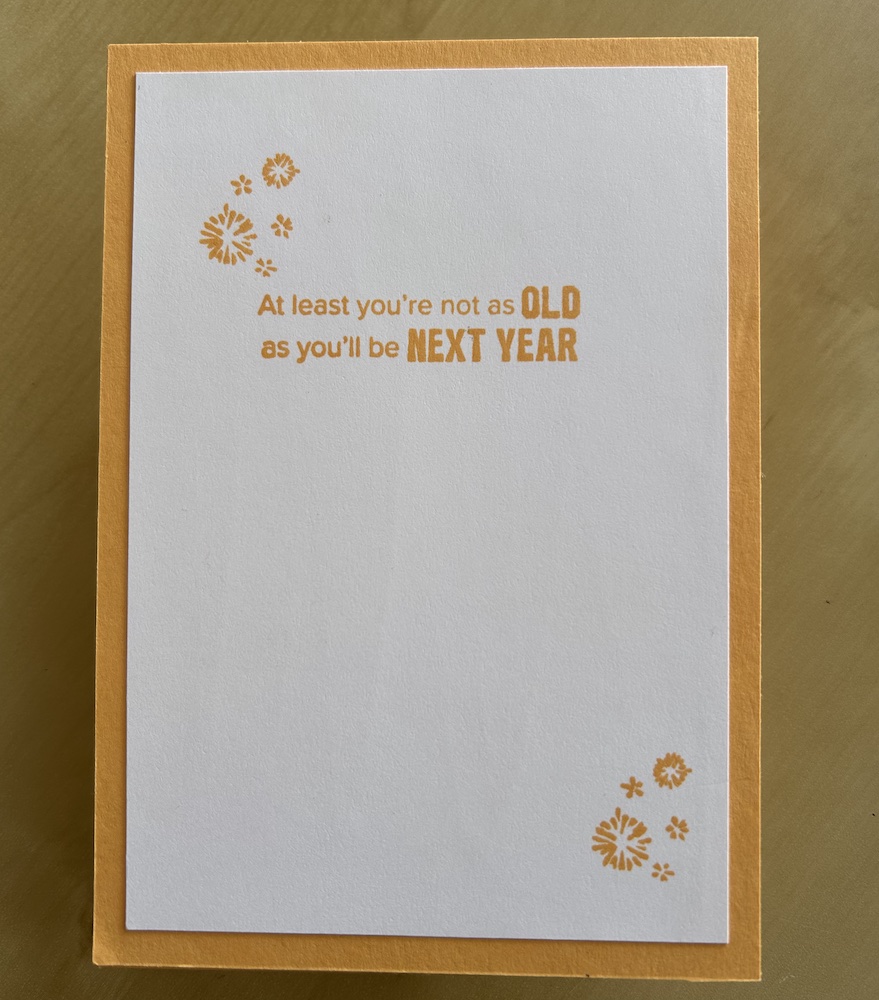
Don’t forget to decorate your envelope!
There is no video for this panel pop-up card as it was made during March’s live Craftalong. The live Craftalongs run on Zoom on the first Thursday of each month – sign up to my emails so you won’t miss one!
I hope you like this card and will have a go at making one – please show me what you come up with.
Thank you for taking the time to read my post.

Don’t forget – you get a FREE pdf when you place any order with me as your demonstrator. And, if your order is over £40, you will also get to choose stuff from my online shop to the value of your order!
Product List  |  |  | ||
 |  |
")
 Designer Series Paper")
