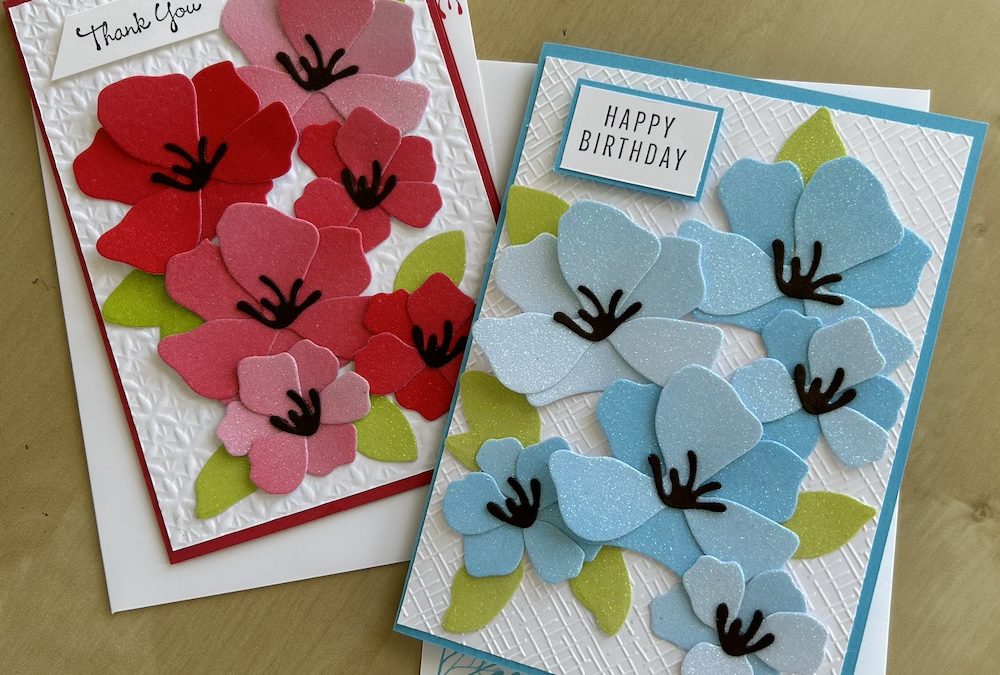
I love the Translucent Florals stamp set and dies. They first appeared in the Sept-Dec mini catalogue, but thank goodness they are still available now as Online exclusives, though there are no guarantees how long items stay available there.
I wanted to use my rather large stash of the 2022-2024 In Colors (cardstock, DSP, specialty paper, ribbon, gems…) before they all retire (boo-hoo) at the end of April and Translucent Florals seemed like a great set to use to complement these gorgeous colours.
The stamp set has Instinctive flower stamps, meaning they stamp to give texture via the stamp itself. There is also a leaf stamp, a flower centre stamp and a sprig stamp as well as some lovely sentiments.
The Translucent Florals dies are just fabulous; the set includes dies to cut two different types of solid flowers and leaves as well as the dies to cut out the images in the stamp set. It’s the solid flowers and leaves dies I used for these cards.
I used retired In Color glimmer paper to die-cut the flowers, but I explain in the video and below what else you could use. (There is a speciality pack of glimmer paper available as an Online Exclusive too.)
To make the card you need:
- Colour cardstock base 21cm x 14.8cm scored in half at 10.5cm (8 1/2″ x 5 1/2″ scored at 4 1/4″)
- Basic White layers (x2): 14.3cm x 10cm (5 1/4” x 4”)
- 6′ x 6″ colour glimmer paper or cardstock to die cut the flowers
- 3″ x 3″ green glimmer paper or cardstock to die cut the leaves
- Scrap of Early Espresso to die cut the flower centres
- Scraps of Basic White and colour cardstock for the sentiment
- Basic 3D embossing folders (also Online Exclusives)
Watch the video below to see how to make the card. The instructions are also given underneath the video.
Emboss one layer piece of Basic White using your favourite Basic 3D embossing folder. Stick this piece to the card front.
Die-cut three sets of large and three sets of small solid flowers from your 6″ x 6″ colour glimmer paper or cardstock. Pair each set up and glue them together. Die-cut three large and three small flower centres from Early Espresso cardstock and glue these to the centres of your flowers. Die-cut five or six leaves from your green glimmer paper or cardstock.
Use a ball tool or your finger knuckle to shape the flowers in your palm. See the video for details if you are not sure about this. Lay the flowers out on your card front. When you are happy, glue them down. Add the leaves randomly to fill in any spaces.
Stamp your chosen sentiment on a scrap of Basic White using Memento ink. Stick it to a scrap of your coloured cardstock and fussy cut a small border around it if you wish – or leave it plain. Add the completed sentiment to your card using dimensionals.
Stamp a chosen sentiment for the inside of your card on the other Basic White layer. Add the flower sprig stamped in a matching colour three times, one stamped off, that is, stamp again immediately after stamping the first image. I decorated my envelope in the same way. Stick the completed inner layer inside your card.
Note: You could use ordinary colour cardstock for your flowers if you don’t have glimmer paper and use your Wink of Stella to make them sparkle.
I can’t stop playing with this gorgeous set. I have another card using the Translucent Florals stamp set and dies to share with you in the next T4S blog hop- watch out for it on Tuesday 12th March!
I’d love to see what you make. Let me know!
Thank you for taking the time to read my post.

Don’t forget – you get a FREE tutorial of eight cards when you place an order with me. There’s a different set every month. And, if your order is over £40, you will also get to choose stuff from my online shop to the value of your order!
Product List


