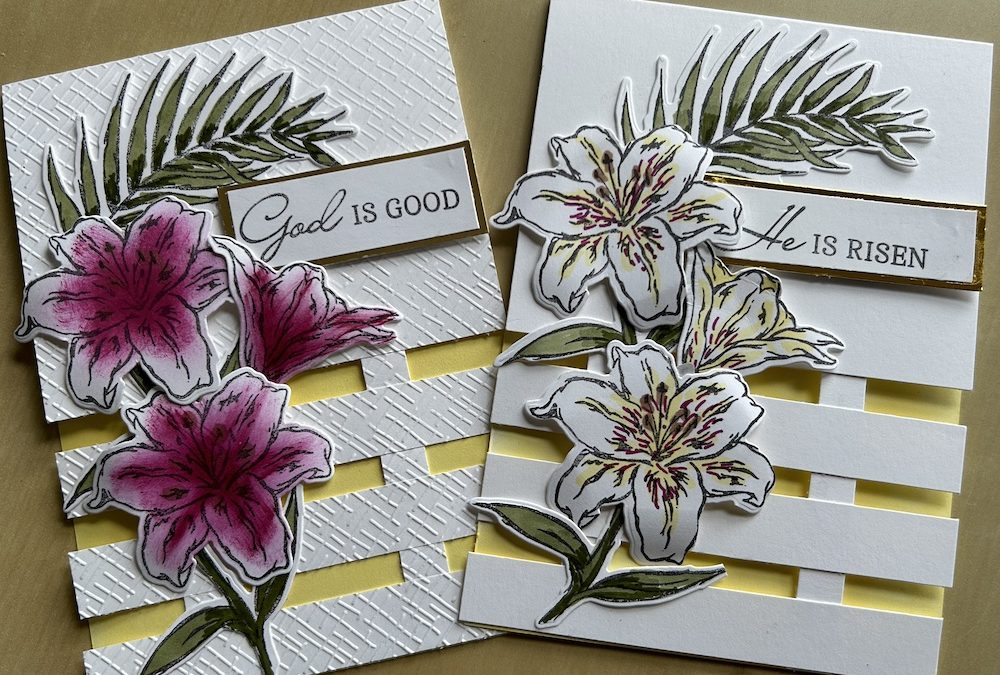
As you read this I’ll be in an operating theatre having my hip replacement. But before I came in, I was able to make this trellis Easter card and also an Easter decoration using the beautiful Easter Lilies stamp set and dies. I’ll post the instructions and video for the Easter decoration next Tuesday (26th March).
My ladies loved making this card (and the decoration) at our class this week. This trellis card is named for see-through parts at the bottom of the card. It looks complicated, but is actually easy to make.
Although I’ve used the Easter Lillies bundle and made it an Easter card, you could use this idea and design with any stamp set you like, with any sentiment you like and any colour scheme you like. It is one of the most versatile designs.
Here is the video of how to make this card. Instructions can be found below if you prefer.
To make this card you need:
- Basic White card base 29.8cm x 10.5cm scored in half at 14.8cm (11” x 4 ¼”, scored at 5½”) and burnished well
- Approx half a sheet of Basic White for stamping
- Small scrap of gold foil
- Colour ink and dauber OR piece of DSP 10.5cm x 7cm (4 1/4″ x 2 3/4″)
From one long end of your cardstock, cut TWO strips of card 1cm (1/2″) wide and THREE strips 1.5cm (3/4″) wide.
Fold your card “inside-out” and turn all your cut strips over. Place one of the three wider strips at the bottom of the card then place the other two equidistant between this strip and the main card piece. Add liquid glue to each strip and the card base in a line upwards and adhere one of the narrower strips across your paced wider strips.
Once you are happy with the position, add glue at an equal point on the other side and adhere the second narrower strip to complete your trellis. See the video if this is not clear. Turn your card the right way out.
Use your sponge dauber and chosen colour to add colour under the trellis area (approx half way up the back of your card base), Or stick a pice of DSP to cover this area to show through the trellis.
Stamp two large flowers and the smaller part open flower head onto Basic White cardstock. Colour as you wish – you can see two different colour schemes in the video. Googling pictures of lilies will give you lots of ideas. Don’t worry about adding colour over the lines of using a dauber – you are going to die-cut the images.
Then stamp the large frond leaf and two small double leaf stems onto Basic White and colour. I used Mossy Meadow stamping blends. Die cut all these images.
Stamp your chosen sentiment onto a scrap of Basic White. Mount this onto a piece of gold foil just slightly larger.
Use your bone folder to gently bend the flower petals to give the flowers some depth and shape. Arrange the die-cut flowers, leaf and stems on your card. Stick the leaves and stems flat to the card, being careful only to add glue where the die-cut will touch the trellis.
Add the flowers using dimensionals. Tuck the sentiment piece slightly behind a flower and stick onto your card – I used dimensionals for this as well.
I hope you like this card and will have a go at making one – please show me what you come up with.
Thank you for taking the time to read my post.

Don’t forget – you get a FREE tutorial of eight cards when you place an order with me. There’s a different set every month. And, if your order is over £40, you will also get to choose stuff from my online shop to the value of your order!
Product List ") |  |  |  |

