
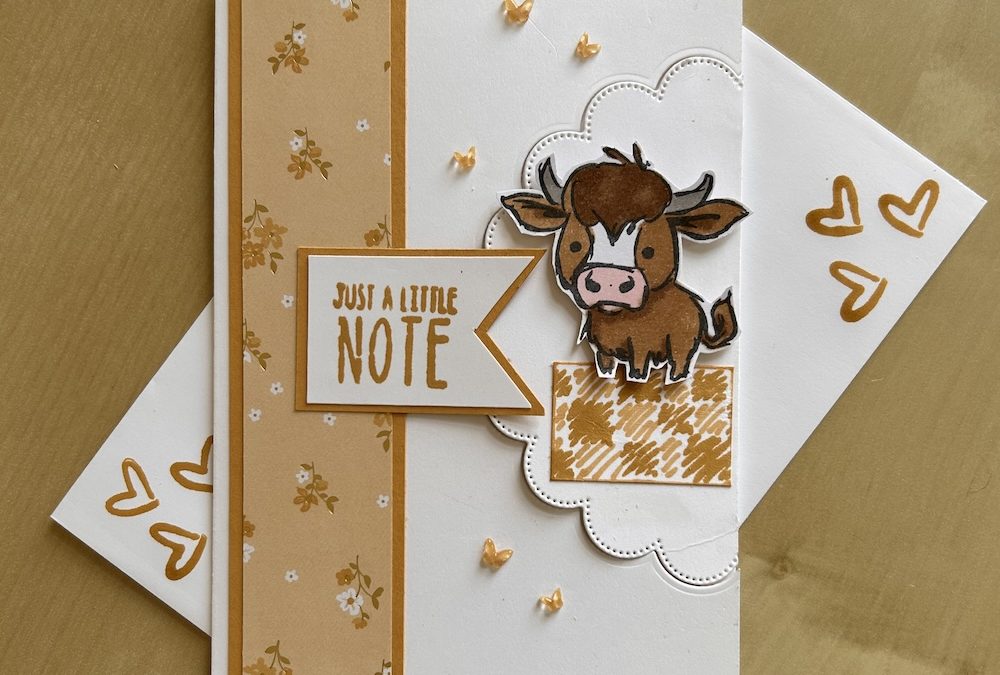
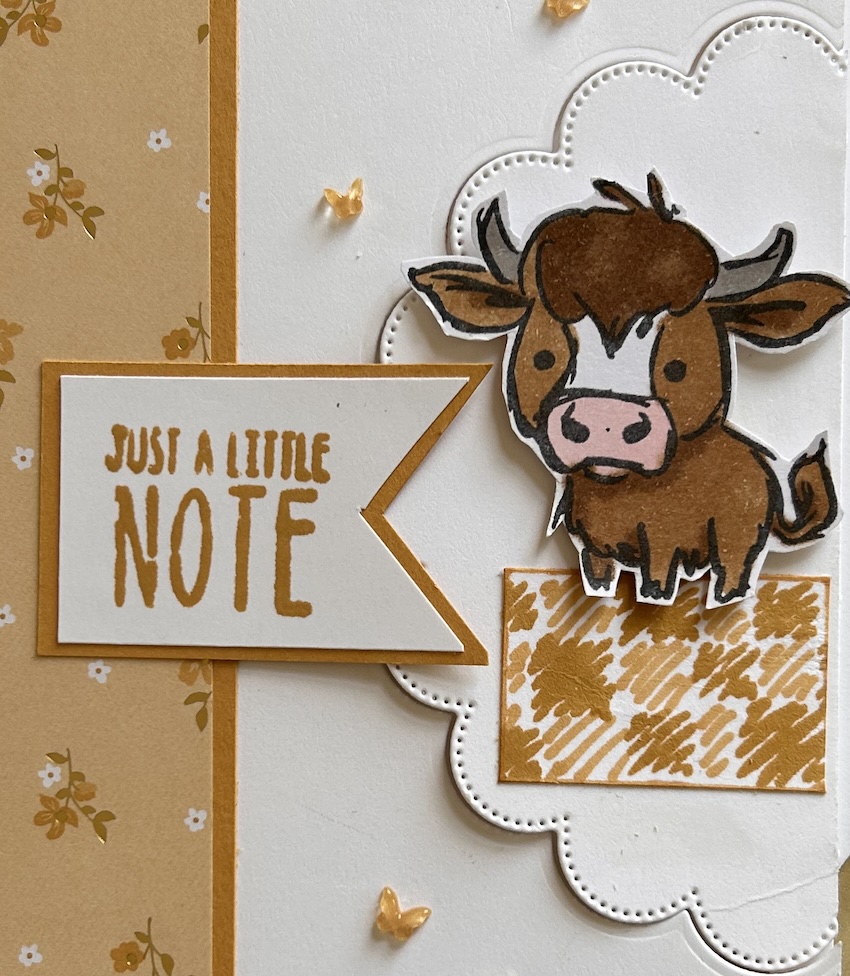
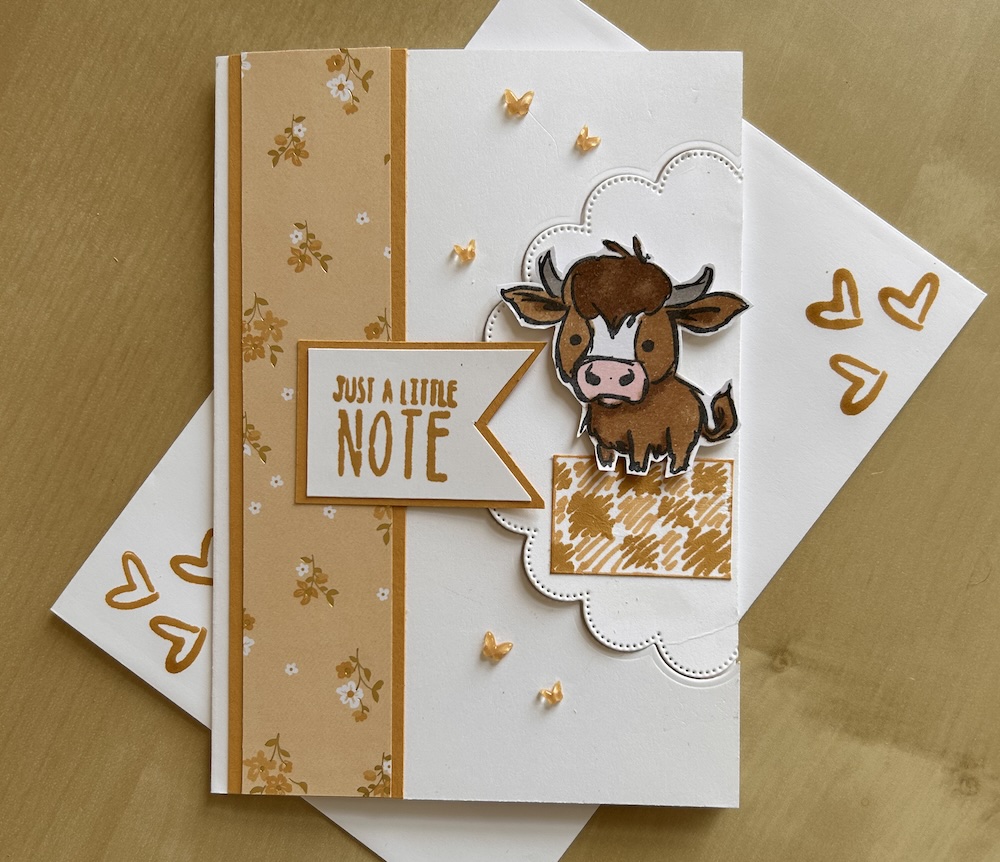
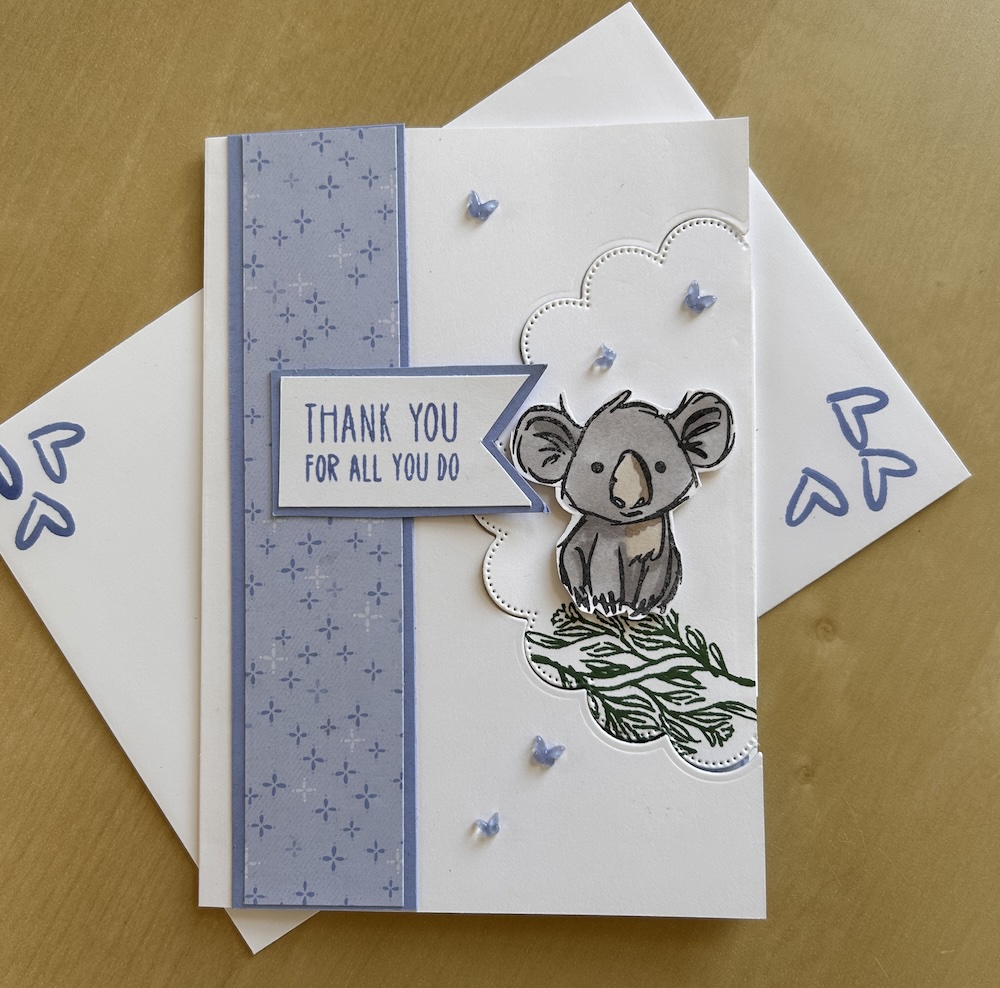
This card has a side aperture which forms a flap, hence the name! I’ve used the Scalloped Blooms dies to form the side aperture and also to create the side flap. The image is from the Wild Bunch stamp set and the Bloom Boutique DSP adds some patterned interest. The In Color butterflies add some bling.
You can use any small to medium-sized image and any DSP for this side flap aperture card and it can be made for any occasion. I’ve used the Scalloped Bloom dies, but the aperture can also be made with any circle die.
The pictures below are of my first card, I made a Hydrangea Hue side flap aperture card in my aborted Craft live – the video is at the end of this post. Why not join us next time?
To make this card you will need:
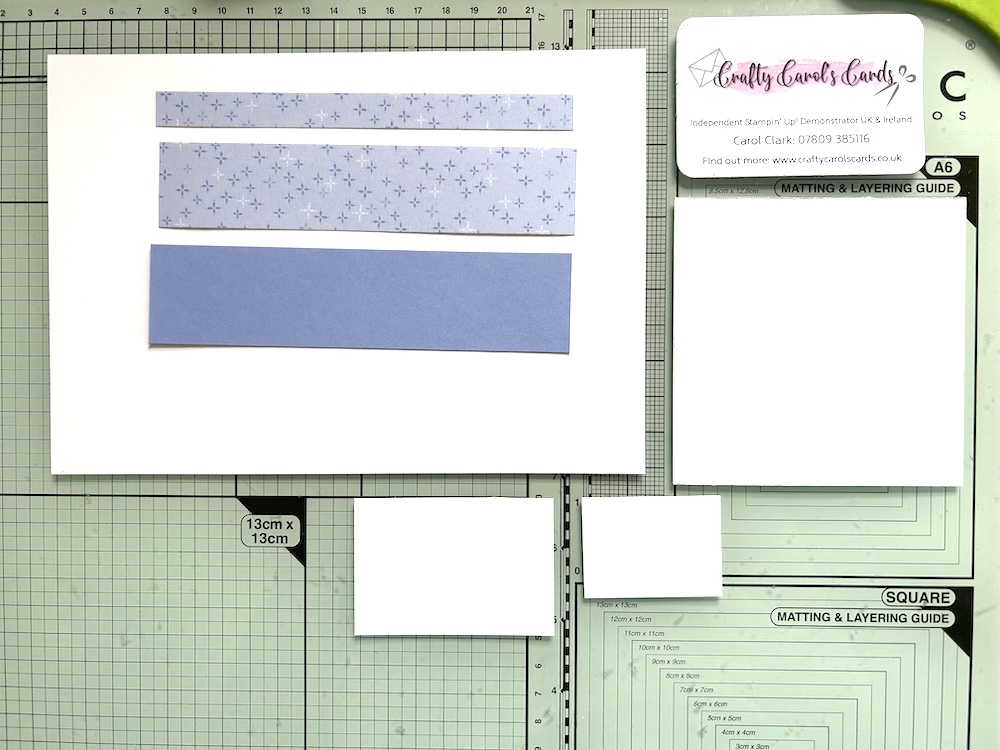
- Basic White thick cardstock 21cm x 14.8cm scored at 10.5cm (8½” x 5½” scored at 4¼”)
- Basic White thick cardstock piece approx 10cm (3½”) for die-cutting side flap scallop
- Scraps of Basic White for stamping
- Strip of coloured cardstock 3.5cm x 14.8cm (1½” x 5½”)
- Strip of Bloom Boutique DSP 3cm x 14.8cm (1″ x 5½”)
- Strip of DSP 1.2cm x 14.8cm (½” x 5½”)
Here are the pieces I used in my Live:
Instructions
The video of me making a side flap aperture card can be found below, or if you prefer, here are the instructions.
Fold and burnish your card base.
Stamp, colour and cut out your chosen image.
Use the second largest Scalloped Blooms die to cut out a half-scallop from the side of the card base.
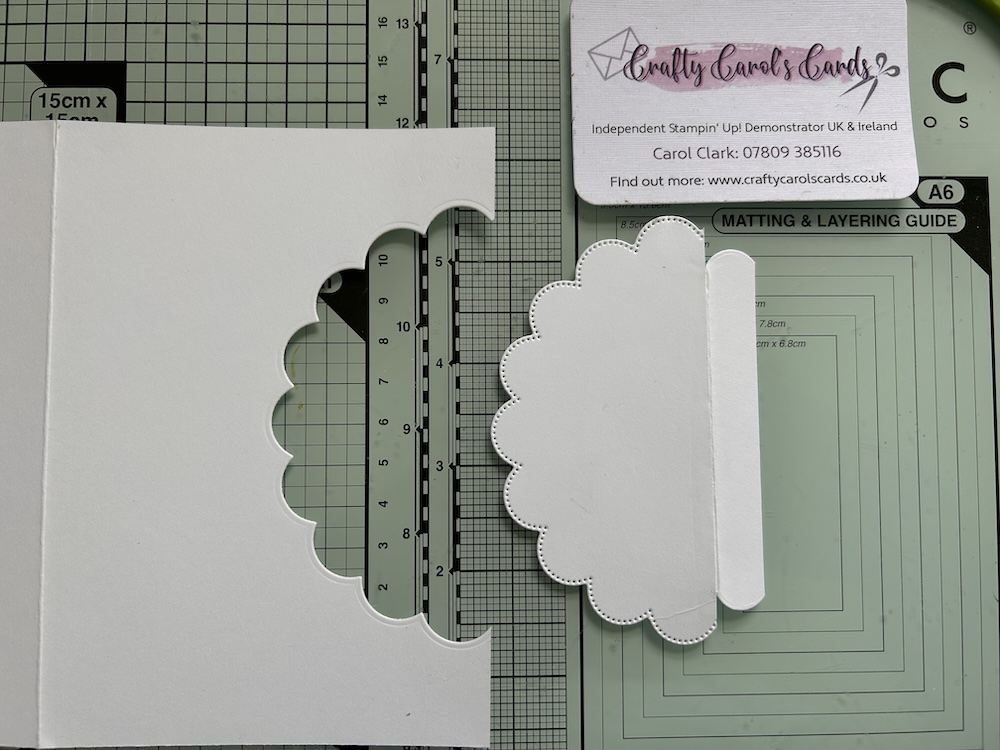
Also die-cut the third largest scallop from your spare piece of Basic White. Cut this in half as shown below, cutting between the scallops. (The other half can make a second side flap aperture card!)
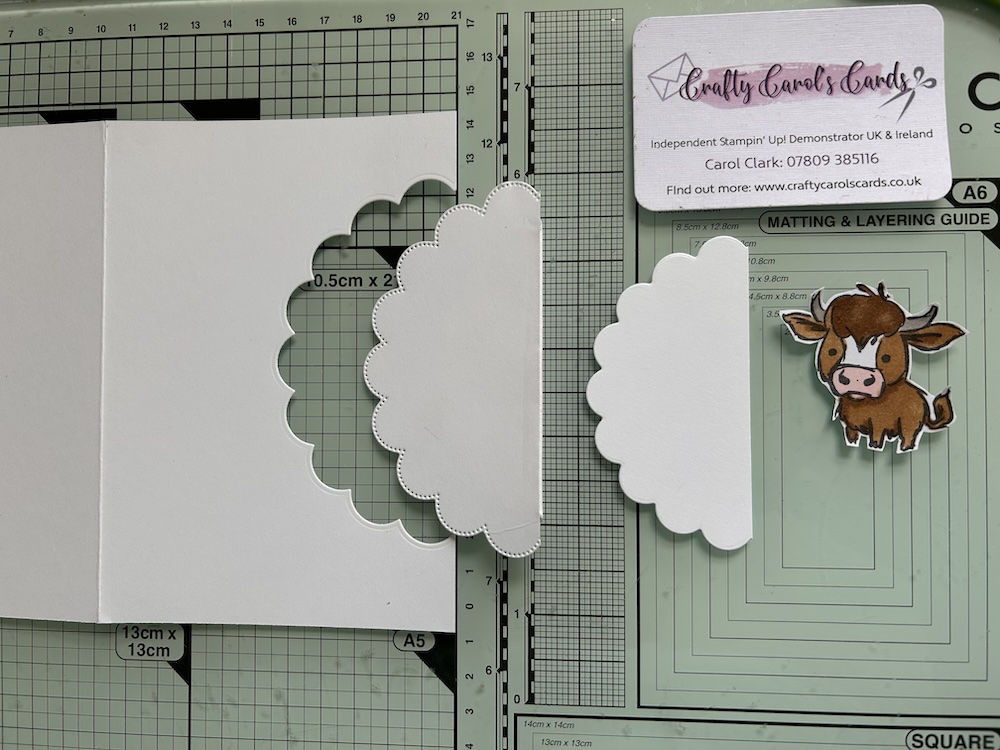
Use your trimmer to score a line down one scallop in. Fold and burnish. Stick the remaining flat part of this piece behind the half scallop you cut from your base card so that the folded part sticks out as shown in the picture below.
Stick the folded flap to the side edge of the base card, lining up your cut scallop carefully in the aperture. See the video if you are unsure.
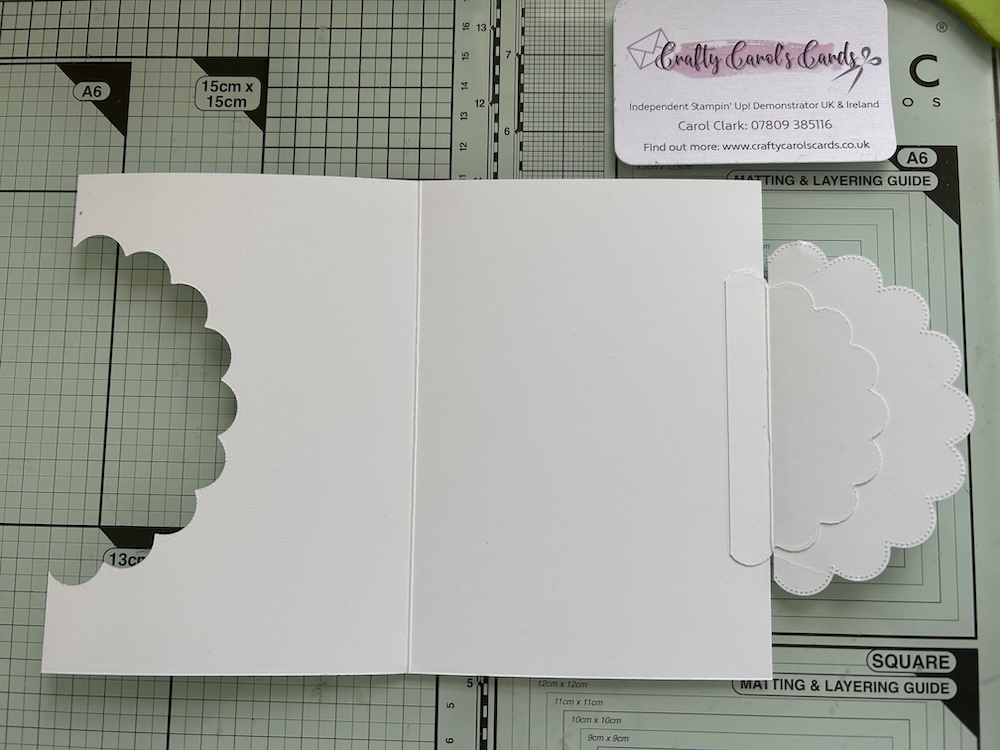
Glue the DSP strip to the coloured cardstock strip and stick to the left-hand side of the front of the side flap card.
Glue the remaining narrow DSP strip to cover the stuck-down flap on the inside of the card. (I stamped a strip with the scribbly blocks stamp for the side flap card shown below.)
Stamp any sentiment and decoration you want inside your card to match your colour scheme.
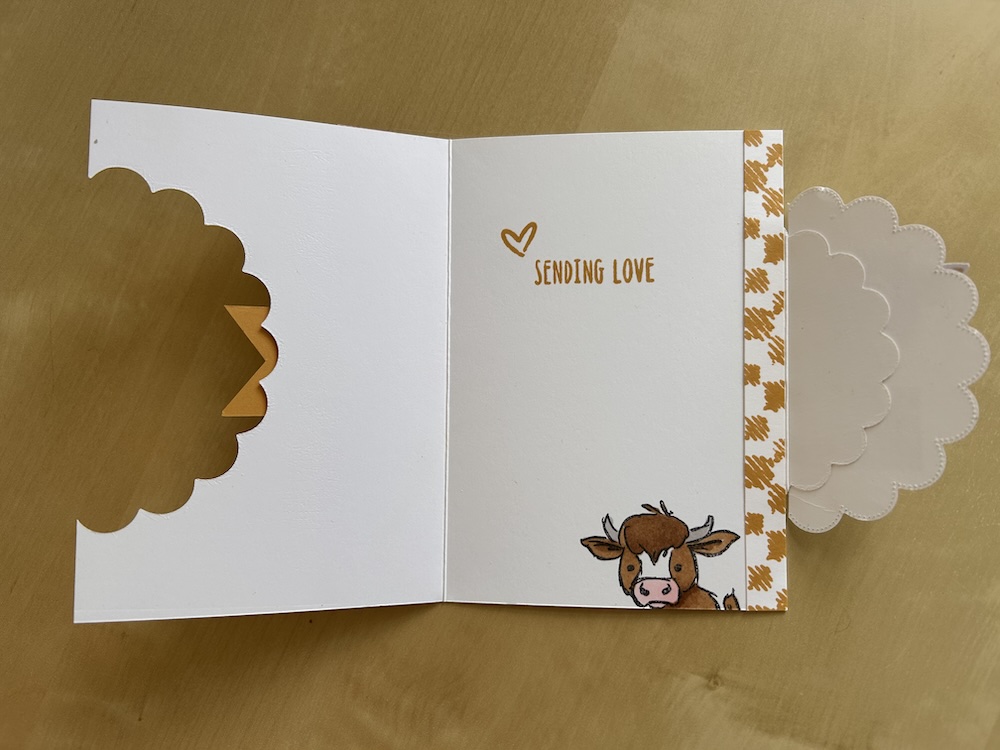
Stamp your sentiment on a scrap of Basic White and trim as required. I flagged mine. Stick to the card front so that it overlaps the side flap to help hold it closed when the card lies flat.
Add your image to the flap using dimensionals, plus any additional stamping you want. (I made a “straw bale” using the scribbly blocks stamp and the Golden Glow dark blend for the card shown, and used the fern stamp for the card made in my Live.)
Add a few In Color butterflies to provide some bling!
Here is the video I made instead of my aborted Craft with Carol Live, of me making a side flap aperture card.
And here is the card made in my Live:
I hope you like this card and will have a go at making one – please show me what you come up with.
Thank you for taking the time to read my post.

If your order from Stampin’ Up! through me over £50, you can choose stuff from my online shop to the value of your order. Watch out for the email!
Product List ![Scalloped Blooms Dies [ 167646 ]](https://assets1.tamsnetwork.com/images/EC042017NF/167646s.jpg "Scalloped Blooms Dies [ 167646 ]") | ![Basic White A4 Thick Cardstock [ 159230 ]](https://assets1.tamsnetwork.com/images/EC042017NF/159230s.jpg "Basic White A4 Thick Cardstock [ 159230 ]") | ![2026–2028 In Color™ A4 Cardstock [ 167684 ]](https://assets1.tamsnetwork.com/images/EC042017NF/167684s.jpg "2026–2028 In Color™ A4 Cardstock [ 167684 ]") | ||
![Multipurpose Liquid Glue [ 154974 ]](https://assets1.tamsnetwork.com/images/EC042017NF/154974s.jpg "Multipurpose Liquid Glue [ 154974 ]") | ![Stampin' Dimensionals [ 104430 ]](https://assets1.tamsnetwork.com/images/EC042017NF/104430s.jpg "Stampin' Dimensionals [ 104430 ]") |
![Wild Bunch Photopolymer Stamp Set (English) [ 167987 ]](https://assets1.tamsnetwork.com/images/EC042017NF/167987s.jpg "Wild Bunch Photopolymer Stamp Set (English) [ 167987 ]")
![Bloom Boutique 12" X 12" (30.5 X 30.5 Cm) Specialty Designer Series Paper [ 167637 ]](https://assets1.tamsnetwork.com/images/EC042017NF/167637s.jpg "Bloom Boutique 12\" X 12\" (30.5 X 30.5 Cm) Specialty Designer Series Paper [ 167637 ]")
![2026–2028 In Color™ Butterflies [ 167656 ]](https://assets1.tamsnetwork.com/images/EC042017NF/167656s.jpg "2026–2028 In Color™ Butterflies [ 167656 ]")


I love these cards and rhis is such a great fold! Your instructions and photos are excellent and very clear. Thanks for sharing your inspiration! 😊 Debs
Thank you. I’m so glad you find my blogs useful x