How time flies! It’s blog hop time again and this month’s theme is Boys and Men. I’m not alone in finding it difficult sometimes to think of good cards for the males in my life.

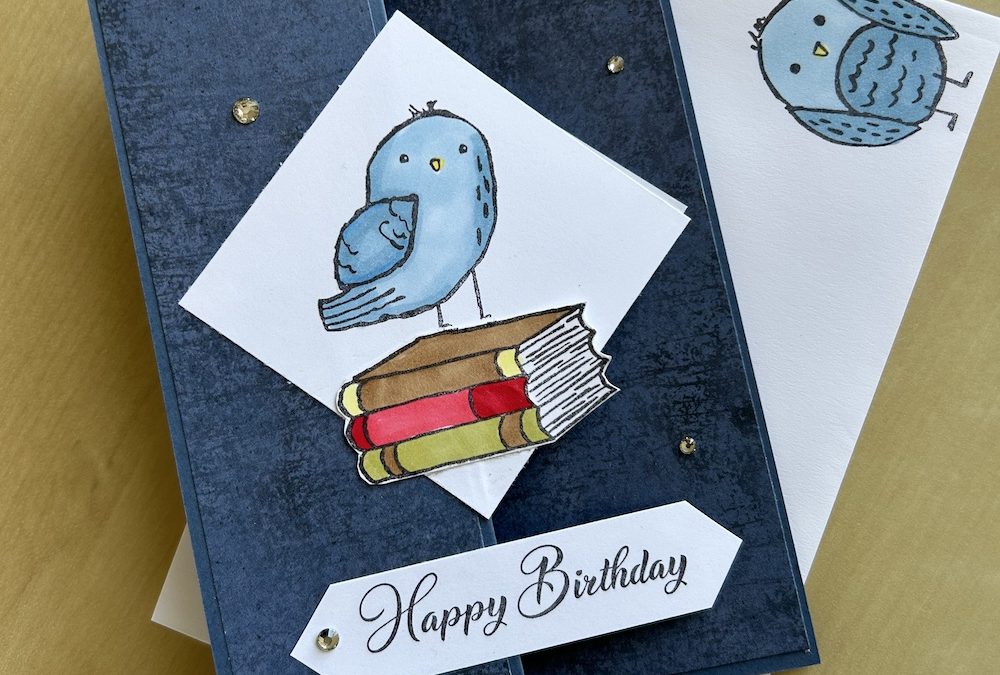
One of my favourite stamp sets from the current Annual Catalogue is Birds Eye View. It’s a lovely set with some gorgeous bird images with books, a branch and leaves. It makes gorgeous cards for anyone really, but also for men. And the set is not retiring! It is carrying over to the new Annual Catalogue.
As a bookworm myself, I love to use the book stamp in my cards which is what I’ve done here.
To make this card you need:
- Misty Moonlight base card 21cm x 14.8cm (8 ½” x 5 ½”)
- Earthen Elegance DSP 10cm x 14.3cm (4″ x 5 1/4″)
- Earthen Elegance DSP (x2) 4.7cm x 14.3cm (1 7/8″ x 5 1/4″)
- Basic White squares (x2) 6.7cm x 6.7cm (2 5/8″ x 2 5/8″)
- Basic White scraps: 2cm x 9cm (3/4″ x 2″) for sentiment, plus scrap to stamp the books
- Various Stampin Blends for colouring
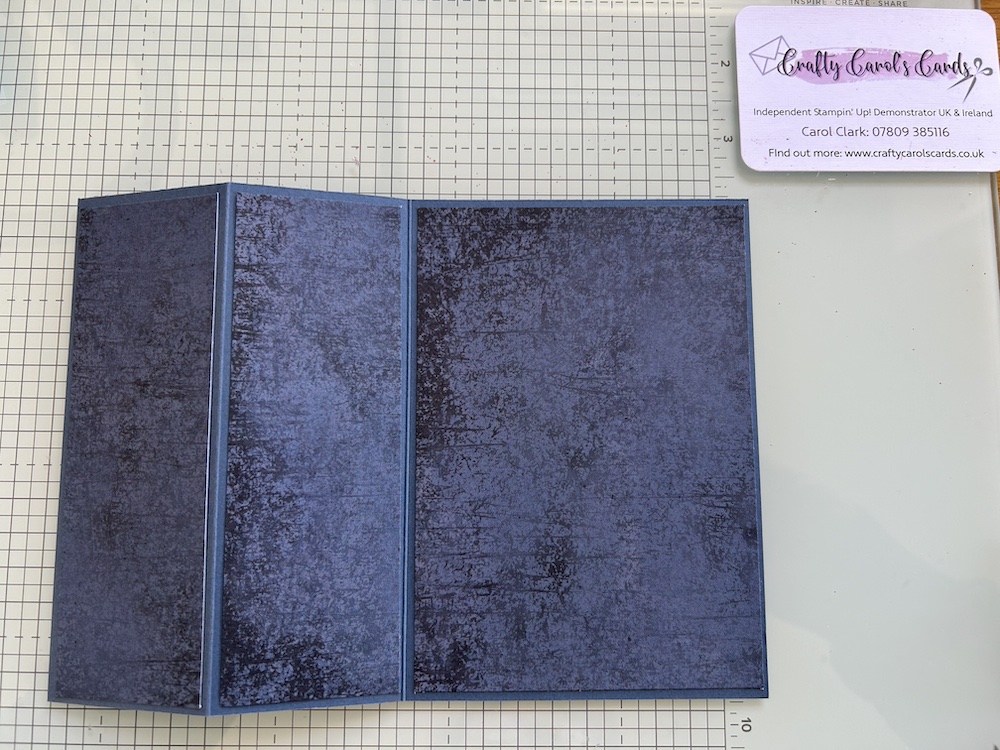
Score your base card at 5.25cm and 10.5cm (2 1/8″ and 4 ¼”) and fold and burnish as mountain and valley fold to form the front flap.
Use your preferred adhesive to stick the DSP panels to the base card.
Stamp the book stack onto a scrap of Basic White. Colour using your chosen Blends (I sued Pecan Pie, Poppy Parade, Old Olive and Lemon Lolly) then fussy cut.
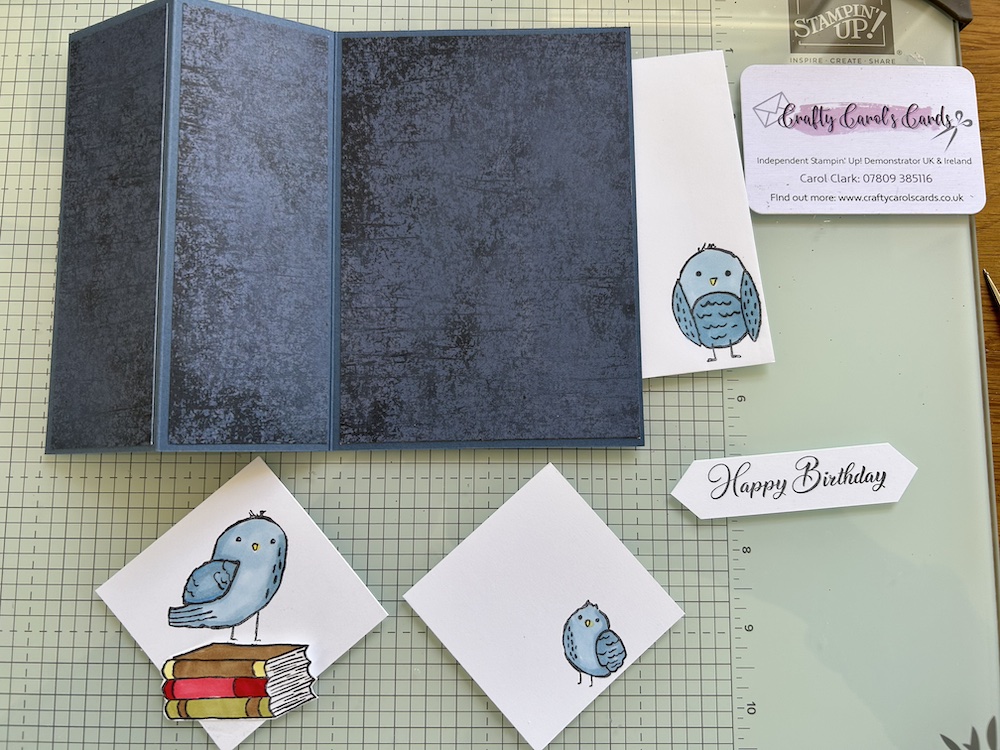
Making sure you keep your squares lying as triangles on your desk, stick the book stack to the lower corner of one piece. Stamp the bird of your choice standing on the book stack. Stamp the small bird on the other square as shown for the inside of the card. I also stamped the standing up bird on my envelope.
Colour your birds using Stampin Blends. I used Balmy Blue, with Lemon Lolly for the beaks.
Stamp your sentiment onto the strip of Basic White. I used Go to Greetings (who else is distraught that this is retiring? I love this stamp set!). I cut the ends of the strip into a banner shape.
You should now have the following pieces ready to assemble:
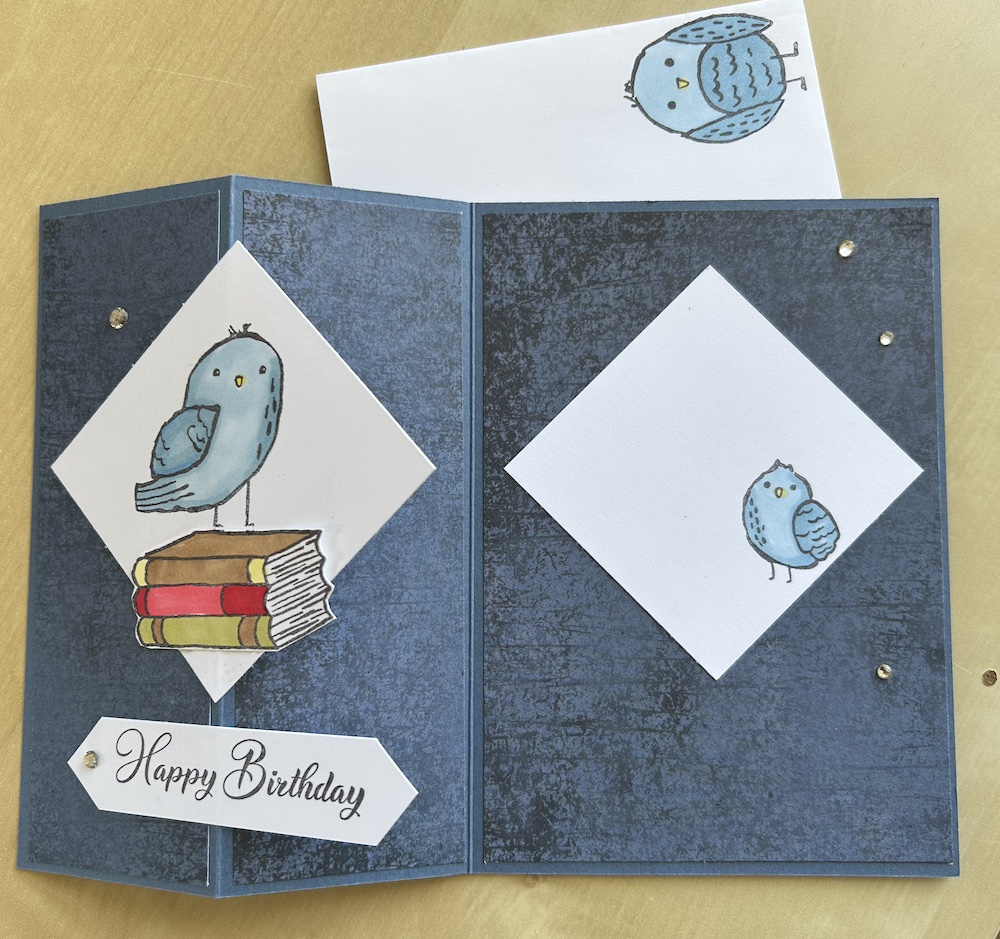
To make up the card, adhere the inside square in the top part of the back of the card base and centre it from both sides. Fold the card closed and stick the front square on top, using the square on the back of the card to position it correctly. Make sure you only put glue on the left hand side!
Add the sentiment to the bottom of the front of the card, again being careful where you put adhesive.
Add a few gems to finish the card. Here is a picture of the card open so you can see all the elements:
I hope you like this card. Please now go and look at the cards from my fellow T4S blog hop colleagues.
Thank you for taking the time to read my post.

Don’t forget – you get a FREE tutorial of eight cards when you place an order with me. There’s a different set every month. And, if your order is over £40, you will also get to choose stuff from my online shop to the value of your order!
Product List  |  |  |

 Designer Series Paper")

Love the inspiration
Fab card, this is my favourite fun fold to do. x
Mine too!
Fab fun fold – so pleased the Bird’s Eye View is staying. Tfs.
Lovely card and fun fold, thanks for the inspiration.
love the colours you’ve used
love the colours you’ve used
Great card and I soo need to get this stamp set.