As this blog post is published, I will be in Rotterdam at the Stampin’ Up! On Stage event from 14th to 17th March. This event is run usually once a year and it is an opportunity for all Stampin’ Up! Demonstrators from Europe to get together, meet up with old friends, make new ones, do some crafting, share ideas, watch presentations and talks and get a sneak peek of the products that will be brought out in the new annual catalogue. Being able to attend such events is one of the many perks of being a Demonstrator.
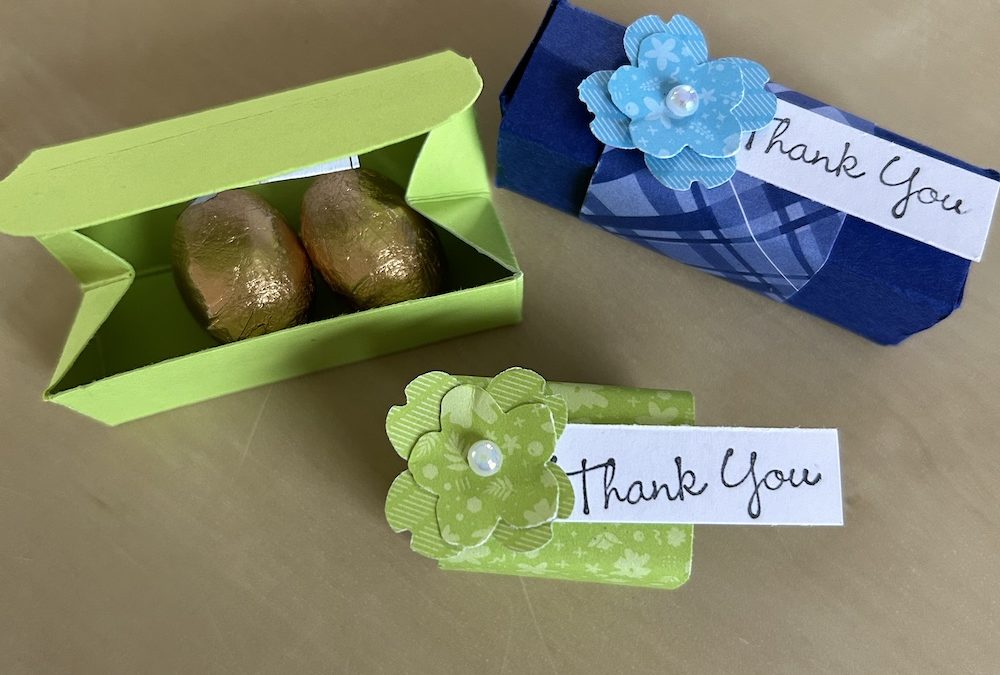
One of the traditions is that when you attend one of these events you take “swaps’, that is, a card or small project that you can swap with other demonstrators. Which means you end up with loads of new ideas for cards and projects to make. This year I have made a mini folded box filled with mini eggs and also a mini folded box containing two Lotus Biscoff biscuits (details in a post tomorrow). I got the original idea for the mini egg mini folded box from a swap I received at an On Stage event a few years ago from a German demonstrator called Sabine Baumann. Thank you Sabine!
I made the boxes using the current 2022-2024 In Colors. I love these colours but they will be retiring at the end of April when we will have five new ones, so I wanted to make the most of them before they go.
How to make the mini egg mini folded box
For each mini folded box that fits two or three mini eggs you need:
- Colour cardstock 9.5cm x 9.5cm (3 3/4″” x 3 3/4″)
- Strip of coordinating DSP approx 3cm x 9.5cm (1 1/4″ x 3 3/4″)
- Scraps of DSP to punch the flower decorations
- Pearl gems
- Scrap of Basic White for stamping
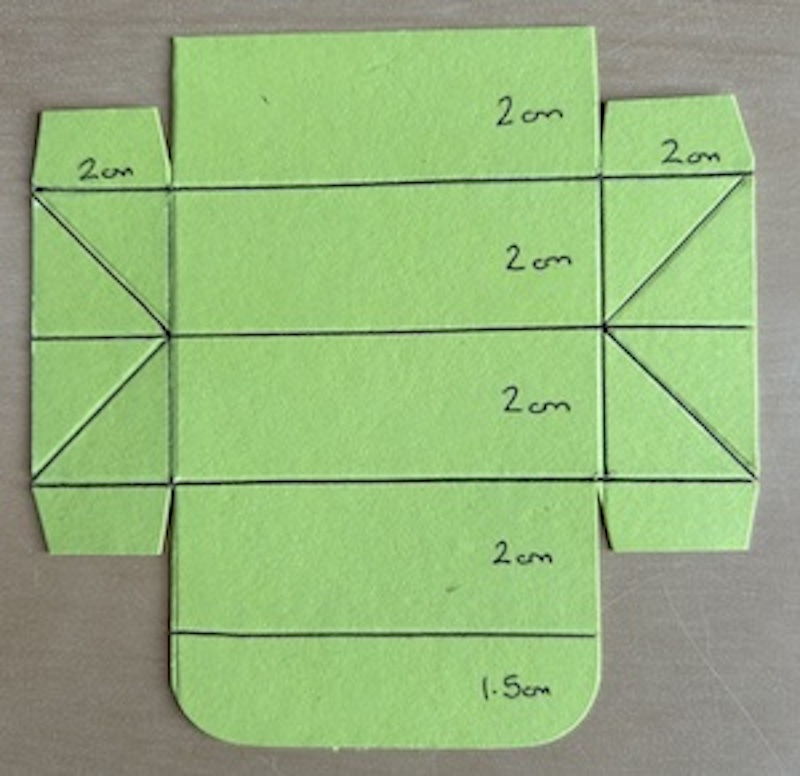
Score the cardstock on one side at 2cm, 4cm, 6cm and 8cm (3/4″, 1 1/2″, 2 1/4″and 3″) and on the other side at 2cm (3/4″) on each side. Fold and burnish all the main score lines. Cut as in the picture below and round the corners of the shortest side as shown in the picture below and in the video (see later in post). Leave small (approximately 1cm) tabs to use to glue the box base together as shown in the picture.
Using the stylus from your scoreboard, score triangular lines in a V shape on the side tabs as shown. I’ve drawn the fold lines in black here so you can see them better.
Fold your box in half while gently pushing these diagonal folds inwards (see video if you are not sure).
Glue the end tabs to the two main box pieces top and bottom using tape or glue, then the box sides will fold together easily through those diagonal folds to create the square box.
Add the mini eggs and fold the box closed with the overlapping tab at the front.
To finish the box, wrap the strip of DSP around the completed box and adhere it together to form a belly band. Punch out the two smallest flowers from matching In Color DSP using the Petal Park builder punch and stick them together reversing the DSP pattern on one.
Stamp a small sentiment on a scrap of Basic White and trim. Stick this to the top of the belly band and add the flower, finishing it off with a small pearl in the centre.
Here is the live video I did to show how I made this swap (from 8 minutes):
It is such fun to make small gifts to give to people you visit or those who need a small pick-me-up. I hope my fellow Demonstrators in Rotterdam like my swaps.
Why not have a go? Do you like the boxes? let me know in the comments below.
Thank you for taking the time to read my post.

Don’t forget – you get a FREE tutorial of eight cards when you place an order with me. There’s a different set every month. And, if your order is over £40, you will also get to choose stuff from my online shop to the value of your order!
Product List  |

 Designer Series Paper")
")
