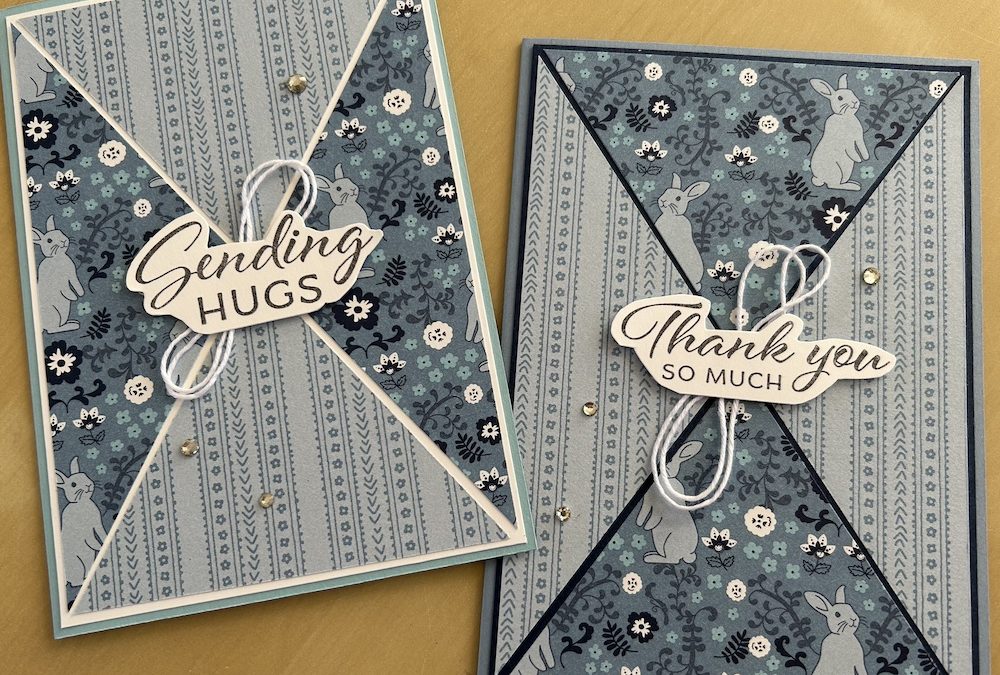
I’m calling these reverse triangles cards and they seem very popular at the moment! They are a good way to use up a little of your DSP stash and are very easy to make, as you will see.
All you need is some DSP that has coordinating and contrasting colours or patterns on both sides. (Of course, you could also use two different pieces of DSP if necessary.) For these example reverse triangles cards I’ve used the retiring Countryside Inn DSP. In our class this week I used the Flight and Airy DSP from Saleabration. Any DSP will work as long as there are two coordinating or contrasting images, colours or patterns.
To make the card you need:
- Boho Blue base card stock 21cm x 14.8cm – scored at 10.5cm (8 ½” x 5 ½”, scored at 4 ¼”)
- Night of Navy or Basic White layer 10cm x 14.3cm (4” x 5 ¼”)
- DSP layer 9.5cm x 13.8cm (3 ¾’ x 5”)
- Basic White inside layer 9.5cm x 13.8cm (3 ¾’ x 5”)
- Scrap of Basic White for sentiment
- Gems, twine or other embellishments as you wish
Here is the video of how to make the card. The instructions are also written out below.
Place the DSP on your trimmer with the cutting blade in the centre of the DSP piece and cut first from one top corner to the opposite bottom corner making sure to line up the corners carefully in the trimmer cut guide.
Use some low tack tape across each cut corner to hold the two pieces together then cut from the opposite top corner to the opposite bottom corner to form four triangular pieces.
Reverse two opposing triangles – your choice which! It will depend on the image or pattern you have chosen. The two pieces you reverse will possibly have raised cut edges showing – use your bone folder to flatten these as shown in the video.
Stick each triangle carefully to your Night of Navy or Basic White card layer. I find it best to start with the top and bottom pieces. Leave a small gap at each edge. You should be left with a gap in the centre between the two pieces as well. Then stick on the two side pieces, making sure the gaps are equal between all the pieces and between the pieces and the edge of the layer.
Stick the completed reverse triangles card front to your card base. Stamp your sentiment on the Basic White scrap and trim as desired. For these cards I cut around the sentiment – see the video if you are not sure about this.
I added some twine behind the sentiment by sticking it to a small piece of tear and tape, then added the sentiment on top using dimensionals. Add some gems or other embellishments as you wish.
Stamp the inside layer with a matching image or sentiment and stick inside your reverse triangles card. Don’t forget to decorate your envelope as well.
I hope you like this card and will have a go at making one – please show me what you come up with.
Thank you for taking the time to read my post.

Don’t forget – you get a FREE pdf when you place any order with me as your demonstrator. And, if your order is over £40, you will also get to choose stuff from my online shop to the value of your order!
Product List  |  |  |  | |
 |  |  |
 Designer Series Paper")
