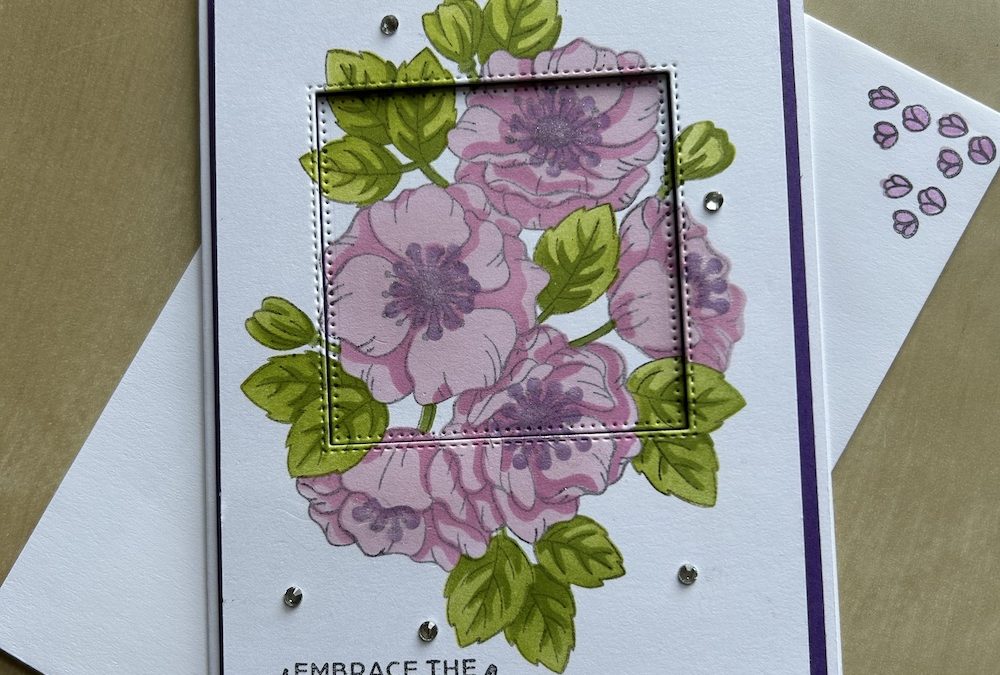
One of our lovely UK demonstrators, Diane Marlow, shared a swap with me at On Stage and gave me the idea for this card. I’ve called it a reverse frame card – it uses a Stylish Shapes rectangle die to cut away part of the image and “sink” it into the card front, leaving both the outer frame and the inside cut part with a stitched outline.
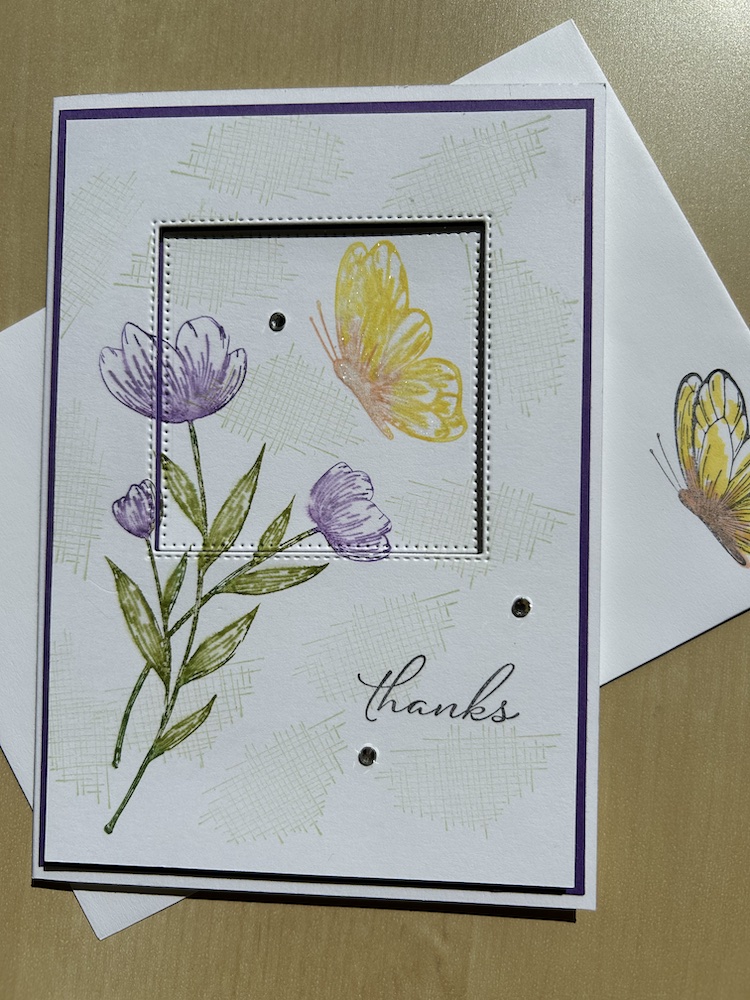
I’ve used the gorgeous Enduring Beauty stamp set, masks and blending brushes for this card, but you could make this card using any large image which has plenty of detail. For example, at my Zoom Craftalong this week I made a fame card using the new Spotlight on Nature set together with a watercolour technique. (Sign up for my emails to learn when I run my lives and my Zoom Craftalongs.)
To make the frame card you will need:
- Basic White card base 21cm x 14.8cm (8 1/2″ x 5 1/2″) scored in half at 10,5cm (4 1/4″)
- Gorgeous Grape cardstock layer 10cm x 14.3cm (4″ x 5 1/4″)
- Basic White layer 9.5cm x 13.8cm (3 3/4″ x 5″)
- Enduring Beauty stamp set (and masks)
- Stylish Shapes dies
- Ink pads in your chosen colours plus blending brushes if using the masks
Here is the video of how to make this reverse frame card. Full instructions are also given below.
Stamp the large image in Memento ink on the Basic White layer.
Use the masks with blending brushes and ink pads to colour in the image – see the video for details. I used Bubble Bath, Fresh Freesia and Highland Heather for the flowers and Lemon Lime Twist plus Old Olive for the leaves, although you will see in the video that I went over the Lemon Lime colour and added a little Old Olive to tone it down a little!
My tips for using the masks are to use temporary adhesive (available from Amazon and stationary stores) to stick the Basic White layer down onto your work surface. Place mask 1 over the image and use low tack tape to stick it down. I used a sticky strip to mark where the notch in the mask was to help me line up the other masks.
Choose your lightest colour and load your blending brush. Tap any excess off onto a piece of waste copy paper then add the colour through the masks using a circular motion.
When you are happy with your colour, remove mask 1 and place mask 3 over your image. Colour with your mid-range colour as before. Note: you can use the same blending brush if you are using colours of the same tone and moving from lighter colours to darker, otherwise use a second blending brush. Repeat with mask 5 to complete your flowers.
Next set up mask 2 and use a smaller blending brush to add your lighter green colour for the leaves. Finally, use mask 4 and the darker green to add the leaf detail. Again you can use the same blending brush for both masks to complete the leaves.
Add a sentiment in Memento ink to the bottom of this card layer.
Cut out a centre portion of your image using the second largest Stylish Shapes rectangle die.
Stick the Gorgeous Grape layer to your card front. Add the outer frame on top of this layer using dimensionals or foam adhesive strips. Then use liquid glue to stick the cut-out portion of the image to your card front through the aperture created in the frame.
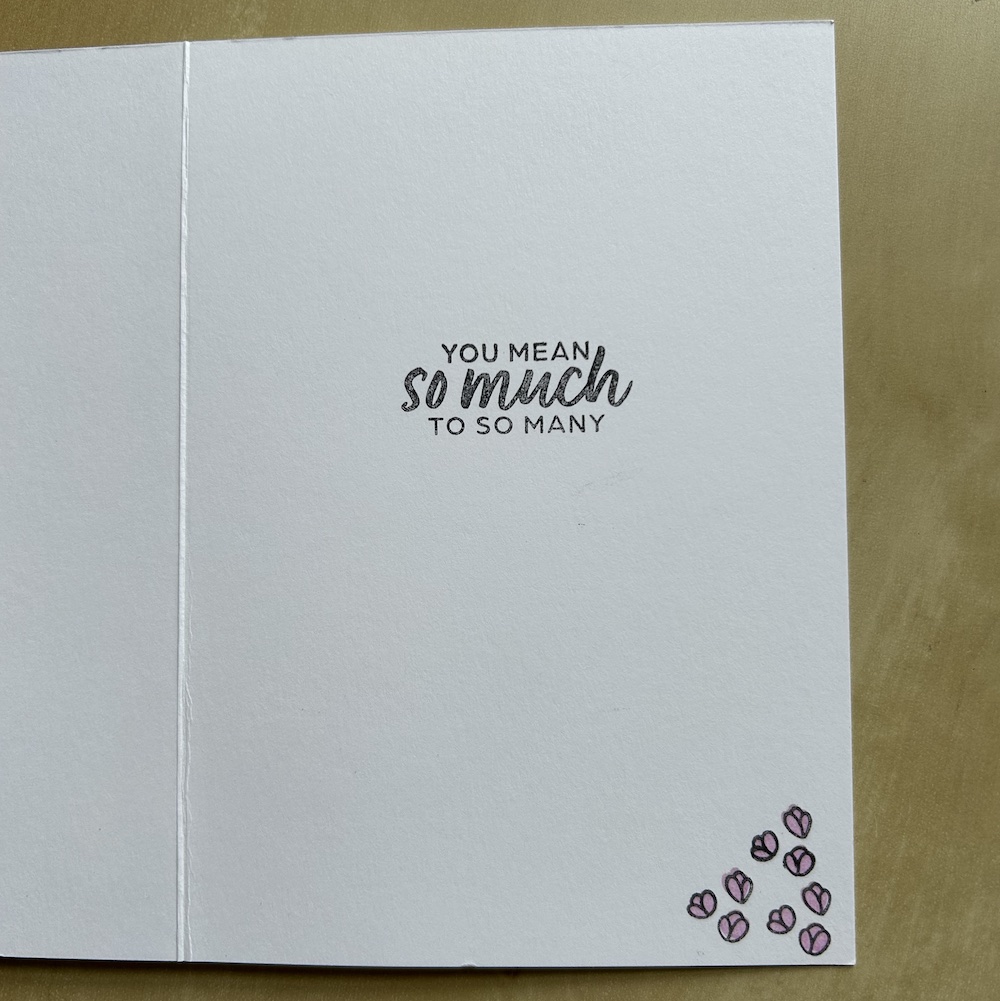
Adding some Wink of Stella to the flower centre and some basic gems completed the front of the card. I used the small flower outline and infill stamps to decorate the inside of my card and my envelope and added a second sentiment to the inside of the card.
Here is the colouring technique frame card we made at the Craftalong, using the new Spotlight on Nature stamp set available from 1st May:
I hope you like this card and will have a go at making one – please show me what you come up with.
Thank you for taking the time to read my post.

Don’t forget – you get a FREE pdf when you place any order with me as your demonstrator. And, if your order is over £40, you will also get to choose stuff from my online shop to the value of your order!
Product List  |  |  | ||
 |  |
")


