
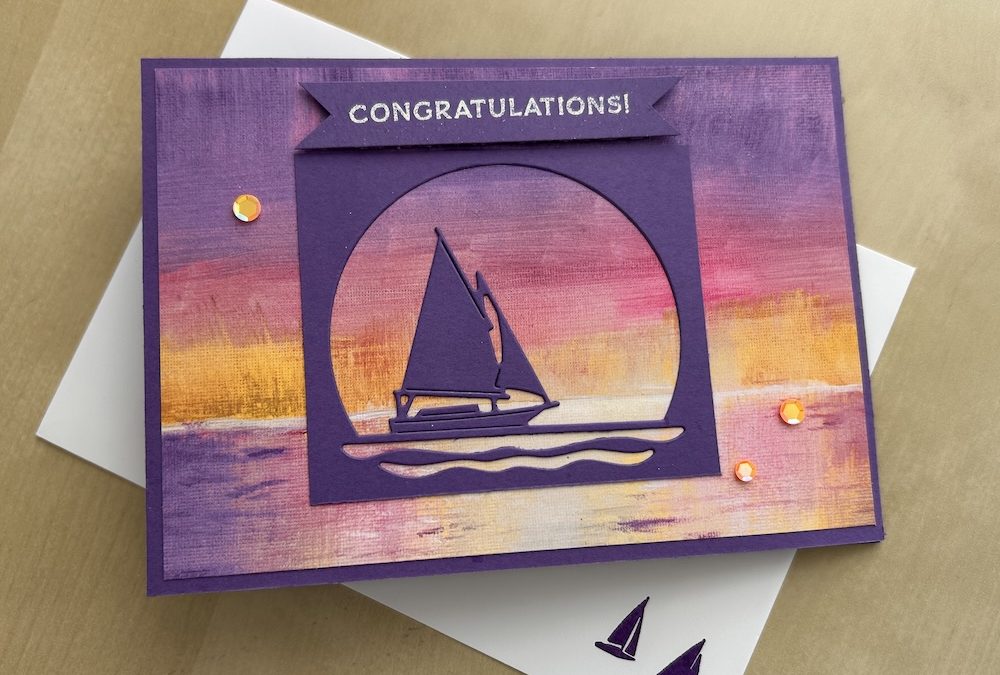
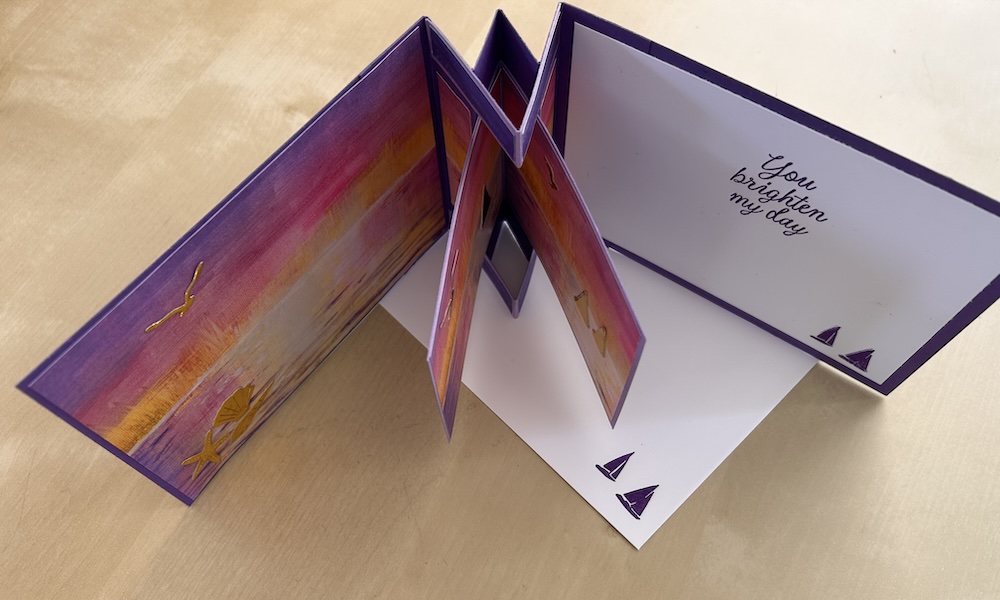
I saw a slimline version of a centre pop-up card with several panels and it gave me the idea for this card with one large centre pop-up panel. I had a couple of goes trying out different sizes for this centre pop-up card, but I’m happy with this final version.
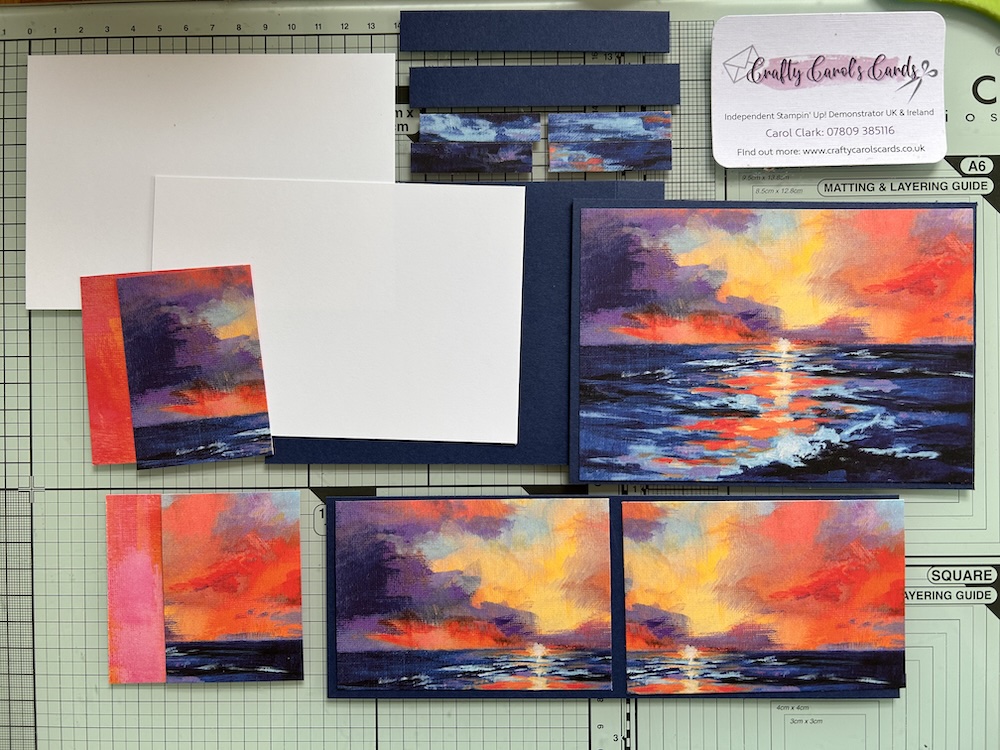
To make this card you need:
- Mechanism Cardstock piece 16cm x 10.5cm (6” x 4¼”)
- Front and back cardstock pieces 14.8cm x 10.5cm (5½” x 4¼”)
- Pop-up panel 21cm x 7cm (8½” x 3¼”)
- Pop-up edge panels (x2): 10cm x 1.5cm (4″ x ½”)
- DSP for front of card (also for inside if wanted): 10cm x 14.3cm (4” x 5¼”)
- DSP panels (x4): 10cm x 6.5cm (4” x 3″) – two can be contrasting DSP
- DSP strips (x4): 4.5cm x 1cm (1¾” x 3/8″)
- Basic White panels (x1 or 2): 13.8cm x 9.5cm (5″ x 3¾”)
- Additional scraps for decoration and sentiment
Instructions:
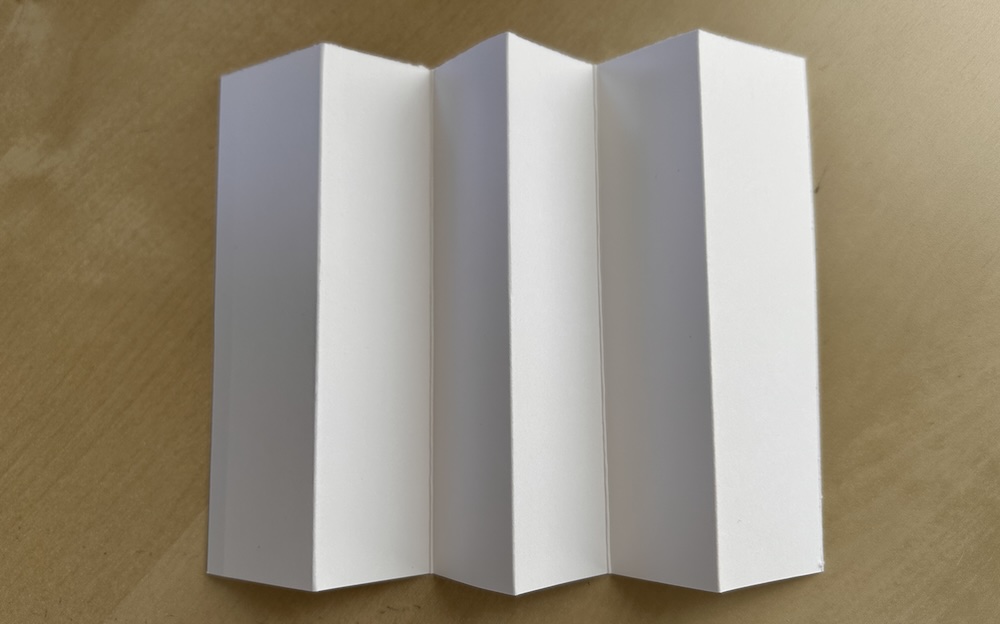
Score the larger mechanism cardstock piece on the long side at 3cm, 5.5cm, 8cm, 10.5cm and 13cm (or every 1″ for US cardstock). Fold and burnish alternately as mountain, valley, mountain, valley and mountain. It should look like this (shown in white for clarity!):
Attach the front and back cardstock pieces to the first and last panels to form the card base.
Adhere the DSP to the front of your card.
To form the centre pop-up panels, first take the two small strips. Score each at 5cm (2″), fold and burnish. Add the tiny DSP strips to the mountain fold sides.
Take the larger strip and score at 10.5cm (4¼”). Valley fold and burnish. Add two DSP panels to this side of your piece.
Attach your pop-up panels to your card, adhering the thin strips to the OUTSIDES of the mechanism panel and the centre large strip on the INSIDE valley. See the video and the picture below if this is not clear!
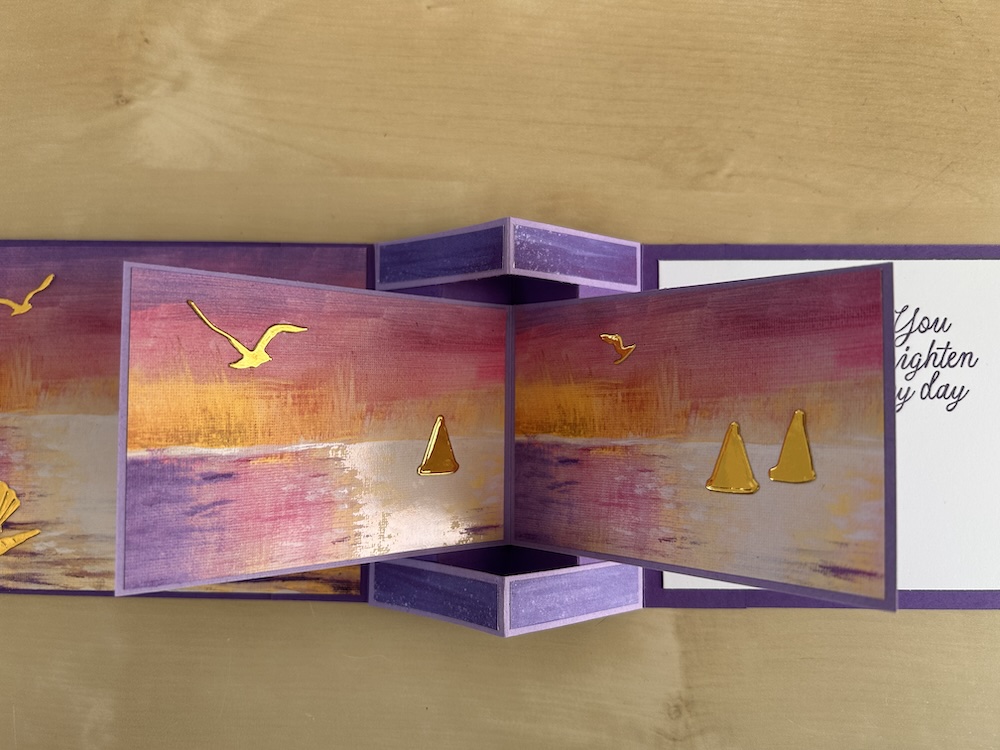
Cut a 2cm (3/4″) strip from the outside long side of the other two DSP panels. Stick the larger pieces behind your centre panel and the strips to the mechanism. (I used separate pieces of DSP in this picture which is for illustration).
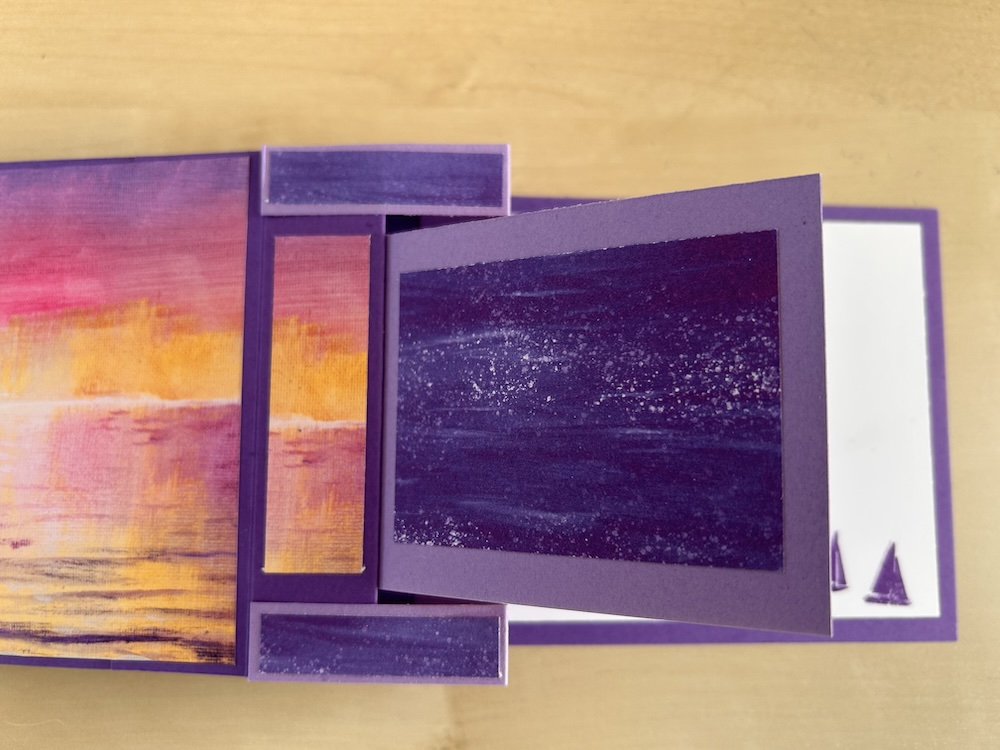
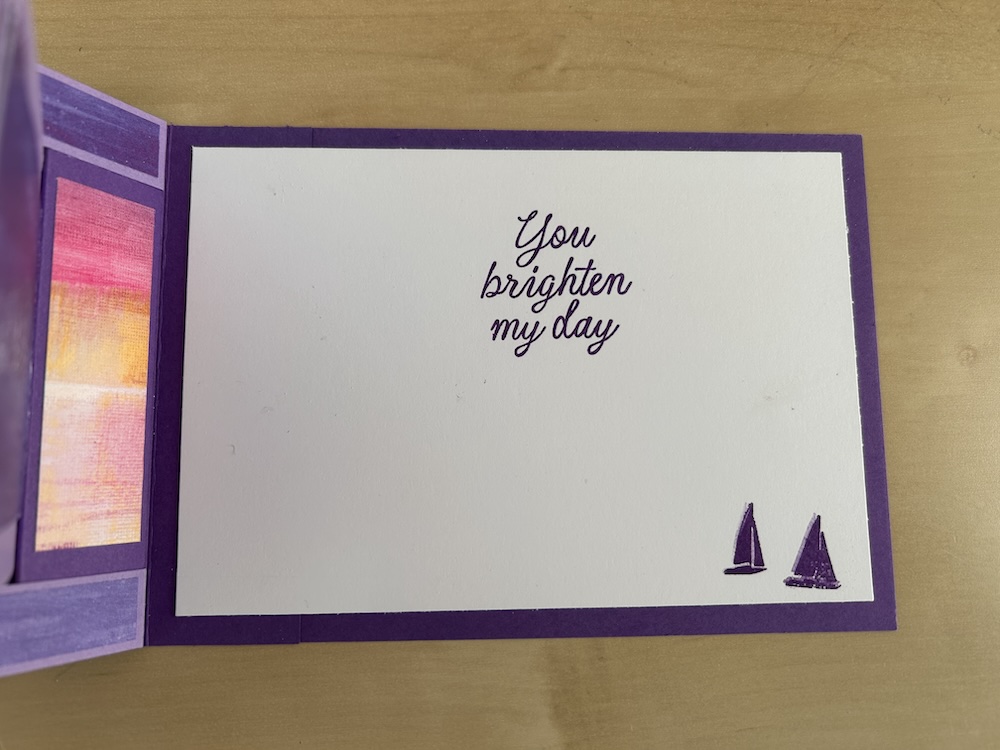
Stamp the Basic White panels as you wish and adhere to the inside front and back of your card. (You could add further DSP to the front inside as I did in this card.)
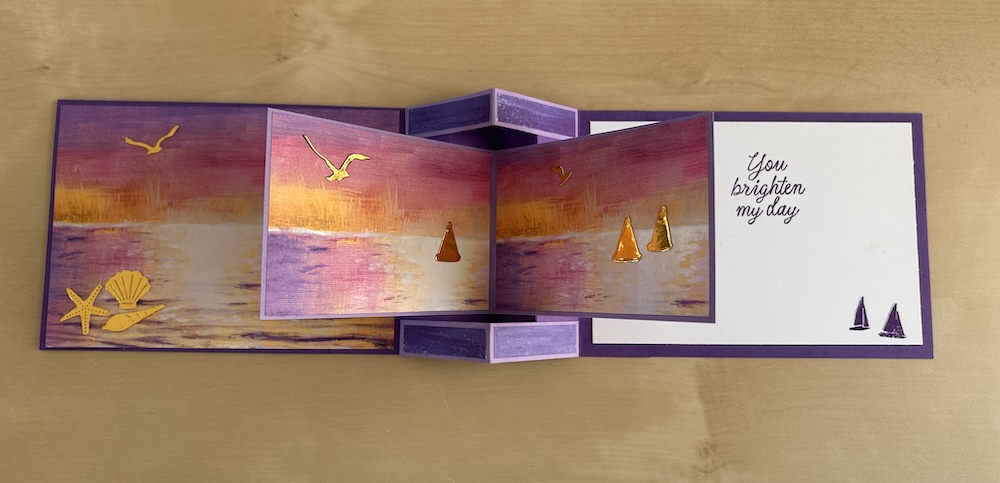
Decorate to finish, with die-cuts and gems. I used a die-cut image for the front and die-cut birds and shells here. This gorgeous DSP doesn’t need much!
Don’t forget to decorate your envelope!
Here’s the video of me making this card:
I hope you like this card and will have a go at making one – please show me what you come up with.
Thank you for taking the time to read my post.

If your order from Stampin’ Up! through me over £50, you can choose stuff from my online shop to the value of your order. Watch out for the email!
Product List ![Sunset Coast Bundle (English) [ 167781 ]](https://assets1.tamsnetwork.com/images/EC042017NF/167781s.jpg "Sunset Coast Bundle (English) [ 167781 ]") | ![Night Of Navy A4 Card Stock [ 106577 ]](https://assets1.tamsnetwork.com/images/EC042017NF/106577s.jpg "Night Of Navy A4 Card Stock [ 106577 ]") | ![Basic White A4 Cardstock [ 166781 ]](https://assets1.tamsnetwork.com/images/EC042017NF/166781s.jpg "Basic White A4 Cardstock [ 166781 ]") | ||
![Paper Trimmer [ 152392 ]](https://assets1.tamsnetwork.com/images/EC042017NF/152392s.jpg "Paper Trimmer [ 152392 ]") | ![Bone Folder [ 102300 ]](https://assets1.tamsnetwork.com/images/EC042017NF/102300s.jpg "Bone Folder [ 102300 ]") | ![Multipurpose Liquid Glue [ 154974 ]](https://assets1.tamsnetwork.com/images/EC042017NF/154974s.jpg "Multipurpose Liquid Glue [ 154974 ]") |
![Scenic Coast 6" X 6" (15.2 X 15.2 Cm) Specialty Designer Series Paper [ 167773 ]](https://assets1.tamsnetwork.com/images/EC042017NF/167773s.jpg "Scenic Coast 6\" X 6\" (15.2 X 15.2 Cm) Specialty Designer Series Paper [ 167773 ]")
![Night Of Navy Classic Stampin' Pad [ 147110 ]](https://assets1.tamsnetwork.com/images/EC042017NF/147110s.jpg "Night Of Navy Classic Stampin' Pad [ 147110 ]")

