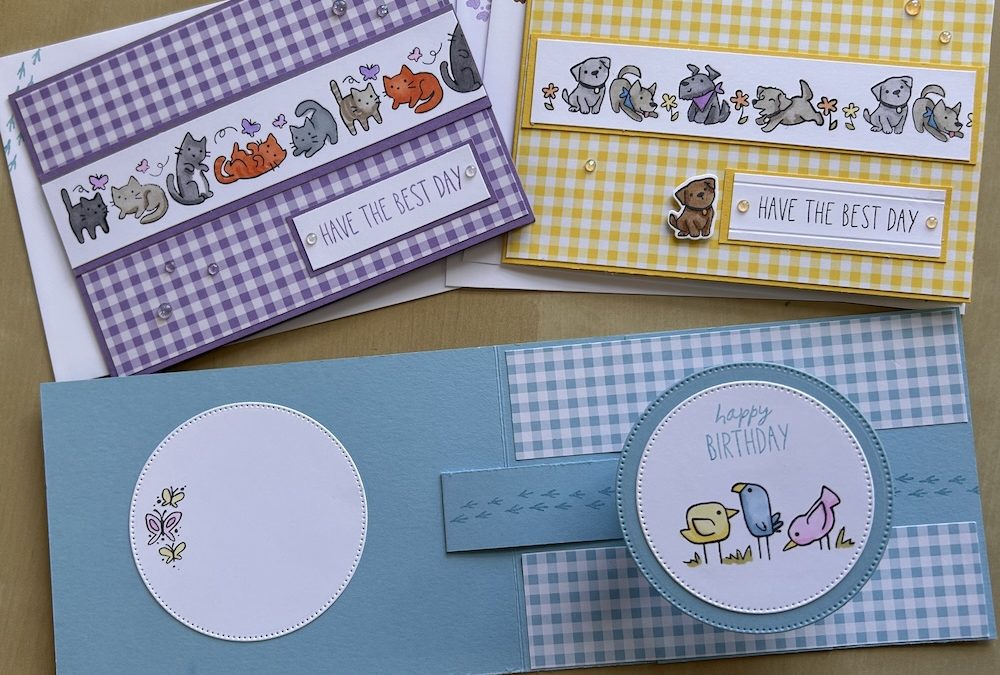
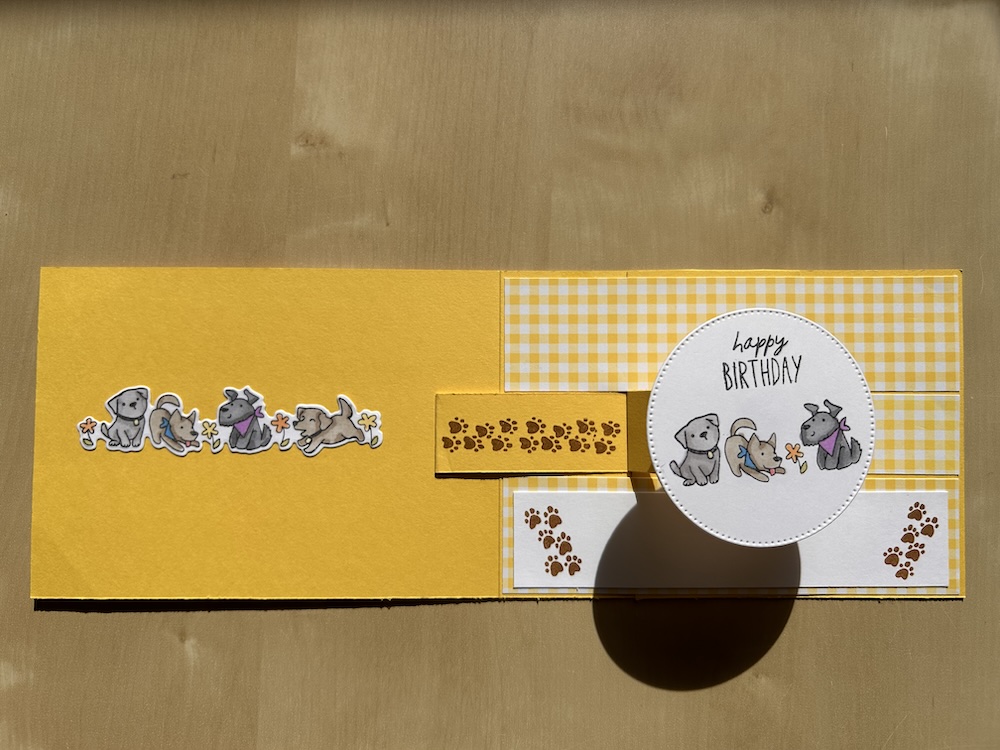
This slider pop-up card is a fun-fold card that is truly a Wow card, but is easy to make when you know how! You can make it for any occasion using any stamp set you have. I’ve made it using the Cutest Crew bundle, but you could use any other stamp set.
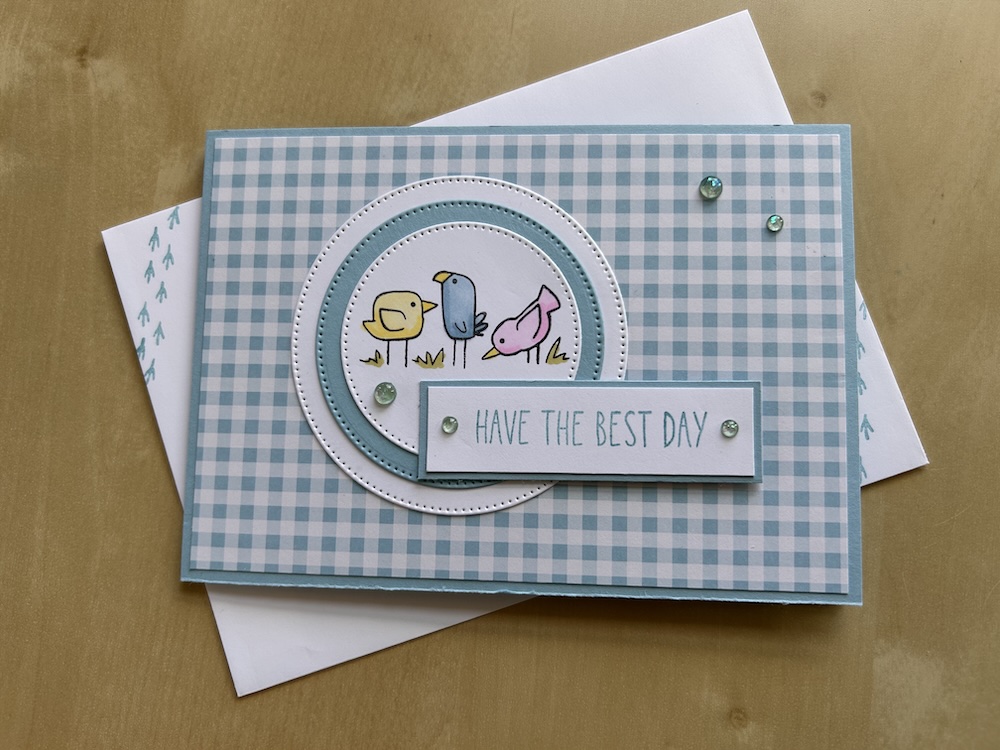
I made three, using the different animal and bird images in the Cutest Crew stamp set. You can see the bird version in the video below. I used some retired Gingham Gala DSP for these cards.
To make this slider pop-up card you need:
- Colour card base 10.5cm x 29.6cm scored at 14.8cm (11” x 4¼” scored at 5½”)
- Colour card mechanism piece 1: 29.6cm x 2.5cm (11″ x 1″)
- Colour card mechanism piece 2: 5.5cm x 10.5cm (2¼ x 4¼”)
- Designer series paper:
- Front: 14.3cm x 10cm (5¼” x 4″)
- Inside x 2: 14.6cm x 3.6cm (4¼” x 1½”)
- Colour cardstock circle for pop-up: 3″ (largest Stylish Shapes die)
- Basic White circle for pop-up: 2½” (second largest Stylish Shapes die)
- Basic White 3″ circle for sentiment/greeting
- Colour cardstock for the front, either strip 3.5cm (1½”) or circle 3″
- Basic White strip for the front, either strip 3cm (1¼”) or 2½” circle
- Scraps of Basic White and colour cardstock for the front sentiment
- Memento ink and colour ink for stamping images
- Blends for colouring
Instructions
Fold and burnish your card base. Adhere the large piece of DSP to the front of your card.
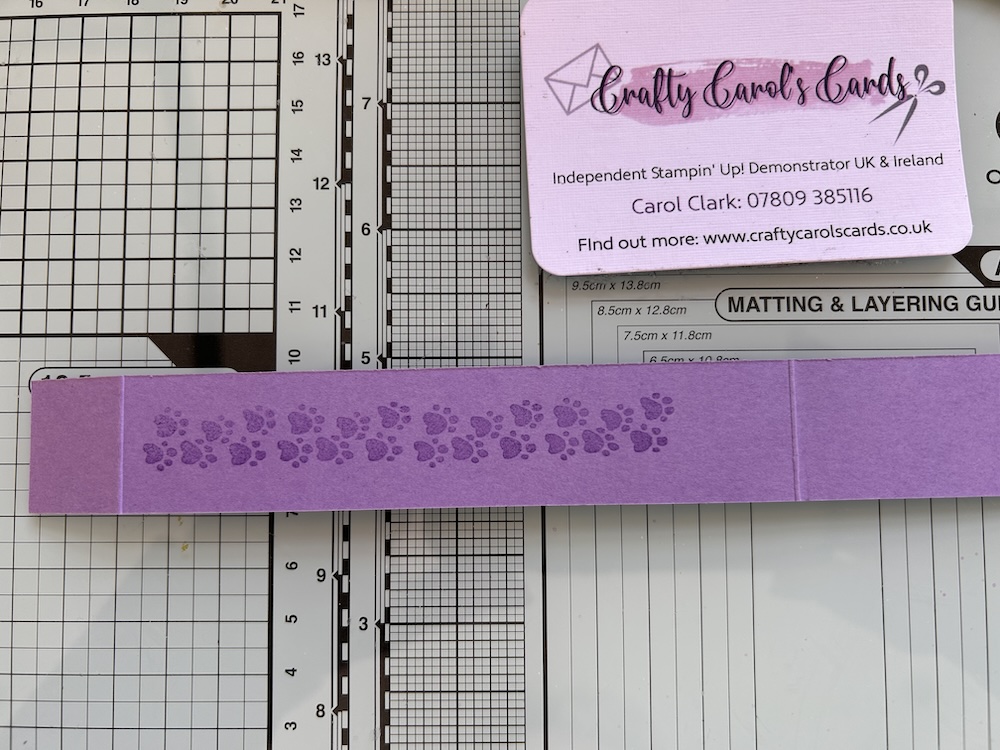
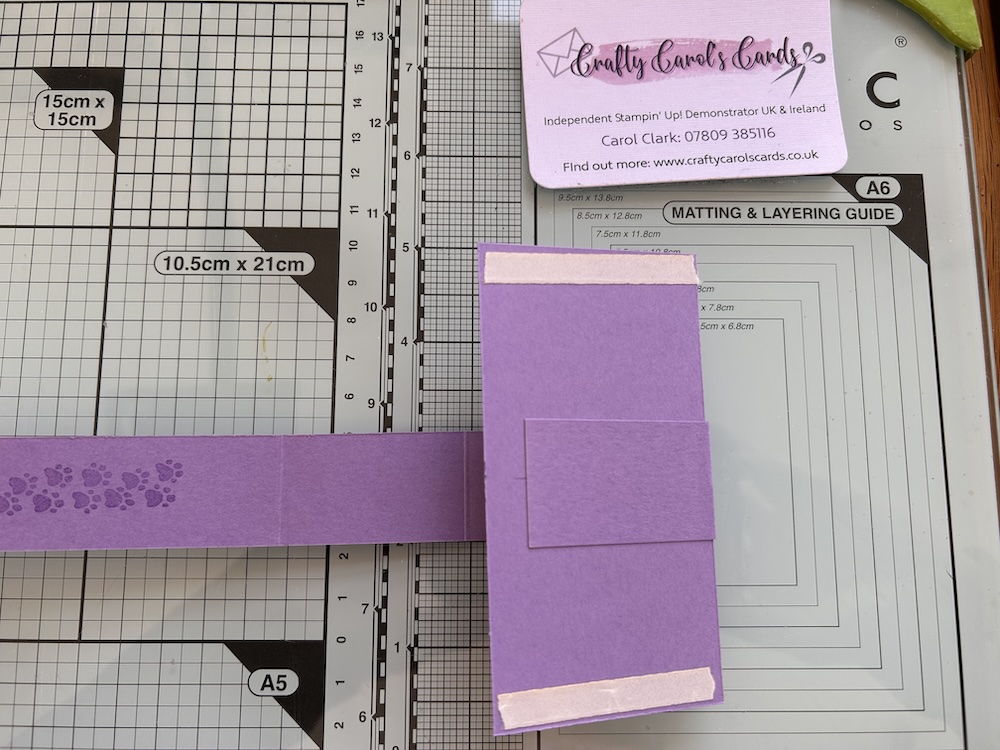
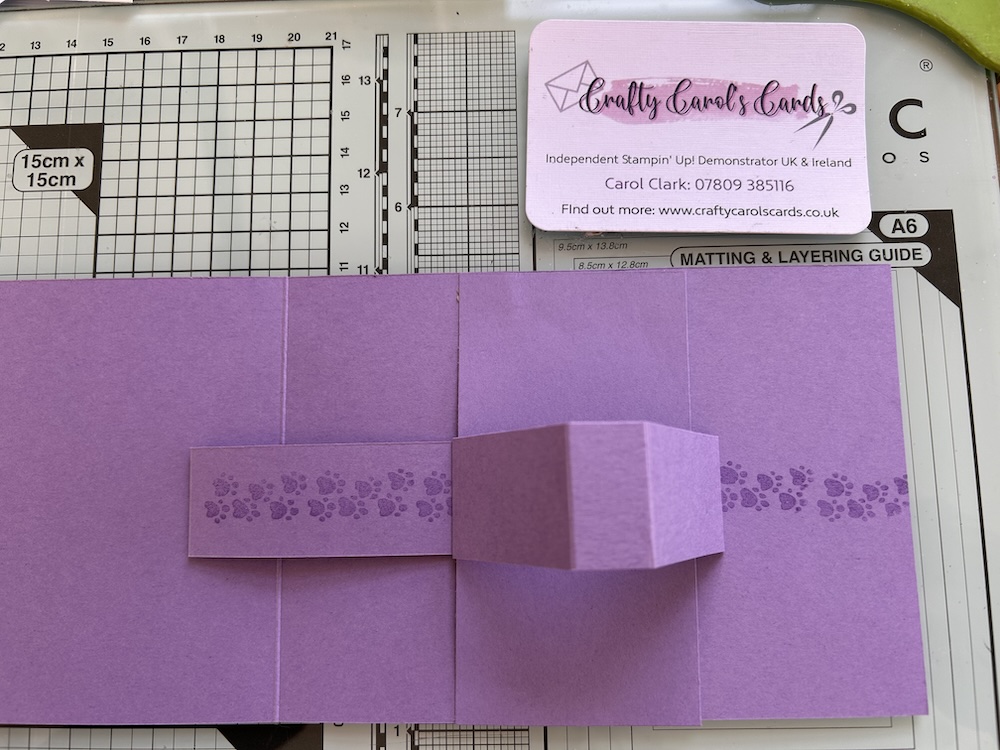
Score the mechanism strip at 2cm, 14.5cm, 19cm, 20.5cm and 25cm. Fold the first score line as a valley fold and all the rest of the score lines as mountain folds. Make sure the edges line up exactly and burnish well.
Stamp the paws image across the largest section of the strip in a coordinating ink as in the picture – see the video if you are unsure.
Mark the centre of the long sides of the second mechanism rectangular piece on the back and draw a line across.
Stick the longer end of the mechanism strip to the back of the rectangle piece so that it lies exactly in the middle, using the line you have drawn to guide you.
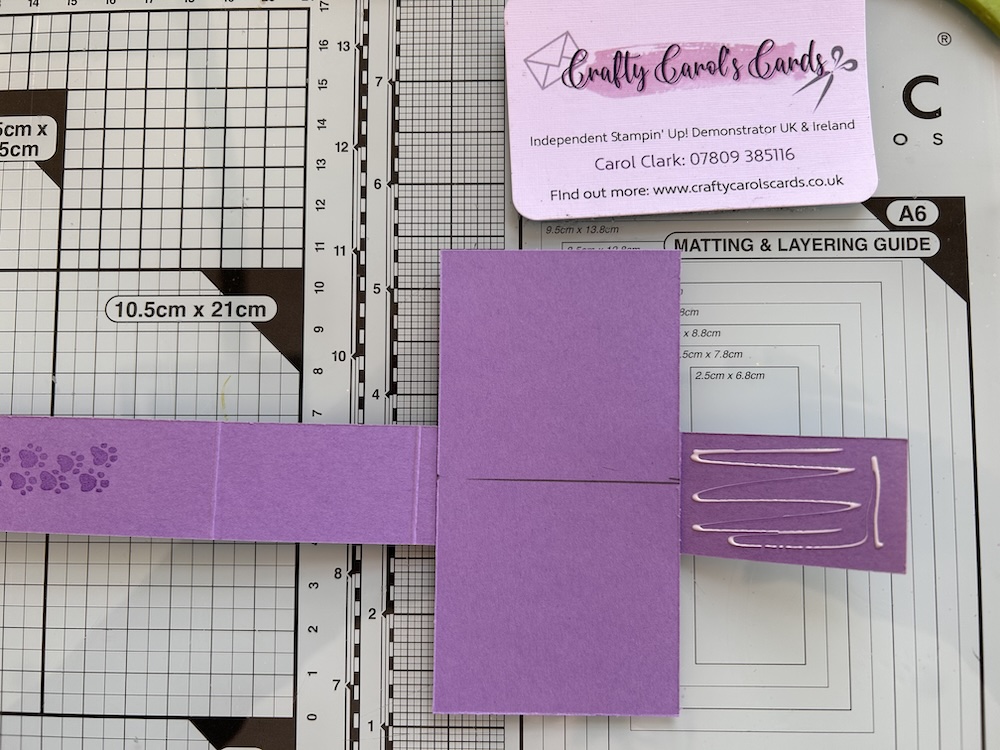
Add tear & tape to the top and bottom of the back of this piece.
Take the tear & tape covers partly off. Turn the piece over and place the rectangle in the centre of your card base.
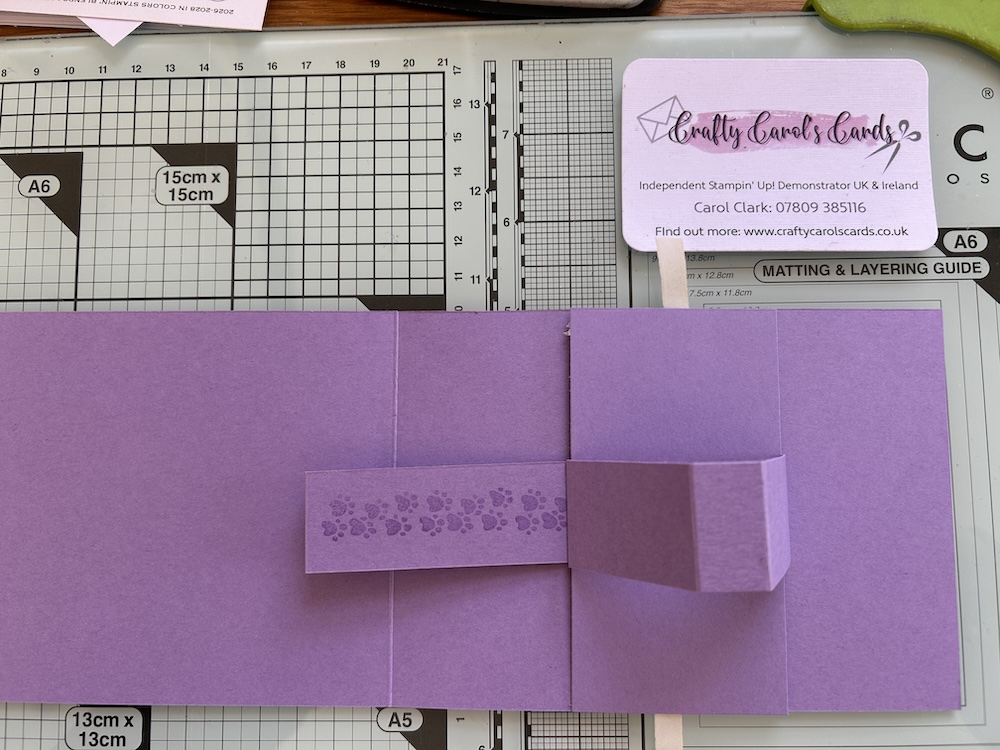
Fold the mechanism flat to ensure it is central and does not overlap the card edges – the left hand side should sit snugly against the card score line. Remove the remaining tear & tape ends to glue down.
Stamp a few more paws on the right-hand side of the card next to the mechanism.
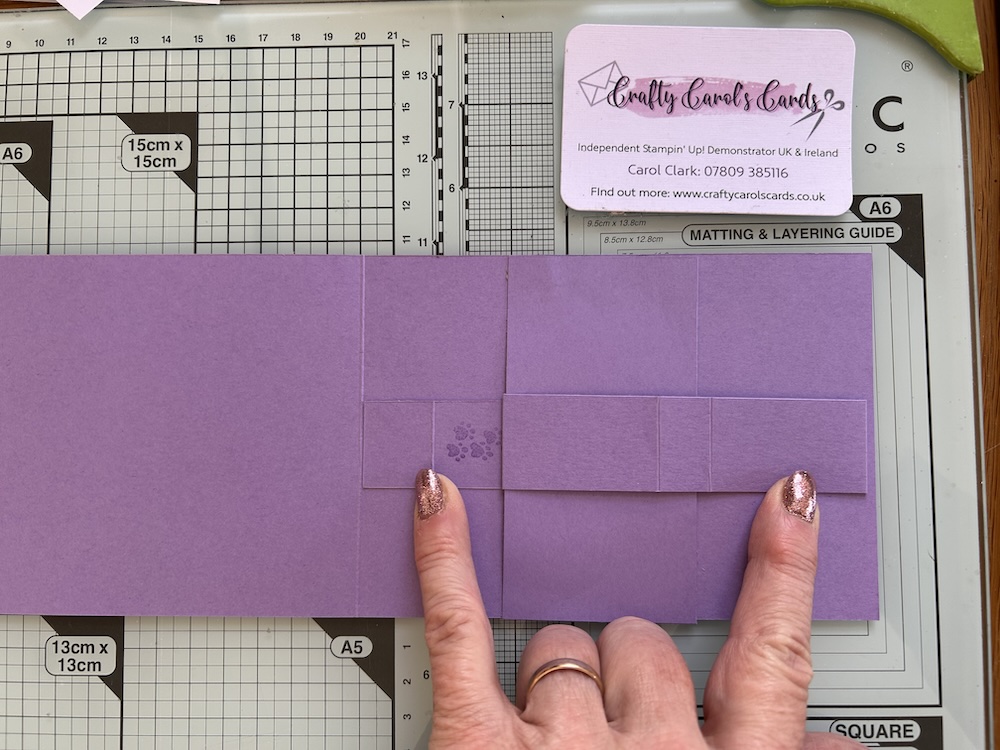
Add glue to the short end panel as shown.
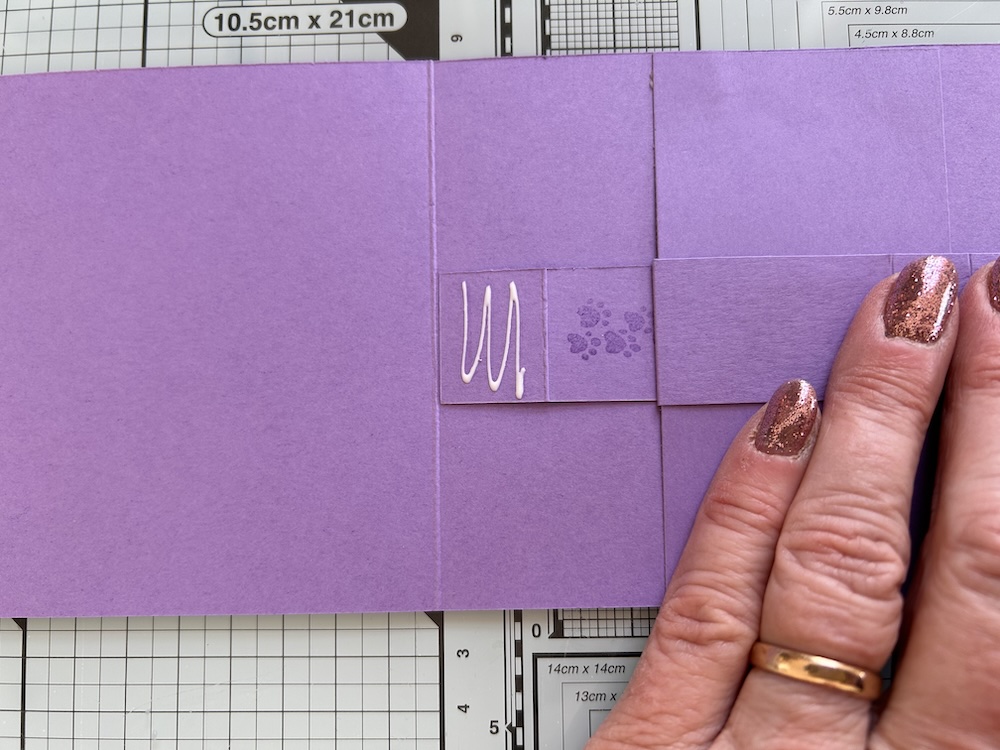
Fold the card closed to glue the mechanism in place.
Glue the two DSP strips above and below your mechanism.
Stamp your sentiment onto the Basic White circle, then add your chosen image. Colour in as you wish using blends.
Stick this to your larger colour cardstock circle.
Add glue to the centre of the mechanism as shown.

Stick the completed circle piece to the centre, holding it for a few seconds to make sure it is well stuck on.
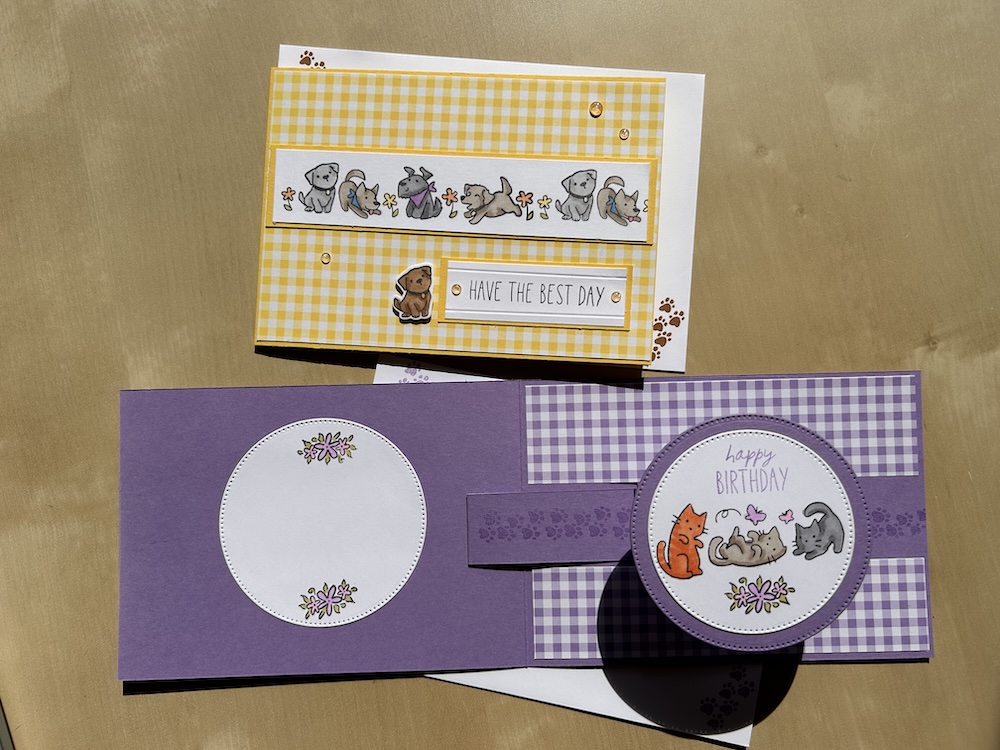
Stamp, colour, then stick a further Basic White circle panel to the left-hand inside of the card to give an area for writing a greeting. You can add a sentiment here if you wish, or use a small coloured image as I have done.
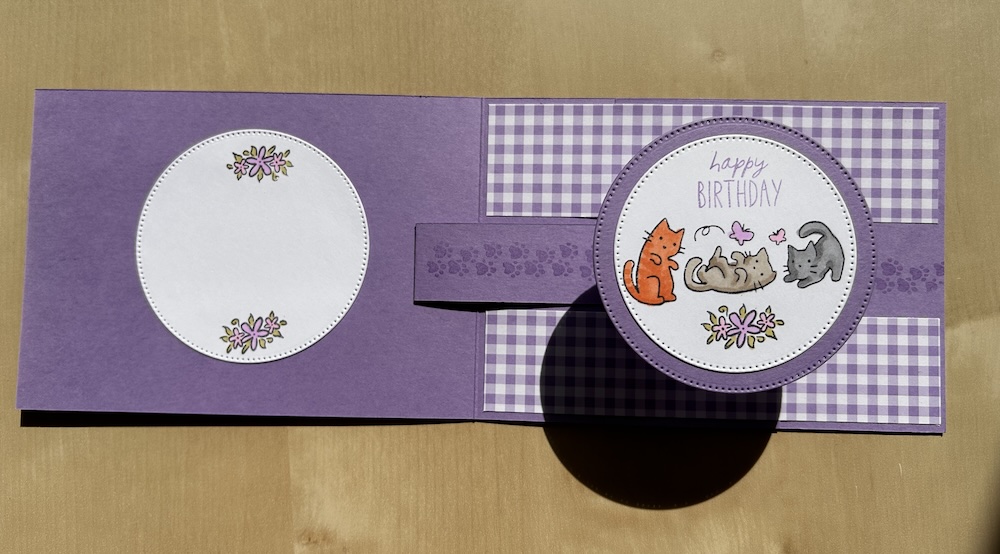
(For the first slider pop-up card I made, I added a strip of Basic White under the slider pop-up as you can see, but it is partly obscured by the pop-up, so I decided having a space for writing on the left-hand side was better! Alternatively, add a panel to the back of your card for writing a greeting. Here is that first slider pop-up card:)
Stamp the cats onto the Basic White strip for the front of the card. You will need to stamp them twice to fill in the panel.
Colour the cats as you wish. I used Timid Tiger, Smoky Slate, Grey Granite, Cloud Cover and Crumb Cake, plus Petunia Pop and Bubble Bath for the butterflies.
Stick to the colour panel and stick across the centre of your card.
Stamp a sentiment in coordinating ink. Trim and add to a colour panel if you wish. Add to the card front, bottom right.
Add a few coordinating gems to finish your card.
Here is the finished cats slider pop-up card:
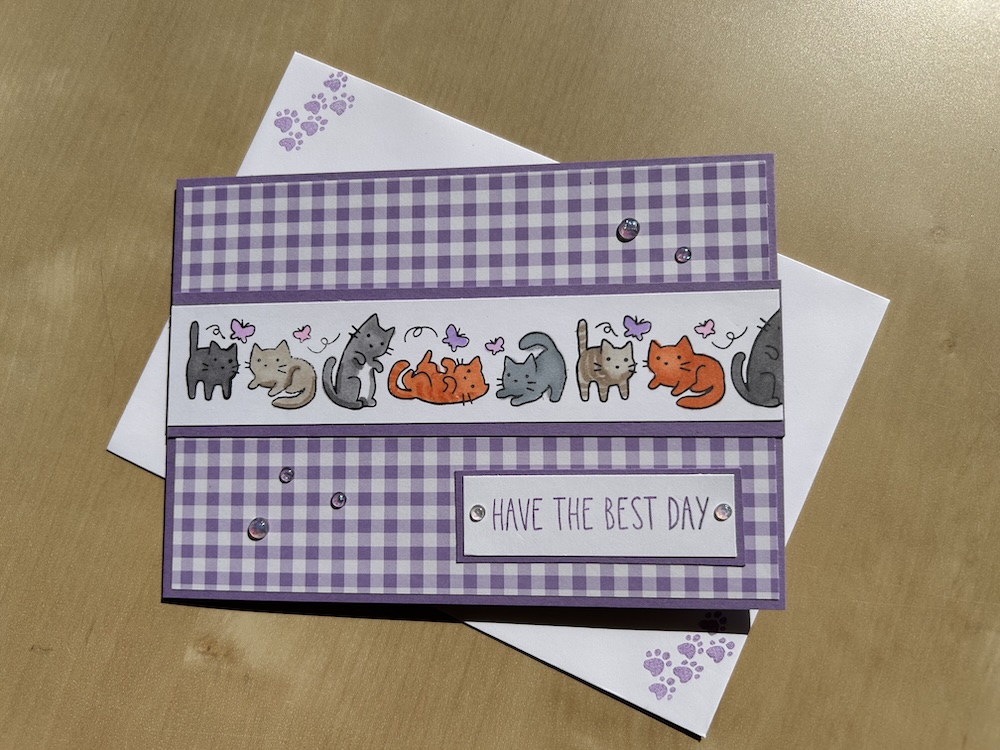
Don’t forget to decorate your envelope!
Here is the video of me making the birds version of this slider pop-up card:
I had great fun making these slider pop-up cards. This is a lovely fun fold to make.
I hope you like this card and will have a go at making one – please show me what you come up with.
Thank you for taking the time to read my post.

Don’t forget – you get a FREE pdf when you place any order with me as your demonstrator. And, if your order is over £40, you will also get to choose stuff from my online shop to the value of your order!
Product List ![Cutest Crew Bundle (English) [ 167149 ]](https://assets1.tamsnetwork.com/images/EC042017NF/167149s.jpg "Cutest Crew Bundle (English) [ 167149 ]") | ![Highland Heather A4 Cardstock [ 147010 ]](https://assets1.tamsnetwork.com/images/EC042017NF/147010s.jpg "Highland Heather A4 Cardstock [ 147010 ]") | ![Daffodil Delight A4 Card Stock [ 121680 ]](https://assets1.tamsnetwork.com/images/EC042017NF/121680s.jpg "Daffodil Delight A4 Card Stock [ 121680 ]") | ![Balmy Blue A4 Cardstock [ 147007 ]](https://assets1.tamsnetwork.com/images/EC042017NF/147007s.jpg "Balmy Blue A4 Cardstock [ 147007 ]") | ![Basic White A4 Cardstock [ 166781 ]](https://assets1.tamsnetwork.com/images/EC042017NF/166781s.jpg "Basic White A4 Cardstock [ 166781 ]") |
![Paper Trimmer [ 152392 ]](https://assets1.tamsnetwork.com/images/EC042017NF/152392s.jpg "Paper Trimmer [ 152392 ]") | ||||
![Tuxedo Black Memento Ink Pad [ 132708 ]](https://assets1.tamsnetwork.com/images/EC042017NF/132708s.jpg "Tuxedo Black Memento Ink Pad [ 132708 ]") | ||||
![Pecan Pie Classic Stampin' Pad [ 161665 ]](https://assets1.tamsnetwork.com/images/EC042017NF/161665s.jpg "Pecan Pie Classic Stampin' Pad [ 161665 ]") |
![Smoky Slate Stampin' Blends Combo Pack [ 154904 ]](https://assets1.tamsnetwork.com/images/EC042017NF/154904s.jpg "Smoky Slate Stampin' Blends Combo Pack [ 154904 ]")
![Gray Granite Stampin' Blends Combo Pack [ 154886 ]](https://assets1.tamsnetwork.com/images/EC042017NF/154886s.jpg "Gray Granite Stampin' Blends Combo Pack [ 154886 ]")
![Crumb Cake Stampin' Blends Combo Pack [ 154882 ]](https://assets1.tamsnetwork.com/images/EC042017NF/154882s.jpg "Crumb Cake Stampin' Blends Combo Pack [ 154882 ]")
![Old Olive Stampin' Blends Combo Pack [ 154892 ]](https://assets1.tamsnetwork.com/images/EC042017NF/154892s.jpg "Old Olive Stampin' Blends Combo Pack [ 154892 ]")
![Bubble Bath Stampin’ Blends Combo Pack [ 161675 ]](https://assets1.tamsnetwork.com/images/EC042017NF/161675s.jpg "Bubble Bath Stampin’ Blends Combo Pack [ 161675 ]")
![Petunia Pop Stampin’ Blends Combo Pack [ 163828 ]](https://assets1.tamsnetwork.com/images/EC042017NF/163828s.jpg "Petunia Pop Stampin’ Blends Combo Pack [ 163828 ]")
![Lemon Lolly Stampin’ Blends Combo Pack [ 161673 ]](https://assets1.tamsnetwork.com/images/EC042017NF/161673s.jpg "Lemon Lolly Stampin’ Blends Combo Pack [ 161673 ]")
![Balmy Blue Stampin' Blends Combo Pack [ 154830 ]](https://assets1.tamsnetwork.com/images/EC042017NF/154830s.jpg "Balmy Blue Stampin' Blends Combo Pack [ 154830 ]")
![Highland Heather Classic Stampin' Pad [ 147103 ]](https://assets1.tamsnetwork.com/images/EC042017NF/147103s.jpg "Highland Heather Classic Stampin' Pad [ 147103 ]")
![Balmy Blue Classic Stampin' Pad [ 147105 ]](https://assets1.tamsnetwork.com/images/EC042017NF/147105s.jpg "Balmy Blue Classic Stampin' Pad [ 147105 ]")
