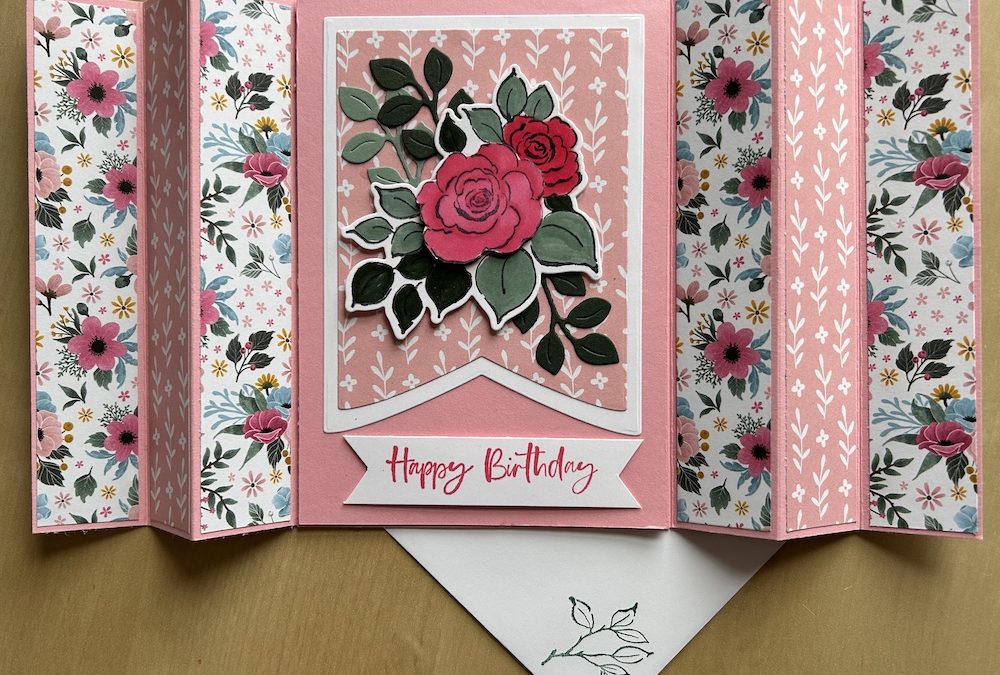
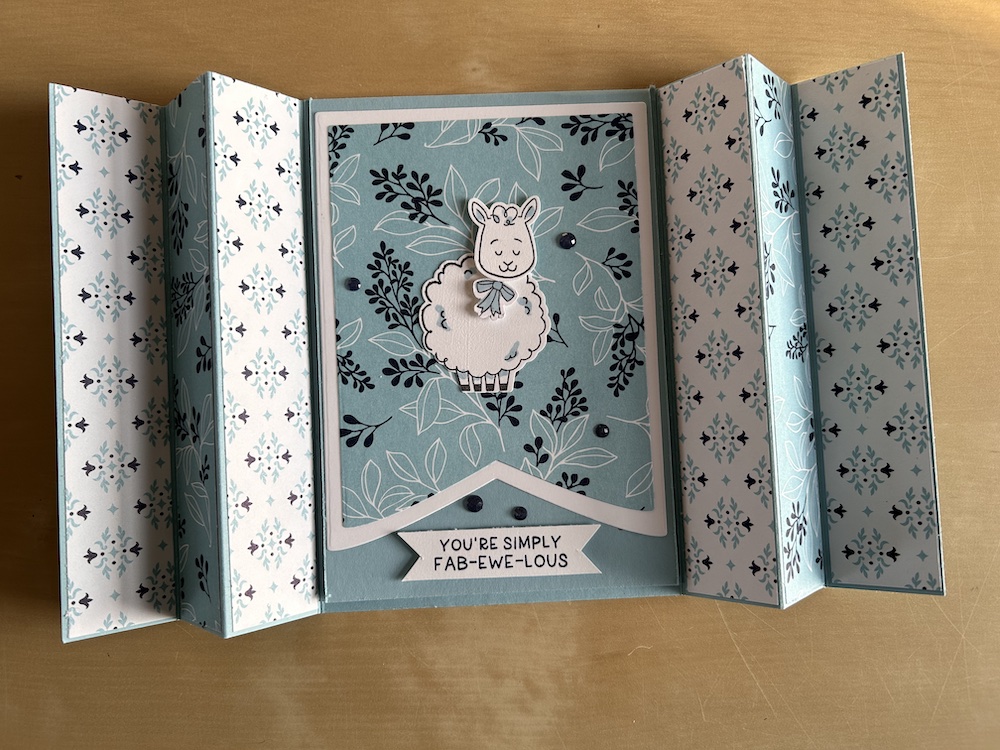
I first made this card on a mystery stamping event with my fabulous colleagues from Build & Bloom. The first time I made it I used the True Blue Florals DSP (December’s Product of the Month) and the Woolly Friends bundle, but I wanted to show how you can use any stamp set and DSP to make this lovely and easy fun fold.
The centre panel opens for a greeting between the pleat folds, but it fits into a regular envelope. Measurements and instructions for this side pleat card are given below.
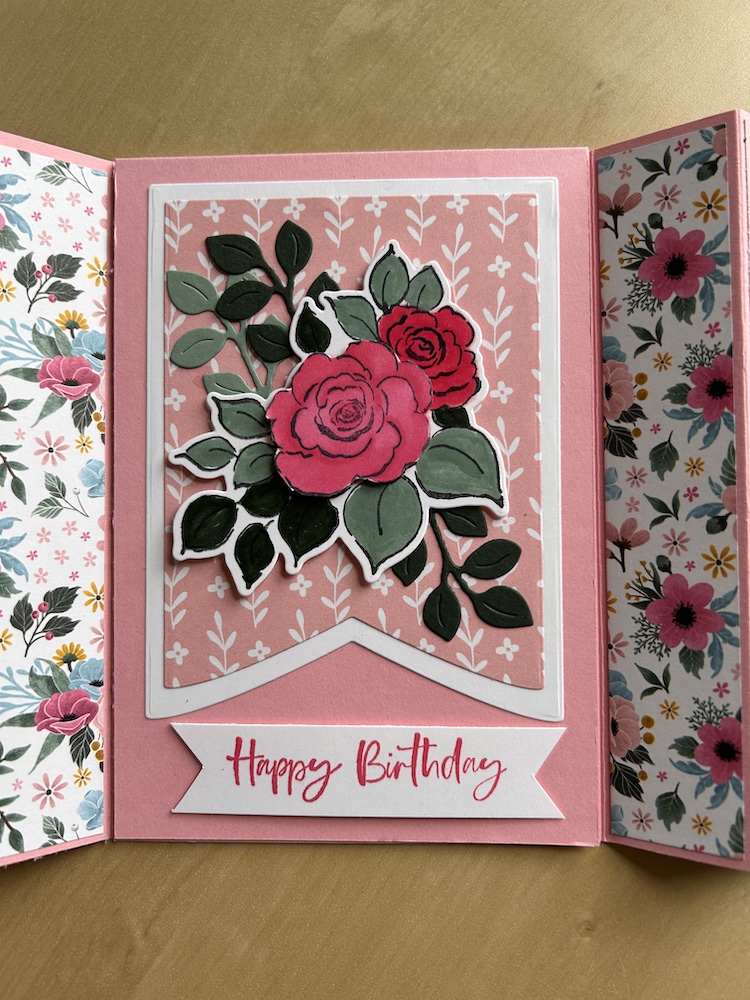
Here is the original card I made:
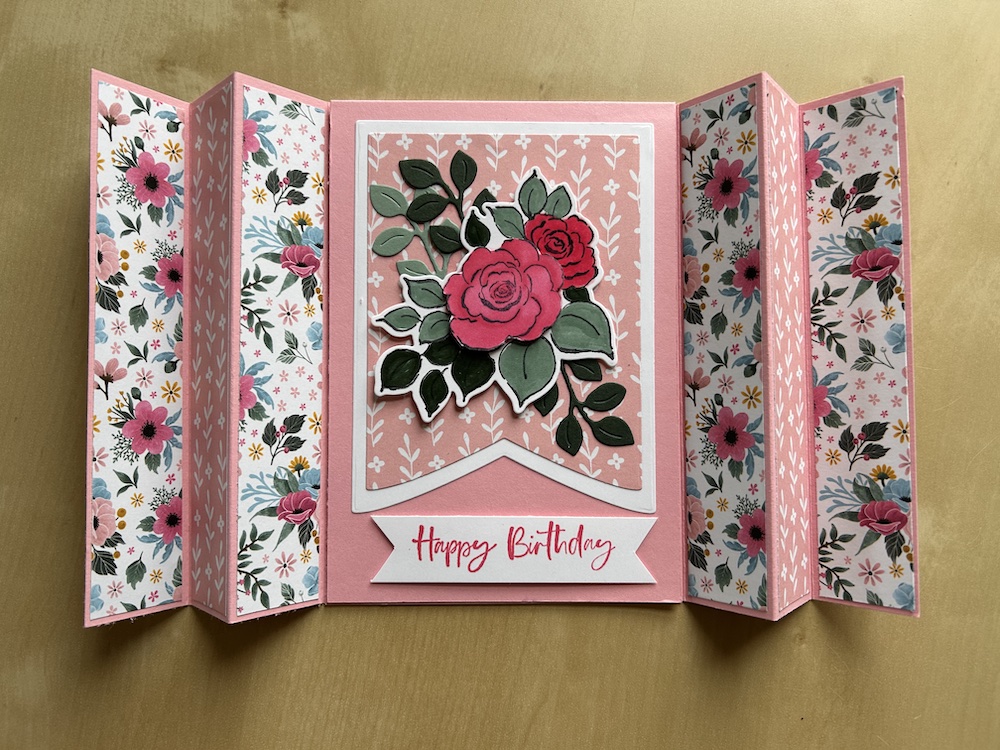
I made my second side pleat card using the Charming Day bundle (currently in Last Chance products) and retired Fitting Florets DSP, but you can use anything in your stash.
To make this card you need:
- Base coloured cardstock 28.5cm x 14.8cm (11″ x 5½”)
- Centre card coloured cardstock 29.6 x 10.3cm (11″ x 4½”)
- DSP strips (x8): 2.6cm x 14.4cm (1″ x 5 3/8”)
- Basic White for centre card layer approx 10cm x 14.3cm (4¼” x 5¼”)
- DSP for centre card approx 9.5cm x 13.8cm (4” x 5”)
- Basic White for centre card inside 9.5cm x 13.8cm (4” x 5”)
- Banner dies (optional)
- Scraps of card for die-cutting and sentiment
The video of how to make this card can be found at the end of this post.
Score the base cardstock on the long side at 3cm, 6cm and 9cm (1 1/8″, 2 1/4″ and 3 3/8″) from both sides. Fold each set and burnish as mountain, valley and mountain folds.
Adhere the strips of DSP to each side pleat fold and the outside of the final panel.
Score the centre card at 14.8cm (5½”), fold and burnish.
I used the banner dies to cut two banners to decorate the front, but if you do not have these, you could use simple layers instead – just trim your pieces as required. Adhere these to the centre card front.
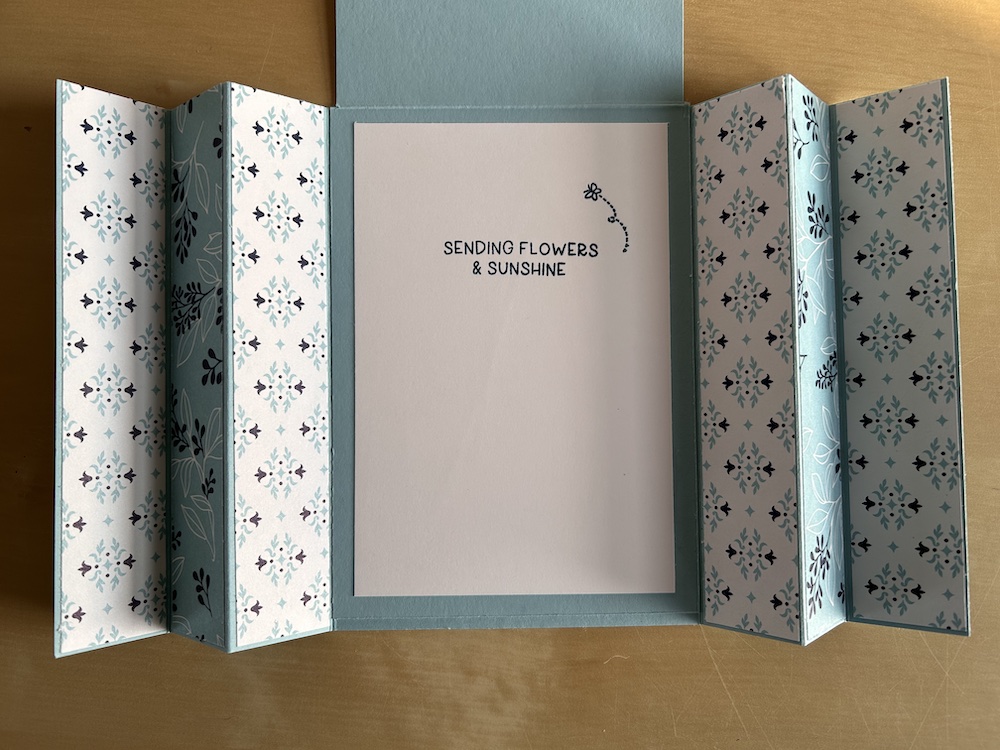
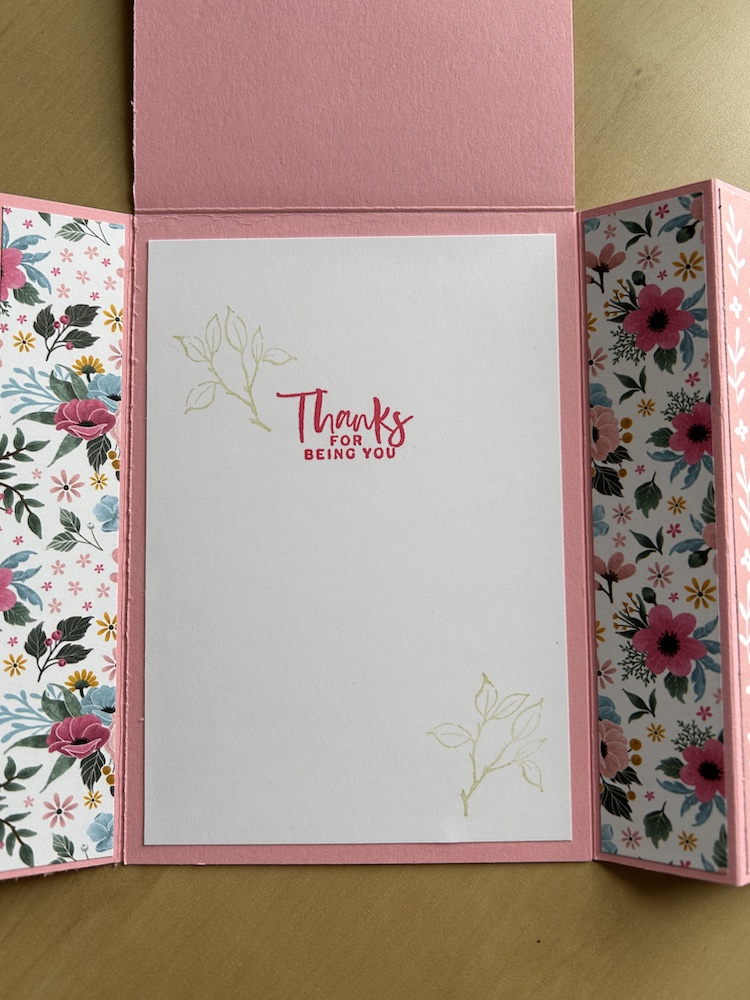
Stamp a greeting on the inside panel and stick inside your centre card.
Carefully stick the completed centre card to the base card, ensuring that the side pleat folds close properly.
Decorate the centre card front as you wish. Be careful not to add dimension at the side, but you can add some in the middle. I used the Charming Day large flower, stamped and coloured with Strawberry Slush blends and Stampin Up! markers. I added two dimensionals in the centre of the larger flower and stuck it to the card front. I added some die-cut leaves around it – see picture and video for details.
I stamped my sentiment, trimmed the scrap, then banner cut the ends before adding it below the banners with two dimensionals in the centre of the strip.
Add gems or ribbon as further decoration if you wish, again keeping these to the centre of your centre card.
Don’t forget to decorate your envelope!
Here is the video of making this card:
I hope you like this card and will have a go at making one – please show me what you come up with.
Thank you for taking the time to read my post.

Don’t forget – you get a FREE pdf when you place any order with me as your demonstrator. And, if your order is over £40, you will also get to choose stuff from my online shop to the value of your order!
Product List ![Woolly Friends Bundle (English) [ 166888 ]](https://assets1.tamsnetwork.com/images/EC042017NF/166888s.jpg "Woolly Friends Bundle (English) [ 166888 ]") | ![Charming Day Bundle (English) [ 166136 ]](https://assets1.tamsnetwork.com/images/EC042017NF/166136s.jpg "Charming Day Bundle (English) [ 166136 ]") | ![Party Banners Dies [ 165264 ]](https://assets1.tamsnetwork.com/images/EC042017NF/165264s.jpg "Party Banners Dies [ 165264 ]") | ![Balmy Blue A4 Cardstock [ 147007 ]](https://assets1.tamsnetwork.com/images/EC042017NF/147007s.jpg "Balmy Blue A4 Cardstock [ 147007 ]") | |
![Pretty In Pink A4 Cardstock [ 163794 ]](https://assets1.tamsnetwork.com/images/EC042017NF/163794s.jpg "Pretty In Pink A4 Cardstock [ 163794 ]") | ![Basic White A4 Cardstock [ 166781 ]](https://assets1.tamsnetwork.com/images/EC042017NF/166781s.jpg "Basic White A4 Cardstock [ 166781 ]") | ![Stampin' Dimensionals [ 104430 ]](https://assets1.tamsnetwork.com/images/EC042017NF/104430s.jpg "Stampin' Dimensionals [ 104430 ]") |
![True Blue Florals 12" X 12" (30.5 X 30.5 Cm) Designer Series Paper [ 167970 ]](https://assets1.tamsnetwork.com/images/EC042017NF/167970s.jpg "True Blue Florals 12\" X 12\" (30.5 X 30.5 Cm) Designer Series Paper [ 167970 ]")
![Strawberry Slush Stampin’ Blends Combo Pack [ 165290 ]](https://assets1.tamsnetwork.com/images/EC042017NF/165290s.jpg "Strawberry Slush Stampin’ Blends Combo Pack [ 165290 ]")
![Strawberry Slush Classic Stampin' Pad [ 165286 ]](https://assets1.tamsnetwork.com/images/EC042017NF/165286s.jpg "Strawberry Slush Classic Stampin' Pad [ 165286 ]")

I really liked the look of this card so I decided to give it a try. I used the measurements on the blog which are slightly different from the ones on the video but should still work. The space for the center card portion seems to be off on my card. There is about 1/4 inch of space on each side and I cannot figure out why
Hi Amanda, thank you so much for this. I suspect you used the inch measurements? I am so sorry, but there was an error. I have now corrected this to the correct size. The centre cardstock piece should be 4 1/2″ wide (which is your missing space). Thank you for bringing it to my attention. I make my cards using centimetres, so it’s great that you found the problem. I hope it is now solved. I hope you still enjoyed making the card.
Ahhh thank you so much for responding! I will fix that and continue on with my card making!
I love this card and made one, but also found the measurements off a bit. I left the middle panel the same, but scored the base at 1 1/8, 2 1/4 and 3 3/8 from each end. I made the DSP strips 1”x5 3/8 and it was perfect!
Thank you so much Kay. Although I try to ensure my inch measurements for my US friends are correct I can only guarantee the cm ones. I shall alter the post to give the correct inch ones, thanks to you!