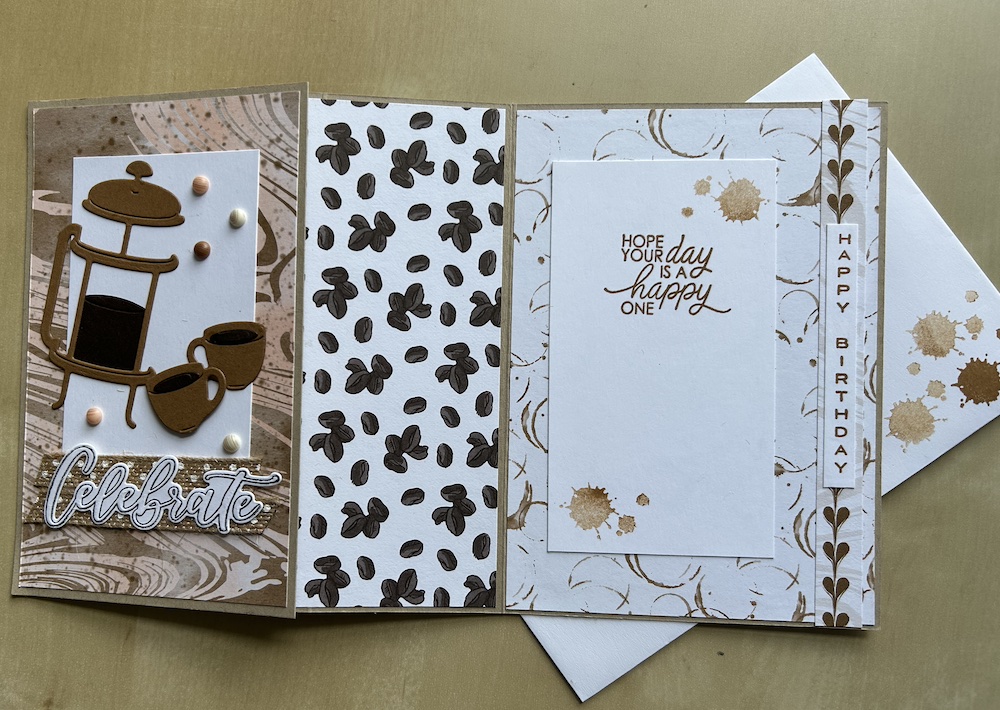
I can’t stop making cards using the gorgeous new A Little Latte suite which is available as an Online Exclusive suite or set of products. There is the Latte Love stamp set, matching dies that also cut out various other coffee-related items, a set of 12 x 12 A Little Latte Designer Series Paper, some of which also cuts out using the dies, a set of adhesive-backed swirl dots and some natural trim with white spots.
For this project, I wanted to make a card for my brother-in-law because it’s his birthday next week. I never make plain cards for family and friends, they have to be special! So I created this fun fold card. I also used the So Sincere stamp set and the Thoughful Moments hybrid embossing folder for the sentiments.
You will need:
- Crumb Cake base 21cm x 14.8cm (8 ½” x 5 ½”)
- Crumb Cake panel 9cm x 14.8cm (3 ½” x 5 ½”)
- Basic White cardstock (2 pieces): 11cm x 5cm (4 1/4″ x 2 3/8″)
- Scrap of Basic White for the vertical sentiment
- A Little Latte DSP front panel layer: 8.5cm x 14.3cm (3 1/4″ x 5 1/4″)
- A Little Latte DSP inside layer: 10cm x 14.3cm (4” x 5 ¼”)
- DSP strip of the heart ribbon DSP (optional)
- DSP panel for inside the card 7cm x 14.3cm (2 3/4″ x 5 1/4″) (optional)
- Scraps of Peace Pie and Early Espresso cardstock for die-cutting
You can see how to make the card in the video, or read the instructions below if you prefer.
Score the card base in half at 10.5cm and also score at 3cm (4 1/4″ and 1 1/4″). Fold in half and burnish as usual then fold the second score line back on itself outwards to form the base for the front panel.
Stick the inside panel of DSP inside the card and stick the front panel DSP piece to the front panel cardstock piece.
If using, stick the strip of heart coffee art DSP down the outer edge of the back panel of the card.
Stamp the Happy Birthday vertical stamp from the So Sincere stamp set onto a scrap of Basic White using Pecan Pie ink. Trim then stick on top of the heart coffee art strip or stick just inside the edge of the back of the card as shown in the picture.
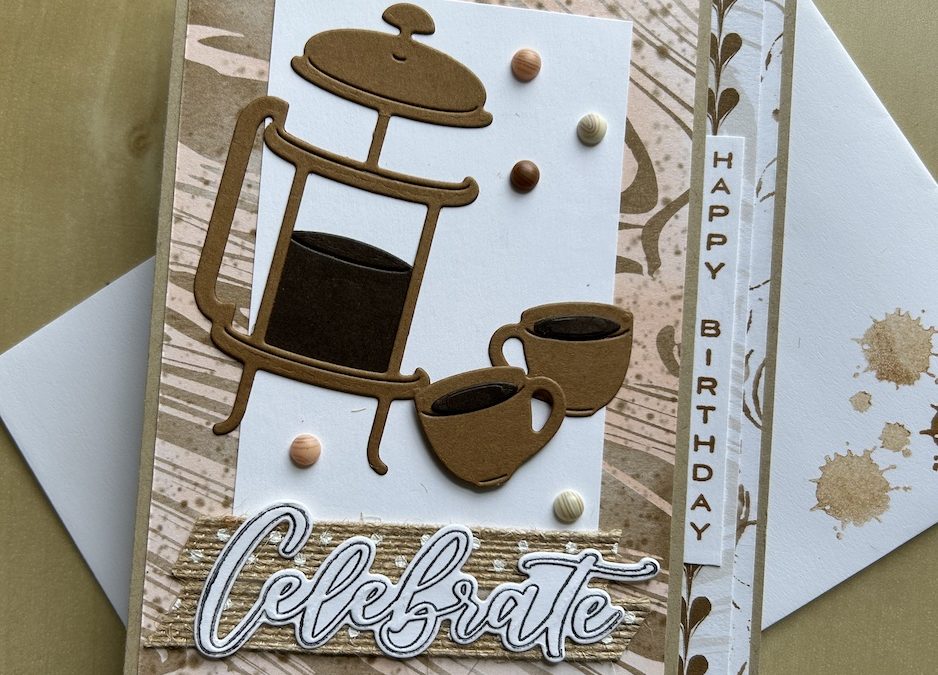
Die cut a cafetière and two cups from Pecan Pie cardstock and die-cut the coffee for the cafetière and the coffee rims for the cups from Early Espresso. Make up the cups.
Stick one Basic White piece to the centre of the front panel. I think this panel might be better is embossed and the new S0 Swirly embossing folder would look good, but I didn’t do that. Add the coffee and cafetière and one cup stuck down flat. Raise the other cup on a dimensional.
Add two diagonally cut strips of the natural trim across the bottom of the card using tea & tape to stick them down. Make a Celebrate sentiment inked in Early Espresso and embossed and die cut using the Thoughtful Moments hybrid folder. Add it on top of the ribbon using tear & tape.
Use tear & tape to stick the front panel onto the folded back portion of the card base, making sure you line it up carefully with the side, top and bottom of the card. Add some of the adhesive-backed swirl gems as decoration.
Complete the inside of the card – see the picture below to help:

Stick the optional panel inside the card front if using – I needed it to hide a mistake when initially scoring my card base! Stamp your sentiment on the inside panel using Pecan Pie ink. Add stamped-off splatters as shown. I used the splatter stamp to decorate my envelope too. Stick the completed panel inside the card.
I hope you like this card and will have a go at making one – please show me what you come up with.
Thank you for taking the time to read my post.

Don’t forget – you get a FREE pdf when you place any order with me as your demonstrator. And, if your order is over £40, you will also get to choose stuff from my online shop to the value of your order!
Product List


