Here is the eighth of my 12 Cards for Christmas projects. I got the idea from a card I made during an online class with another demo, Pat, the Crafting Bunny – thanks, Pat! – though I made a slightly simpler version for this project and called it a DSP tag card.
We made this DSP tag card at my November Craftalong where I showed all the different ideas – this card looks very different depending on the DSP and colour scheme you use, as you can see in the examples below. Here’s the card I made with Pat:
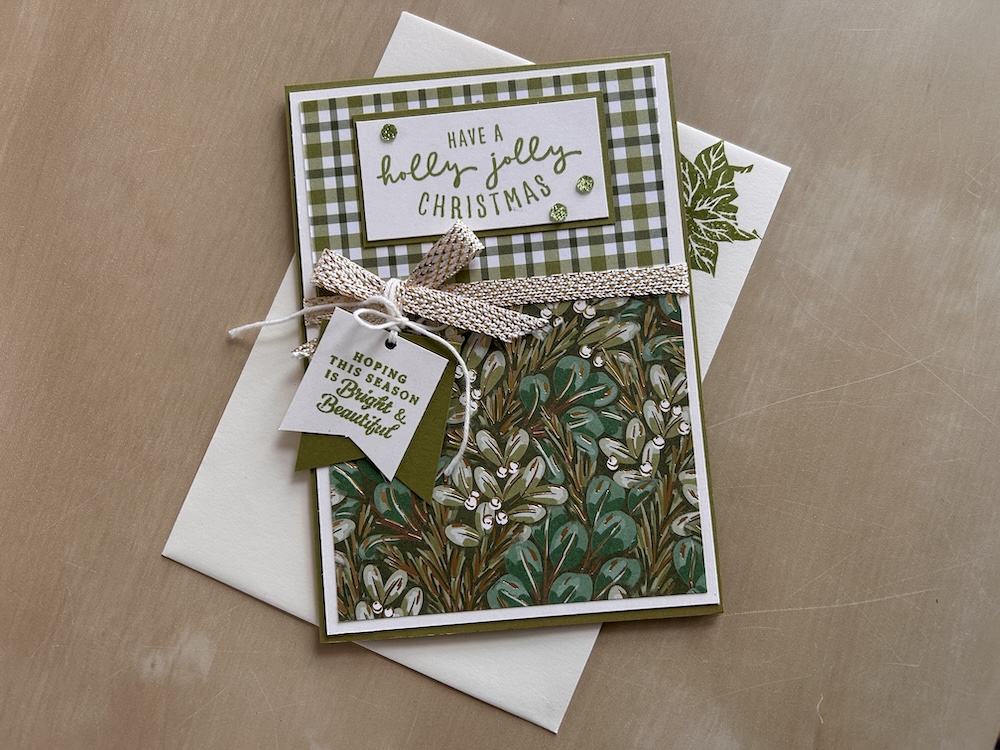
The DSP tag card uses a double-sided piece of DSP with coordinating patterns on each side, or two pieces of coordinating DSP, one cut at 9.6cm x 6cm and one 9.6cm x 7.9cm (3¾” x 2″ and 3¾” x 3″)
I used retired DSP for these projects and retired stamp sets for the sentiments.
To make this DSP tag card you need (US cardstock sizes in brackets):
- DSP with a reversible coordinating pattern 9.6cm x 13.9cm (3¾” x 5”)
- Coordinating colour cardstock 10.1cm x 14.4cm (4” x 5¼”)
- Basic White (or Very Vsnilla) card base 21cm x 14.8cm scored at 10.5cm (8½” x 5½” scored at 4¼”)
- Scraps of Basic White (Very Vanilla) for sentiment and tag
- Scrap of colour cardstock for tag
- Coordinating ink pad(s)
- White/coloured ribbon and twine
- Gems to decorate
You can also make this card with a Basic White (or Very Vanilla) card base and white panel. You will then need another Basic White panel for the inside of the card.
Here are the pieces for my Craftalong DSP tag card:
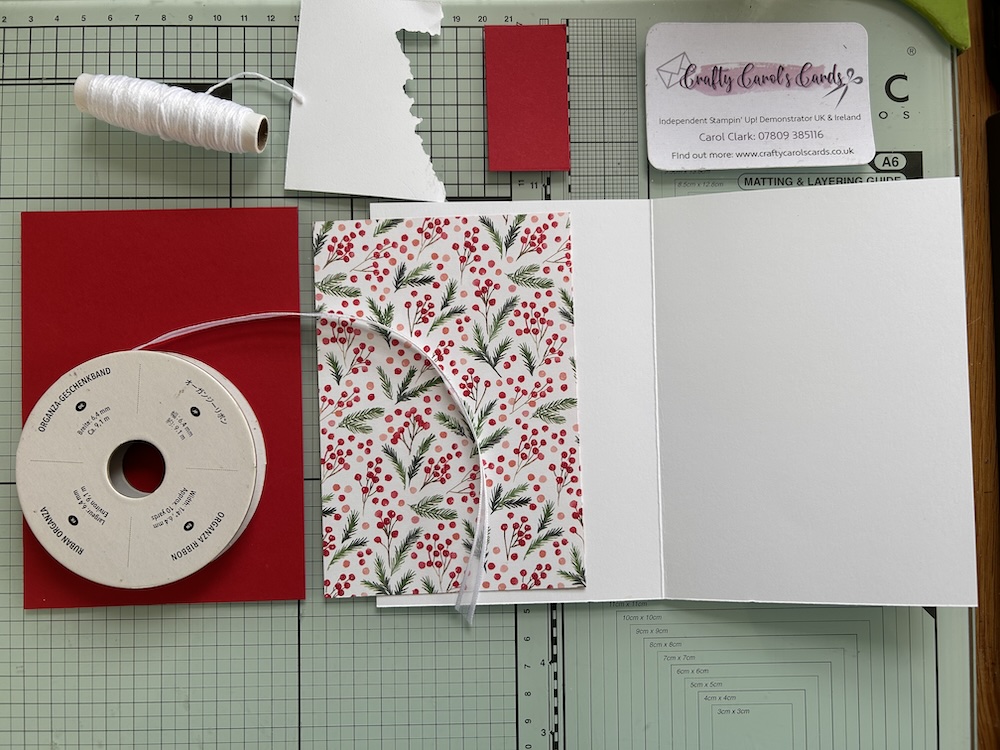
The instructions are below and/or you can watch the video at the end of this post.
Instructions
Fold and burnish the base cardstock.
Adhere the bottom (larger) DSP panel to the colour card base, leaving the same border around the sides and bottom. Adhere the smaller, coordinating piece of DSP to the top of this panel.
Add two small pieces of double sided tape to each side across the DSP join, wrapping around to the back.
Cut a length of ribbon to reach easily across the panel and adhere, sticking the ends to the back of the panel. The centre should not be stuck down.
Stamp a small sentiment to a scrap of Basic White (or Very Vanilla). Flag the bottom as shown.
Adhere this to a scrap of coordinating cardstock and flag the ends of that too.
Hold these pieces together and punch a small hole in the top.
Cut a length of twine (approximately 6″), push it through the holes and tie.
Wrap the completed tag around the white ribbon to the left of the panel. Use a glue dot to hold it in place if necessary. (See the video if you are unsure.)
Tie a small ribbon bow and add to the ribbon over the tag using glue dots.
Adhere the completed panel to the front of your card base.
Stamp a sentiment. You can either flag the ends, or layer it onto a colour piece of cardstock – see my example cards for ideas! Add to the top of your card using dimensionals.
Finish your DSP tag card with a few gems.
Don’t forget to decorate your envelope!
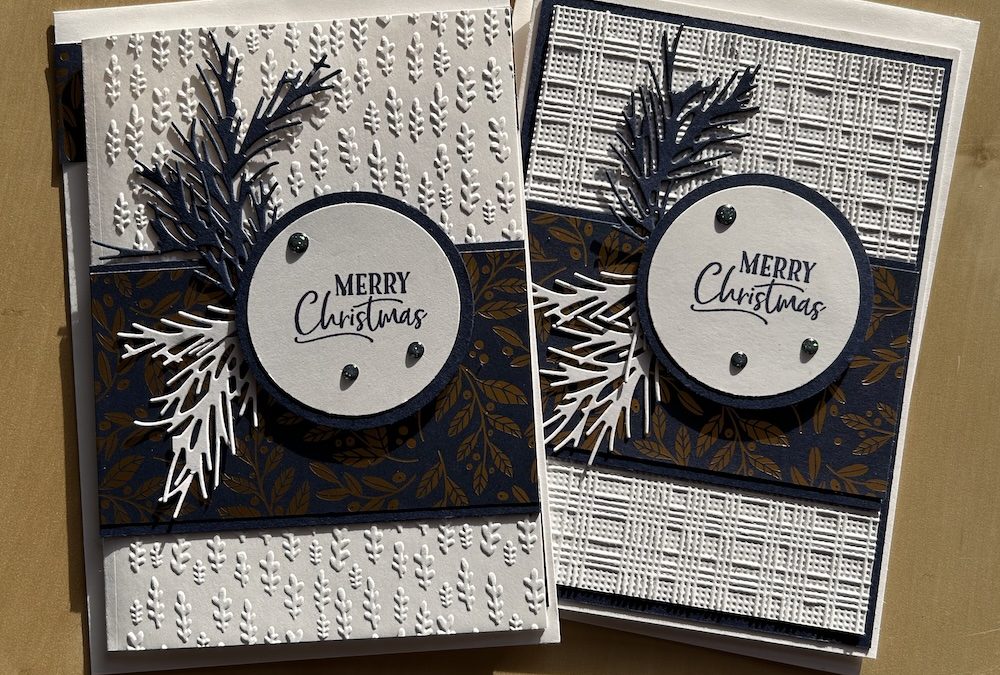
Here are some of the DSP tag cards I have made:
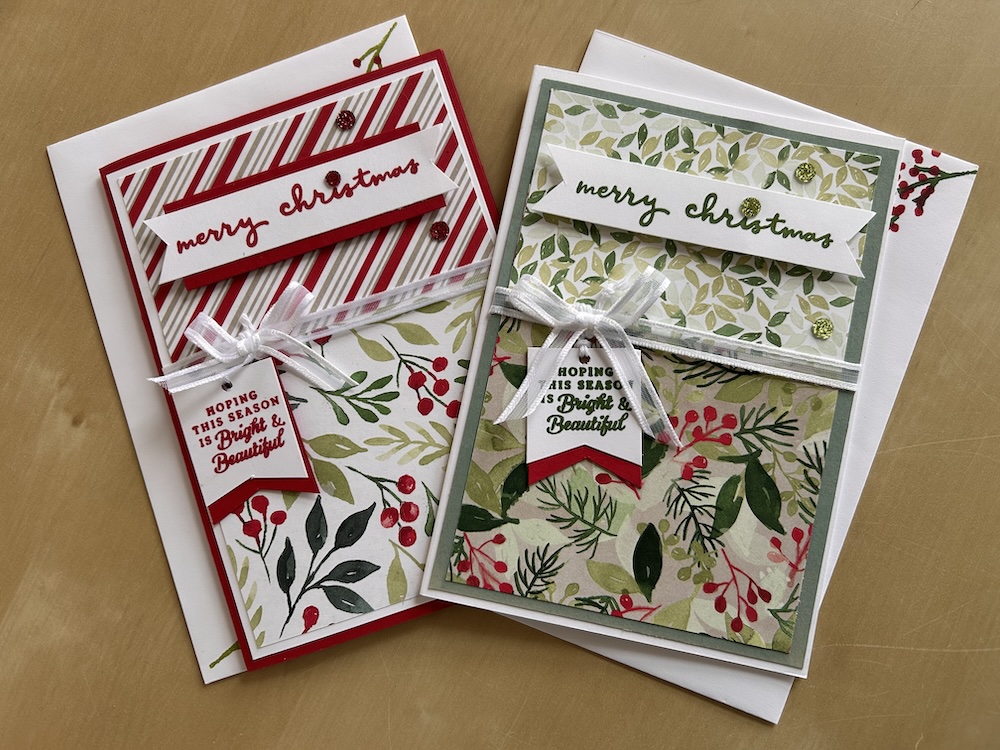
Here is the video of me making a DSP tag card:
I hope you like this card and will have a go at making one – please show me what you come up with.
Thank you for taking the time to read my post.

If your order from Stampin’ Up! through me over £50, you can choose stuff from my online shop to the value of your order. Watch out for the email!
Product List  |  |  |