I got the idea for this double flap card from a swap from a lovely demonstrator, Emilie Raballand, at our recent On Stage event in Rotterdam. It’s exactly what it says on the tin – a fun fold card with a double flap.
It is an easy fun fold card but is a real WOW card that any recipient is going to love. There is plenty of space on the front mini flap card and inside the card to add whatever sentiment and greeting you want, making it suitable for any occasion. Using different colours and DSPs will make these cards look very different.
I demonstrated this card at my Craft with Carol LIVE session today and you can watch the video below to see how I made the card (and see two other cards made in the same way). I have also written out the instructions for this double flap card below.
You will need:
- Base colour cardstock 1: 25cm x 14.8cm (9 1/2″ x 5 1/2″)
- Base colour cardstock 2: 16cm x 8cm (6″ x 3″)
- DSP large panels (x2-3); 10cm x 14.3cm (4″ x 5 1/4″)
- DSP small panel: 3.5cm x 14.3cm (3/4″ x 5 1/4″)
- DSP panels for card 2 (x2-3): 7.5cm x 7.5cm (2 3/4″ x 2 3/4′)
- Basic White panel for inside card: 9.5cm x 13.8cm (3 3/4″ x 5″)
- Basic White panel for card 2: 6.5cm x 6.5cm (2 1/2″ x 2 1/2″)
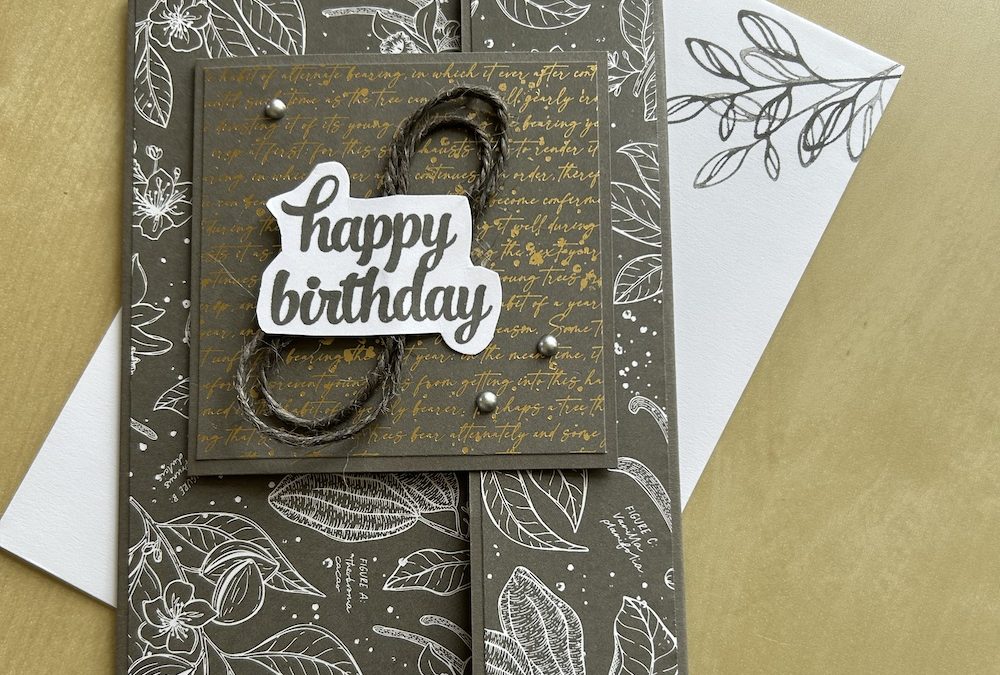
I used Pebbled Path cardstock and the gorgeous Nature’s Sweetness DSP, plus the Layering Leaves stamp set and sentiments for this double flap card – you can see all the products I used below.
Score the base cardstock 1 at 10.4cm and 21cm (4 1/4″ and 8 1/2″) – you want the left hand panel to be slightly less than the centre panel, to allow the flap to fold over neatly. If your fold means it is too tight a fold, trim a sliver off your front panel. Fold each panel and burnish folds.
Score cardstock 2 in half at 8cm (3″), fold and burnish.
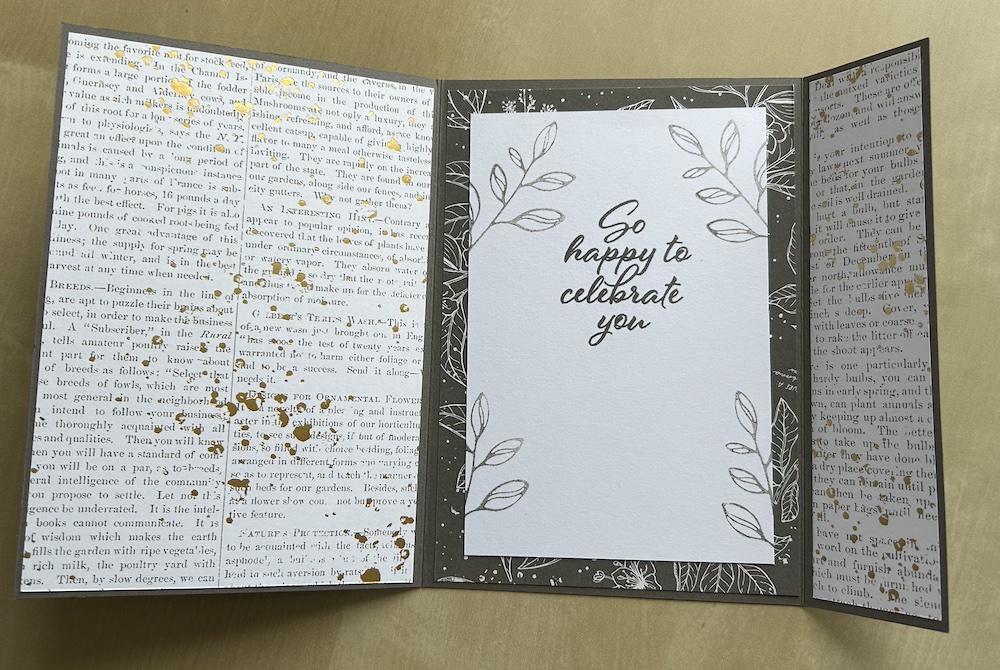
Add the DSP panels to each panel of each card, putting the narrow strip of the front of the flap panel. Adding a panel to the inside front of each card is optional, but I liked the look! You could also add a strip to the inside of the flap panel – your choice. Here’s my card with both flaps open:
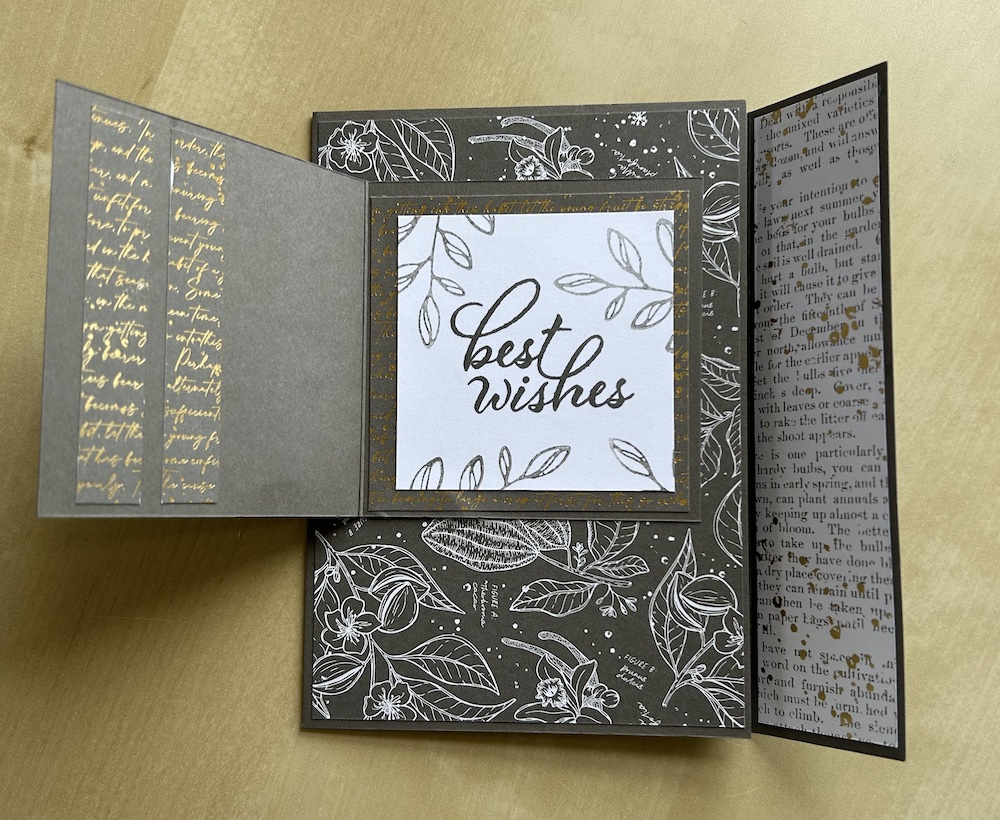
Stick the completed small card to the main card in the centre of the front panel.
Stamp your chosen sentiment or image onto the small Basic White panel for the front of the small card. Add a stamped sentiment plus any images you want to the large Basic White panel for the inside and stick both these panels down flat to the cards. Here’s the part open card:
For the front of the mini card, I stamped a sentiment (retired!) then cut around it using my snips.mI used some Pebbled Path jute trim as decoration, stuck down on a piece of tear-n-tape, then added my sentiment using dimensionals. (You can raise anything on the front of this card using dimensionals, as it will not interfere with the main card flap.)
Add gems of other embellishment as you wish and voila, your double flap card is complete.
Don’t forget to decorate your envelope – I forgot on the live but remembered to do so afterwards!
Product List  |  |
 Specialty Designer Series Paper")
")

