This mountain slider is such a fun fun fold! I first saw this card at a stamping retreat with the wonderful Australian demos, Kylie and Bruno Bertucci. They made it as a double mountain slider for a square card, so I played around and I’ve adapted it for my usual C6-sized card using the gorgeous Scenic Coast specialty DSP and Sunset Coast bundle.
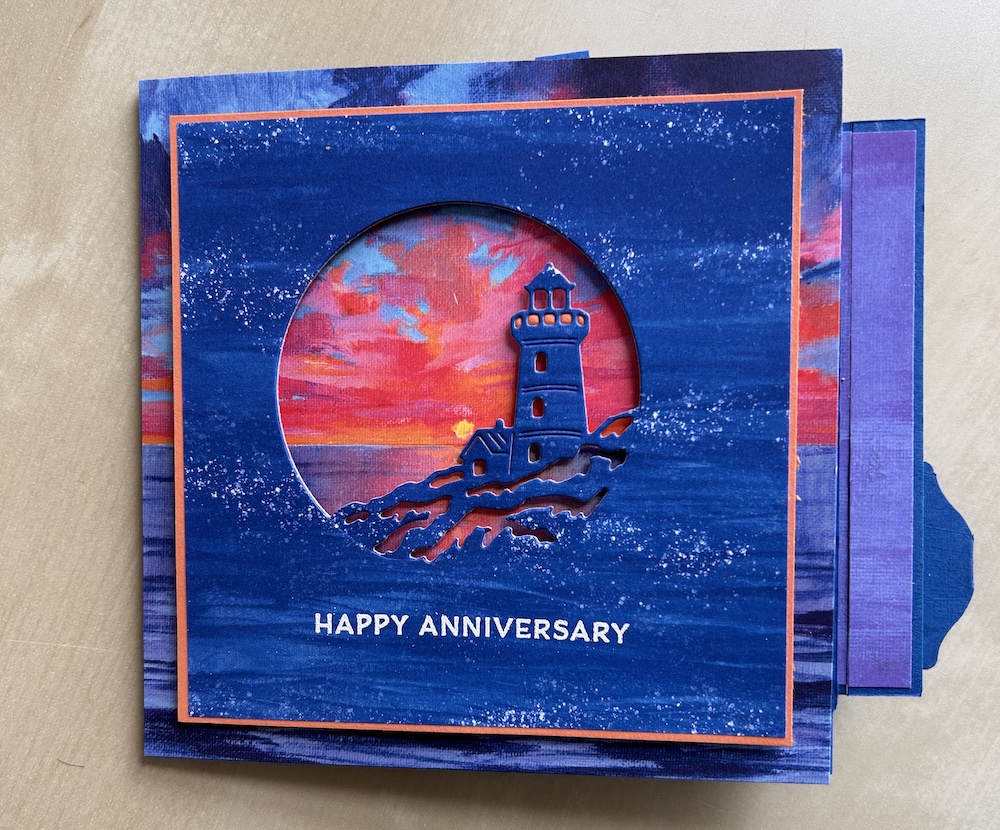
I made it first as a square double mountain slider for my husband for our wedding anniversary (on Thursday!):
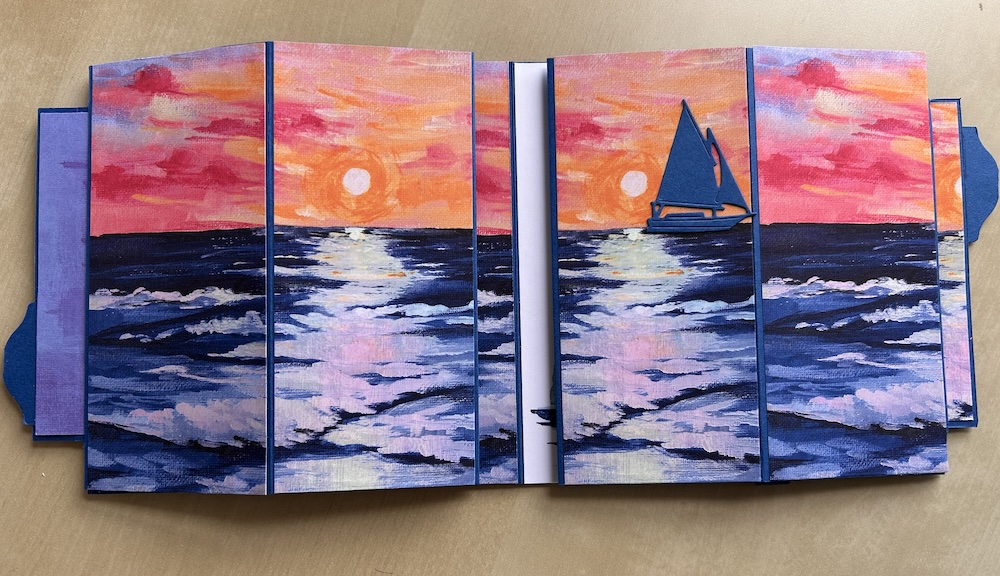
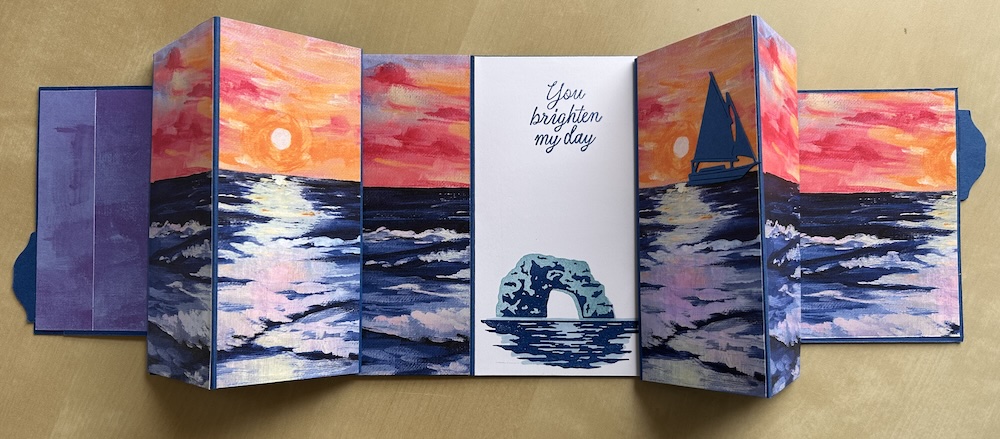
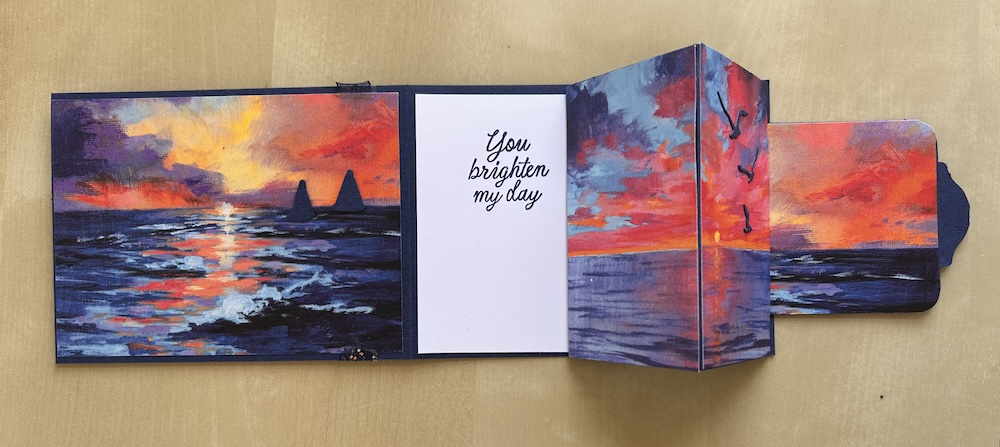
Here is the inside:
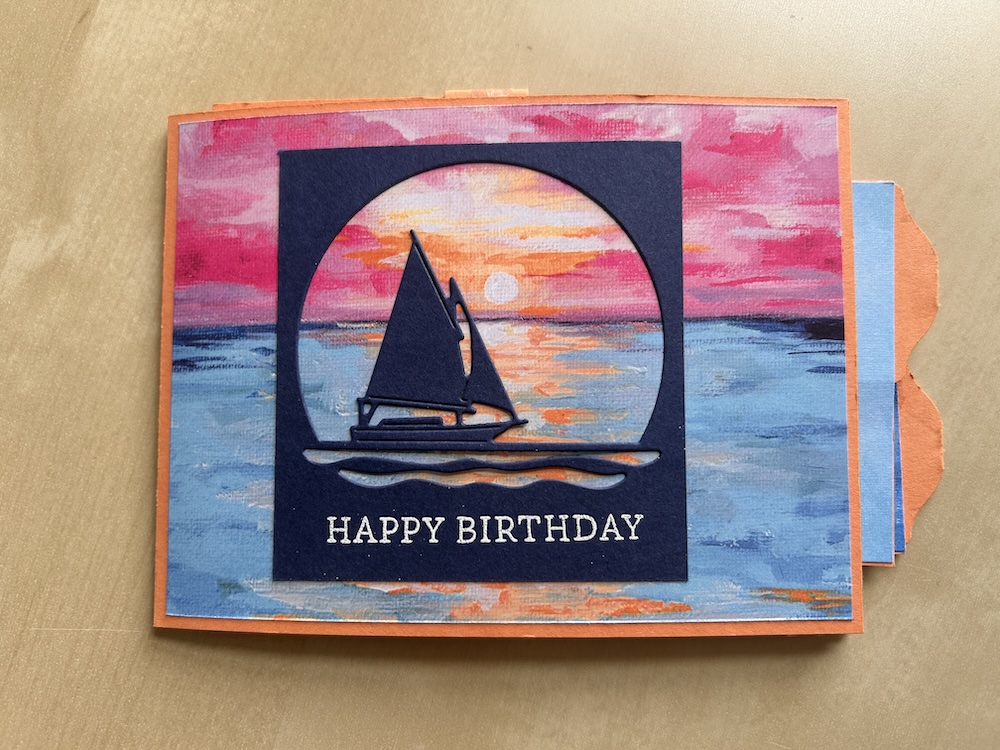
Then I made another double one in my normal card size.
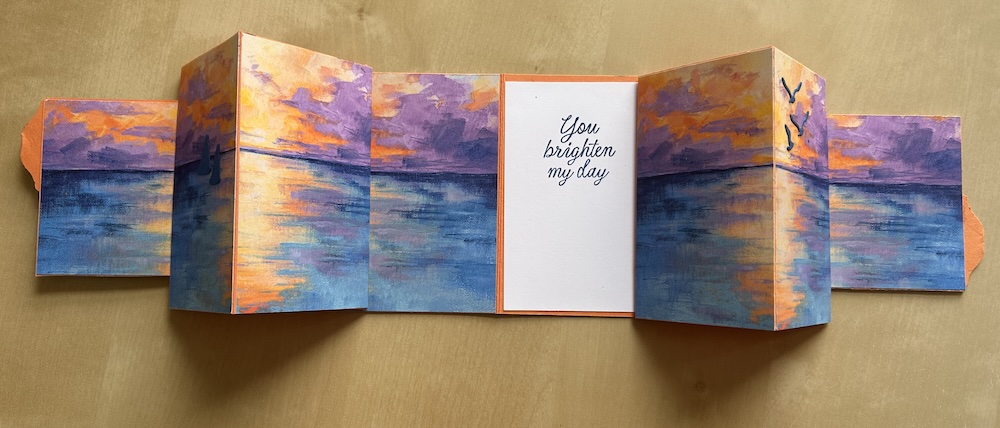
I was pleased with them, but the double mountain slider is a bulky card, so it would be expensive to post. Therefore for the video and this post I’m focusing on making a single mountain slider card.
I have only included UK/Europe centimetre sizing for this mountain slider card – I have not had time to adjust the measurements for US-sized cardstock, sorry.
For this card you will need:
- Base cardstock: 28cm x 10.5cm
- Cardstock mechanism: 28.5cm x 10.4cm
- Cardstock strip 24cm x 1cm
- DSP for card front: 13.5cm x 10cm
- DSP/cardstock for inside front: 12.9cm x 9.5cm
- DSP panels for slider (x2): 6.4cm x 10.5cm
- Basic White panel: 7cm x 10cm
- DSP additional piece for mechanism (optional): 7.5cm x 7.5cm
- Scraps for slider end (optional) approx 7.5cm x 2cm
- Cardstock scrap to punch tab approx 6cm x 5cm (optional)
Instructions
Score the base card at 14cm and burnish. (Note: this card is slightly smaller than usual to allow for the slider tab in order to fit into a C6 envelope.)
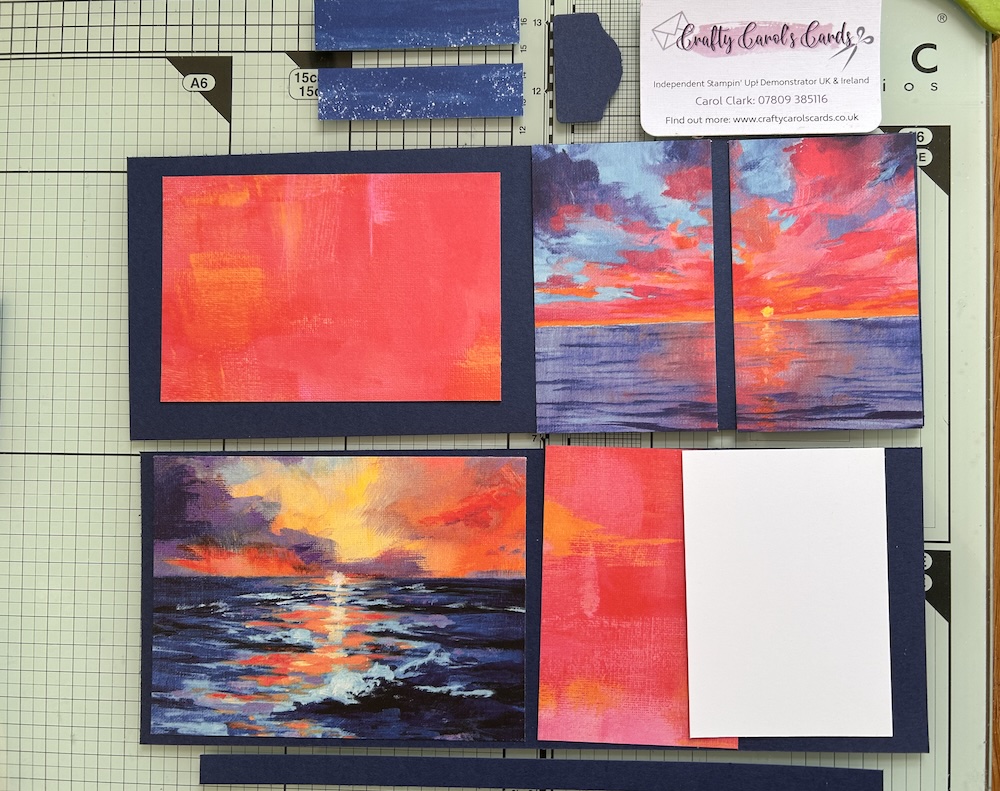
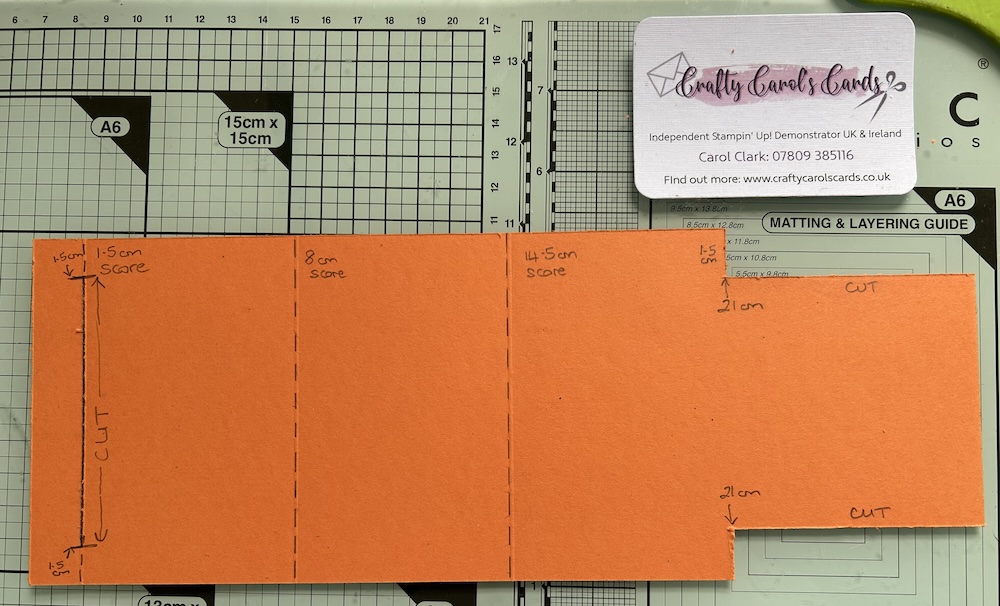
Take the mechanism cardstock and score and cut as noted below and shown in the picture (also see the video):
- SCORE on the long side at 1.5cm, 8cm, and 14.5cm
- CUT 1.5cm down from the top and up from the bottom at the 21cm measurement
- MARK the far end at 1.5cm from the top and 1.5cm from the bottom.
- CUT the end pieces off as shown in the picture
- CUT a slot starting 1.5cm at the top and ending 1.5cm from the bottom on the first score line
It should now look like this:
Fold carefully on each score line as mountain and burnish, making sure the edges are exactly straight. Slide the pull tab through the slot to check it all works!
Test the undecorated mechanism against your card – you may want to trim the end of the pull piece, especially if you are adding the optional tab.
Add your chosen panels of DSP to the mountain folded side of the first two panels. If you want, add the optional panel to the pull-out slider side, add this on the side that faces up when the mechanism is pulled open – you may want to slide the tab end through the slot to work out where to stick it. Again, see the video if you are unsure.
Punch a tab out of cardstock (I used the Keeping Tabs punch and folded it in half) and stick to the back centre of the outside edge of the mountain slider mechanism.
Add the DSP panels to the front of your base card and to the inner side of the front.
Stamp your sentiment and any decoration onto the Basic White panel then stick it inside the card on the inside of the back inner part of your card, next to the fold.
Form the mountain slider mechanism. Slide the long strip inside the mechanism, fold it around to the back then stick it to itself to hold it snugly in position.
Place the mechanism on the card folded flat with the tab to the outside. Fold in the end tab and stick it down with tape at or near to the edge of your card base, making sure the mountain slider mechanism is straight.
Slide the band so that it rests against the left edge of the “mountain” when the tab is pulled open. Stick this band to the card – see the video if you are unsure.
Test it!
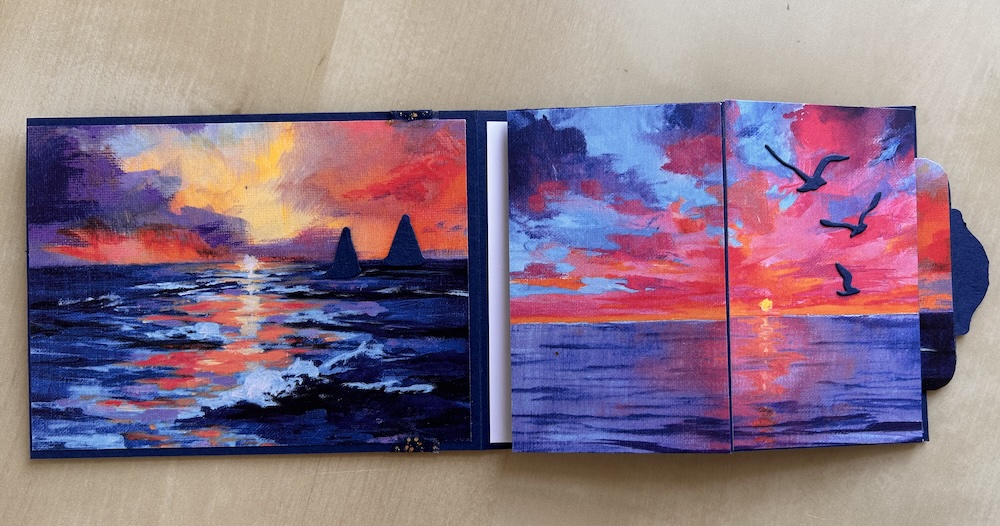
I completed my card by adding some die-cut birds and boats inside and a die-cut lighthouse to the front.
Stamp the sentiment you want and add to the front of your card. I heat embossed mine due to the slight mishap with the DSP…..(all on the video!), which also meant I had to add some ribbon as shown.
Don’t forget to decorate your envelope!
Here is the completed card.

And here is the video of me making this card:
I hope you like this card and will have a go at making one – please show me what you come up with.
Thank you for taking the time to read my post.

Don’t forget – you get a FREE pdf when you place any order with me as your demonstrator. And, if your order is over £40, you will also get to choose stuff from my online shop to the value of your order!
Product List ![Sunset Coast Bundle (English) [ 167781 ]](https://assets1.tamsnetwork.com/images/EC042017NF/167781s.jpg "Sunset Coast Bundle (English) [ 167781 ]") | ![Night Of Navy A4 Card Stock [ 106577 ]](https://assets1.tamsnetwork.com/images/EC042017NF/106577s.jpg "Night Of Navy A4 Card Stock [ 106577 ]") | ![Basic White A4 Cardstock [ 166781 ]](https://assets1.tamsnetwork.com/images/EC042017NF/166781s.jpg "Basic White A4 Cardstock [ 166781 ]") | ||
![Metallics Wow! Embossing Powder [ 165678 ]](https://assets1.tamsnetwork.com/images/EC042017NF/165678s.jpg "Metallics Wow! Embossing Powder [ 165678 ]") | ![Paper Trimmer [ 152392 ]](https://assets1.tamsnetwork.com/images/EC042017NF/152392s.jpg "Paper Trimmer [ 152392 ]") | ![Heat Tool - Uk Plug [ 129054 ]](https://assets1.tamsnetwork.com/images/EC042017NF/129054s.jpg "Heat Tool - Uk Plug [ 129054 ]") |
![Scenic Coast 6" X 6" (15.2 X 15.2 Cm) Specialty Designer Series Paper [ 167773 ]](https://assets1.tamsnetwork.com/images/EC042017NF/167773s.jpg "Scenic Coast 6\" X 6\" (15.2 X 15.2 Cm) Specialty Designer Series Paper [ 167773 ]")
![Night Of Navy Classic Stampin' Pad [ 147110 ]](https://assets1.tamsnetwork.com/images/EC042017NF/147110s.jpg "Night Of Navy Classic Stampin' Pad [ 147110 ]")
