
In two weeks time I will be in Cologne for our annual Stampin’ Up! conference. It will probably be the last one I attend, so I want to make the most of it. Many people attending make swaps to share with each other. These can provide some great project ideas. So I needed to get a move on to make mine for this trip and I decided to adapt this sweet holder as my swap.
I did a YouTube and Facebook live to show you how to make my simple sweet holder swaps and you can find that at the end of this post.
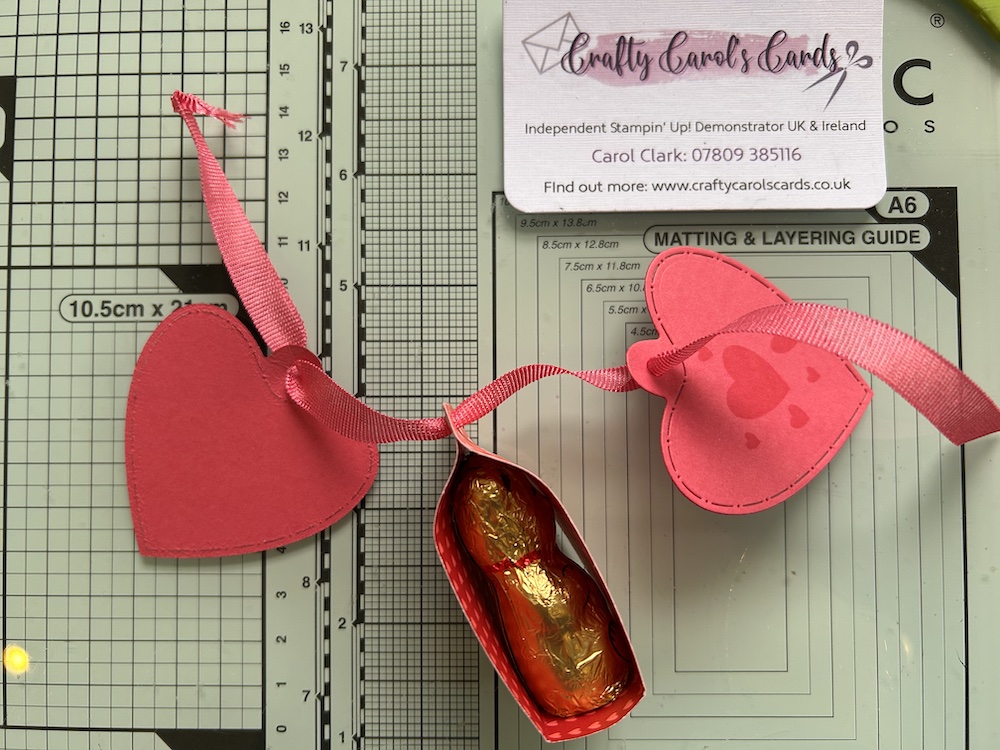
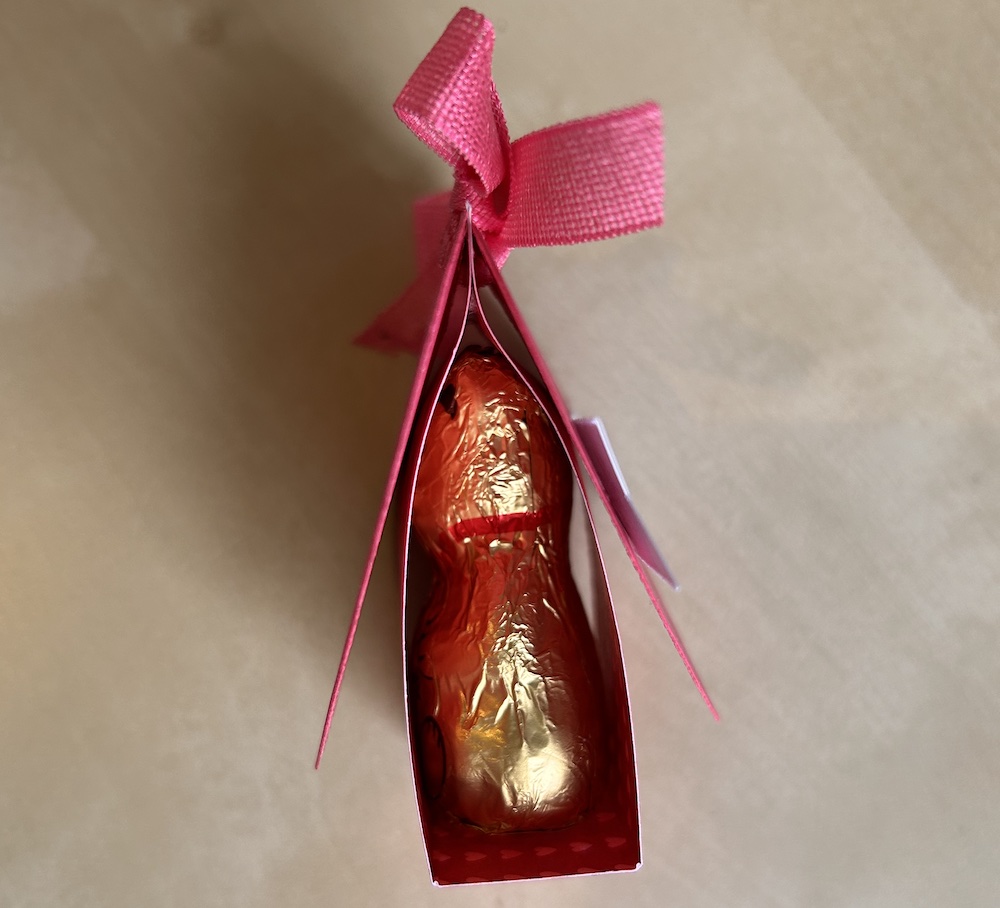
I first made the sweet holder project shown in the pictures below as a treat for my husband for Valentine’s Day.
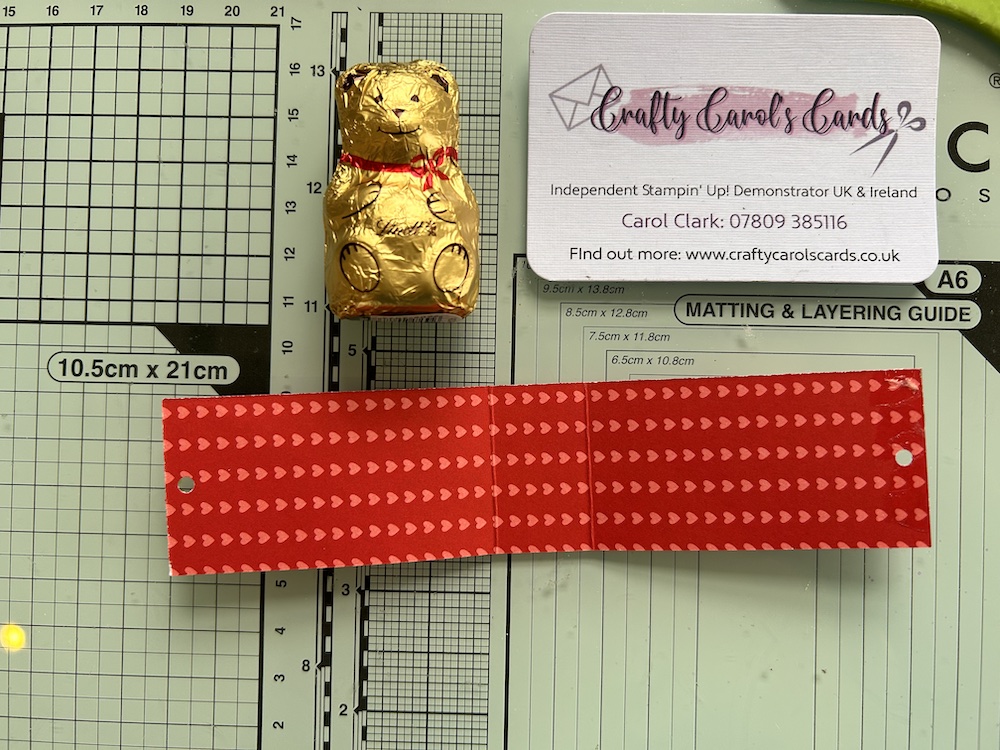
NB: These sweet holders fit a small Lindt teddy. If using a different-sized sweet, you may need to adjust the strip measurements to fit.
To make this Lindt teddy sweet holder you will need:
- Designer Series Paper (DSP) of your choice 15cm x 3.5cm (6″ x 1½”)
- Coloured cardstock to punch or die-cut a heart (or two hearts if you prefer) – I used the Endless Love die.
- Scrap of Basic White for your sentiment
- Ink pad to coordinate with your DSP choice
- Ribbon to decorate
Score the strip on the long side at 6.5cm and 8.5cm (2½” and 3½”).
Fold inwards and burnish.
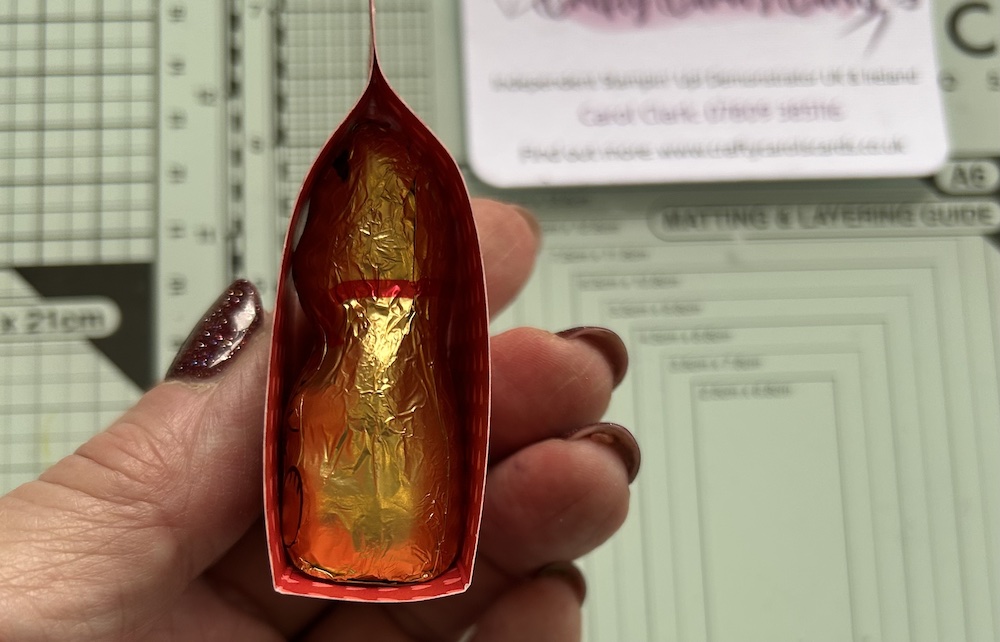
Add a strip of tear & tape to one end and squeeze the ends together to stick.
Use a hole punch to punch a small hole in the end – you can see this in the picture below, opened out so you can see:
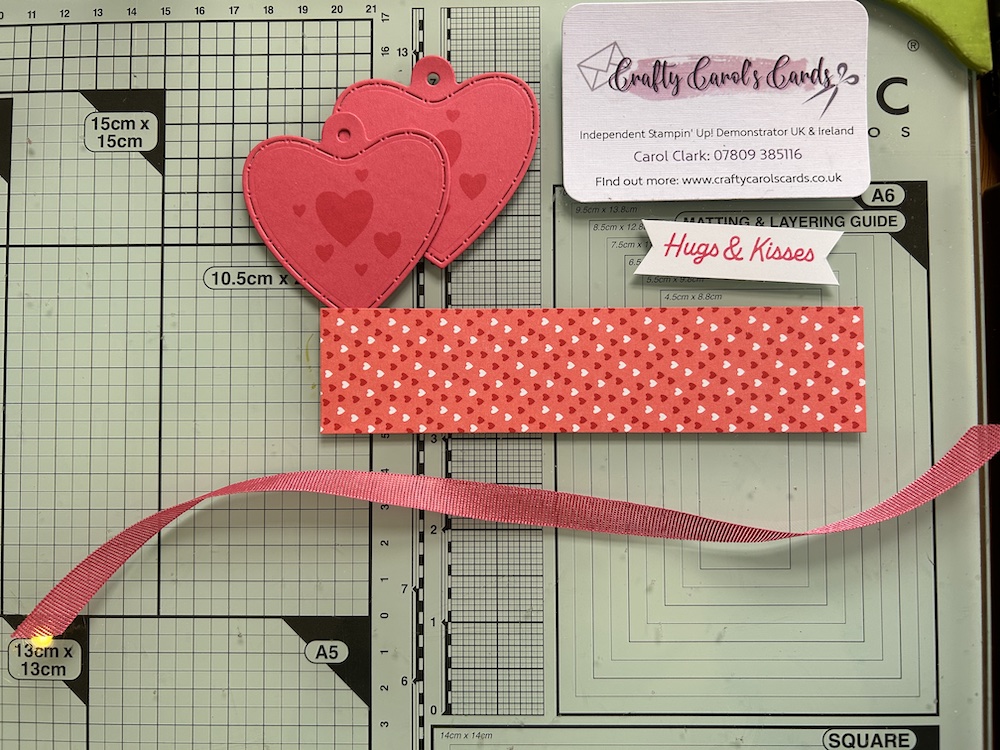
Stamp a background heart pattern on the heart using the coordinating colour ink pad.
Stamp a sentiment using your coloured ink on a scrap of Basic White and die-cut or punch out.
Add to the front heart using dimensionals.
Push a length of ribbon through the holes in the heart(s) and strip as shown:
Tie the ribbon in a neat bow.
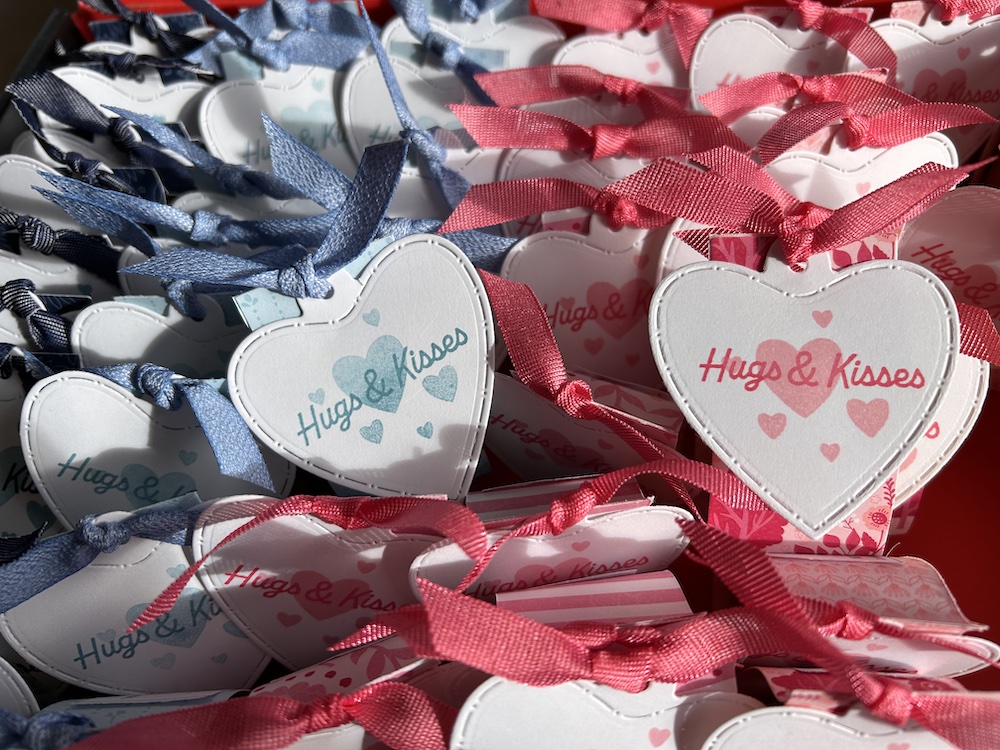
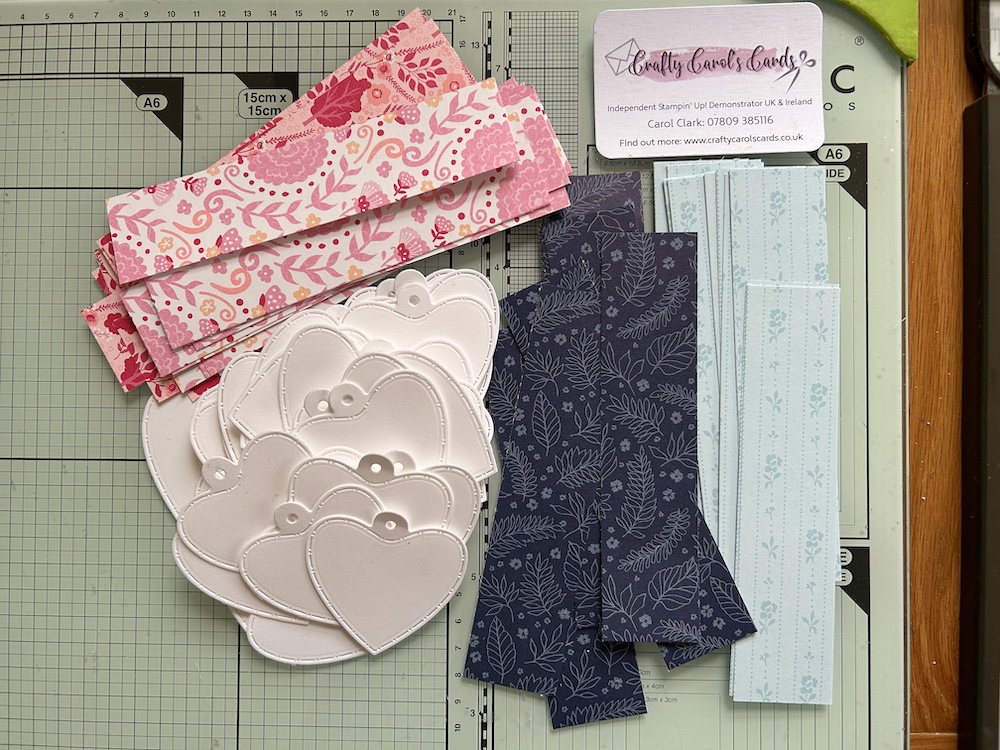
For my swaps, I used one Basic White die-cut heart, stamping directly onto it. Use either a lighter and a darker coloured ink pad, for the hearts and the sentiment respectively, or use a single colour ink pad with a stamping-off technique for the hearts. Here are all my pieces ready to assemble!
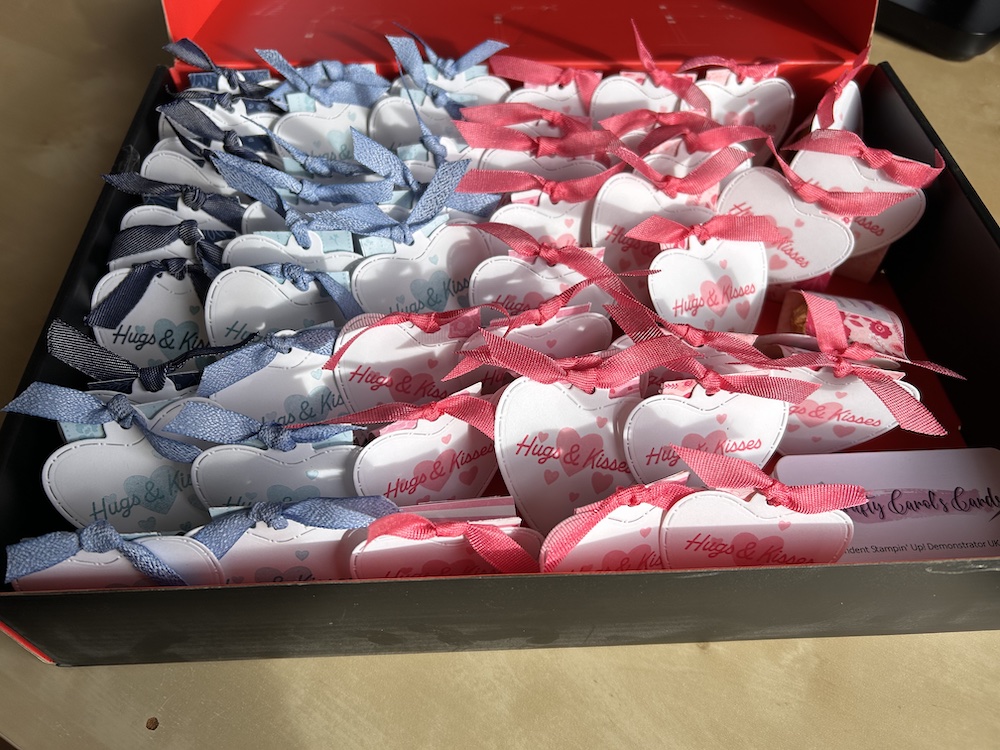
I added the ribbon using a simple knot, which was quicker! Here are some of my swaps:
And here is the video of how to make them:
Thank you for taking the time to read my post.

Don’t forget – you get a FREE tutorial of eight cards when you place an order with me. There’s a different set every month. And, if your order is over £40, you will also get to choose stuff from my online shop to the value of your order!
Product List ![Endless Love Bundle (English) [ 167062 ]](https://assets1.tamsnetwork.com/images/EC042017NF/167062s.jpg "Endless Love Bundle (English) [ 167062 ]") | ![Strawberry Slush A4 Cardstock [ 165297 ]](https://assets1.tamsnetwork.com/images/EC042017NF/165297s.jpg "Strawberry Slush A4 Cardstock [ 165297 ]") | ![Basic White A4 Cardstock [ 166781 ]](https://assets1.tamsnetwork.com/images/EC042017NF/166781s.jpg "Basic White A4 Cardstock [ 166781 ]") | ||
![Paper Trimmer [ 152392 ]](https://assets1.tamsnetwork.com/images/EC042017NF/152392s.jpg "Paper Trimmer [ 152392 ]") | ![Stampin' Dimensionals [ 104430 ]](https://assets1.tamsnetwork.com/images/EC042017NF/104430s.jpg "Stampin' Dimensionals [ 104430 ]") | ![Multipurpose Liquid Glue [ 154974 ]](https://assets1.tamsnetwork.com/images/EC042017NF/154974s.jpg "Multipurpose Liquid Glue [ 154974 ]") |
![Strawberry Slush Classic Stampin' Pad [ 165286 ]](https://assets1.tamsnetwork.com/images/EC042017NF/165286s.jpg "Strawberry Slush Classic Stampin' Pad [ 165286 ]")
![Strawberry Slush 3/8" (1 Cm) Faux Linen Ribbon [ 165274 ]](https://assets1.tamsnetwork.com/images/EC042017NF/165274s.jpg "Strawberry Slush 3/8\" (1 Cm) Faux Linen Ribbon [ 165274 ]")
