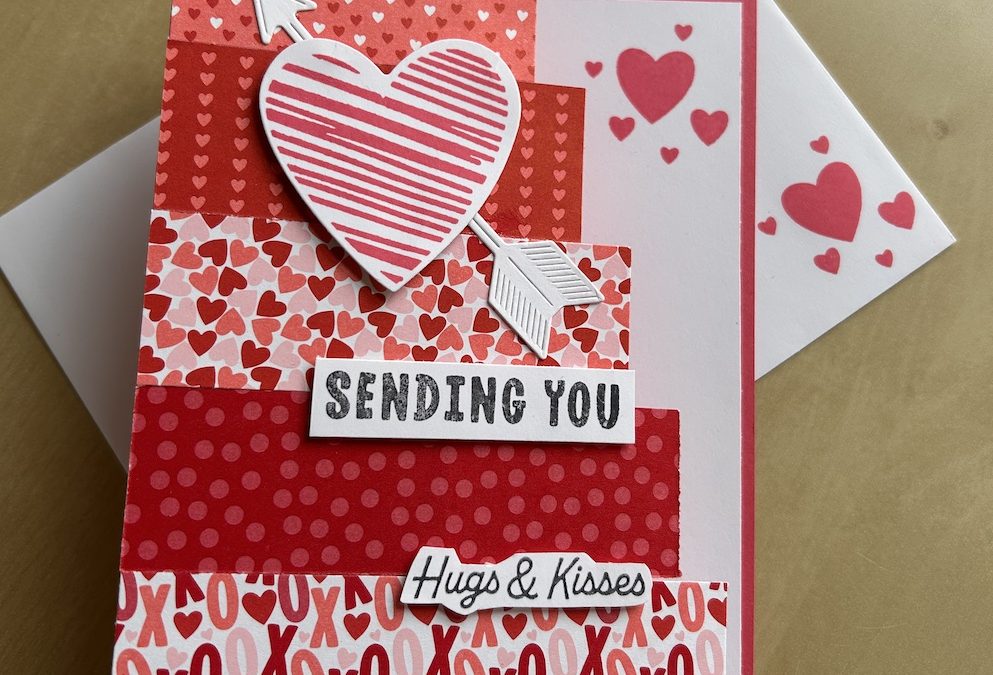
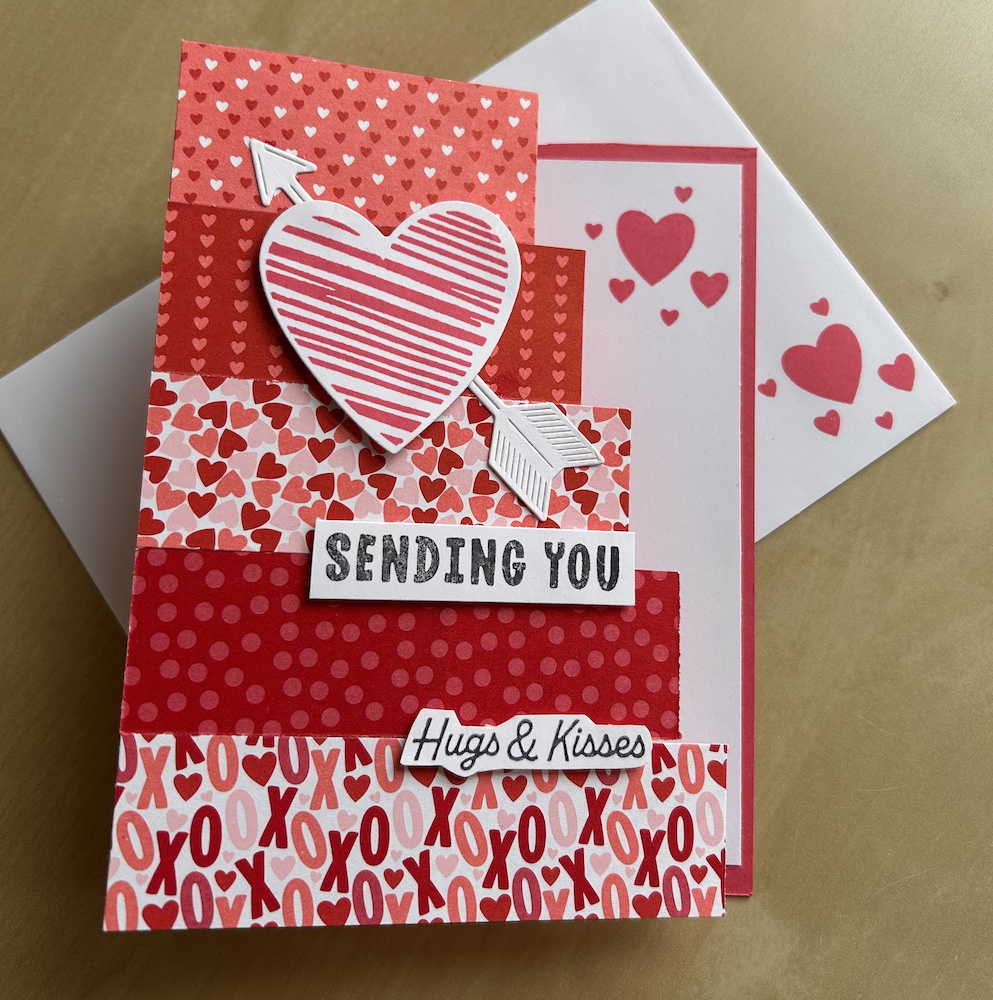
This is a simple, fun fold card with added interest from the DSP “steps”. I’ve used the new Endless Love bundle and Made with Love Designer Series Paper, but you could use any colour base card to match any DSP you have. This card is also suitable for any occasion, not just Valentine’s Day.
We made this card at February’s Craftalong, my free online class via Zoom. If you’d like to join me next time, please sign up for my emails to get all the details.
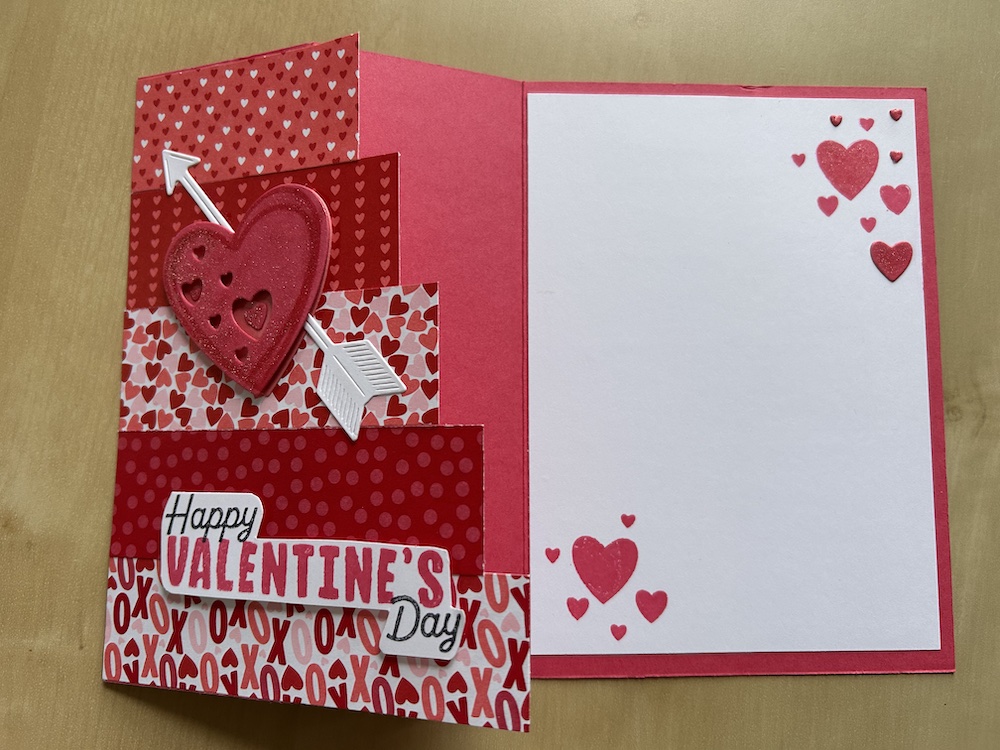
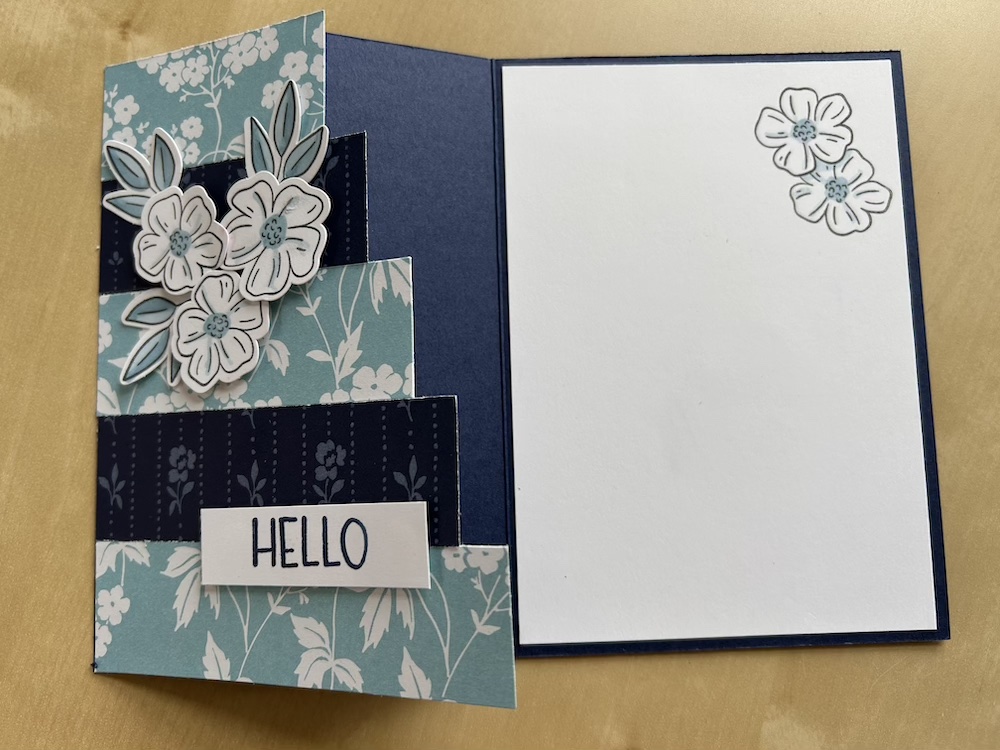
Here is my first stepped fun fold card opened so you can see the “steps” clearly – though ignore the fact that I glued the bottom strip on upside down on this card…. The decoration is also quite fussy, so I made it simpler for the Craftalong card.
For the Craftalong card I used Strawberry Slush for my card base, the Endless Love bundle and Made with Love DSP. I also made a second card using a different colour combo, a Night of Navy card base and strips of the True Blue Florals DSP that you can see at the end of this post.
To make this stepped fun fold card you need:
- a stamp set with a medium sized image plus any coordinating dies or punches
- DSP piece: 14.8cm x 10.5cm (5½”x 4¼”) OR five coordinating remnants, that should be 3cm or 1¼” wide x 10.5cm (4¼”)
- one colour card base to coordinate with your chosen DSP: 21cm x 14.8cm (8½” x 5½” )
- Basic White insert 10cm x 14.3cm (4” x 5¼”) if using dark coloured card
- spare Basic White scraps for stamping the heart and sentiment(s) and die-cutting the arrow
Instructions
Score your card base on the long side at 5.2cm (2 1/8″) and 10.5cm (4¼”). Fold in half and burnish, then fold the second score line outwards to form the fun fold flap.
Cut your DSP into five strips as follows: if using metric measurements, cut a fraction under 3cm wide. If using US measurements, cut two strips at 1¼” and three at 1″ wide. See the video if you are unsure.
Alternate your patterns (if using one piece of DSP). Leave one strip at the full length. Trim the others in turn to: 9.5cm, 8.5cm, 7.5cm and 6.5cm. (For US cards, leave one 1 1/4″ strip the full length. Trim the other to 2¼”. Cut the three 1″ strips to 3¾”, 3¼”, and 2¾” long. Again, see the video if you are unsure.
Adhere each strip in turn to the left-hand flap of the card base, butting them up together. Add the adhesive to the card not the DSP to make it easier. Start with the longer strip, then each shorter strip in turn.
Stamp the heart cluster in Strawberry Slush at the top right and bottom left of your card insert. Stick inside the card.
Stamp a large heart of your choice in Strawberry Slush. Die-cut. I used the stripy one.
Cut a long arrow from a scrap of Basic White and cut in half. Stick the arrow to the card front, making sure it shows as you want behind your heart.
Add the heart on top using dimensionals.
Stamp your sentiments in Memento. and trim as you wish. I fussy cut around the outline of Hugs & Kisses.
Add to the bottom of the card front using dimensionals. I stuck these across the joins between the DSP pieces to give added stability to my stepped fun fold card.
Don’t forget to decorate your envelope!
Sadly, I forgot to record the Craftalong, so there is no video. I’ll try and remember next time! Remember, you can join me via Zoom every first Thursday at 11am – book in my online shop to get the Zoom link.
Here’s the second card I made during this month’s Craftalong using the Virtual Retreat stamp set and True Blue Florals DSP:
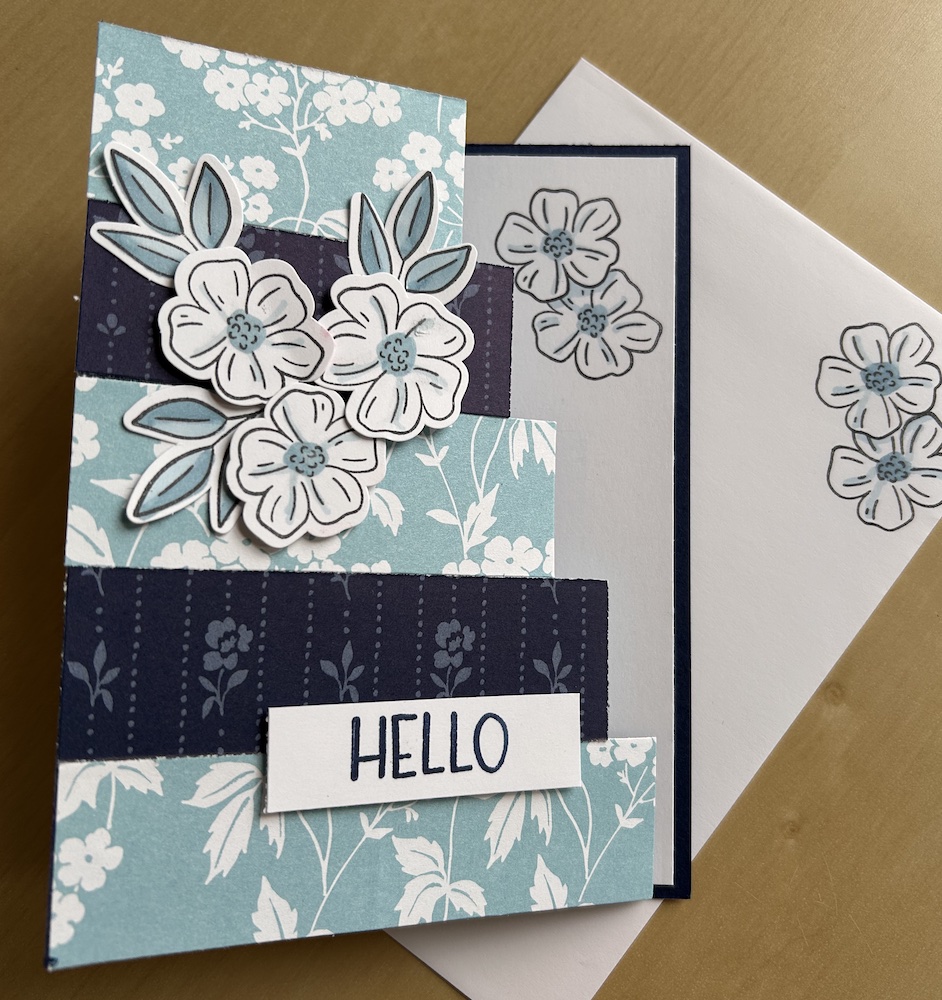
I masked the flower stamp using a sticky note to make the flowers overlap inside the card and on the envelope. I coloured the images with Balmy Blue blends.
I hope you like this card and will have a go at making one – please show me what you come up with.
Thank you for taking the time to read my post.

Don’t forget – you get a FREE pdf when you place any order with me as your demonstrator. And, if your order is over £40, you will also get to choose stuff from my online shop to the value of your order!
Product List ![Endless Love Bundle (English) [ 167062 ]](https://assets1.tamsnetwork.com/images/EC042017NF/167062s.jpg "Endless Love Bundle (English) [ 167062 ]") | ![Strawberry Slush A4 Cardstock [ 165297 ]](https://assets1.tamsnetwork.com/images/EC042017NF/165297s.jpg "Strawberry Slush A4 Cardstock [ 165297 ]") | ![Basic White A4 Cardstock [ 166781 ]](https://assets1.tamsnetwork.com/images/EC042017NF/166781s.jpg "Basic White A4 Cardstock [ 166781 ]") | ||
![Flirty Flamingo A4 Cardstock [ 141421 ]](https://assets1.tamsnetwork.com/images/EC042017NF/141421s.jpg "Flirty Flamingo A4 Cardstock [ 141421 ]") | ![Tuxedo Black Memento Ink Pad [ 132708 ]](https://assets1.tamsnetwork.com/images/EC042017NF/132708s.jpg "Tuxedo Black Memento Ink Pad [ 132708 ]") | ![Paper Trimmer [ 152392 ]](https://assets1.tamsnetwork.com/images/EC042017NF/152392s.jpg "Paper Trimmer [ 152392 ]") | ![Mini Stampin' Dimensionals [ 144108 ]](https://assets1.tamsnetwork.com/images/EC042017NF/144108s.jpg "Mini Stampin' Dimensionals [ 144108 ]") |
![Made With Love 12" X 12" (30.5 X 30.5 Cm) Designer Series Paper [ 167054 ]](https://assets1.tamsnetwork.com/images/EC042017NF/167054s.jpg "Made With Love 12\" X 12\" (30.5 X 30.5 Cm) Designer Series Paper [ 167054 ]")
![Strawberry Slush Classic Stampin' Pad [ 165286 ]](https://assets1.tamsnetwork.com/images/EC042017NF/165286s.jpg "Strawberry Slush Classic Stampin' Pad [ 165286 ]")
