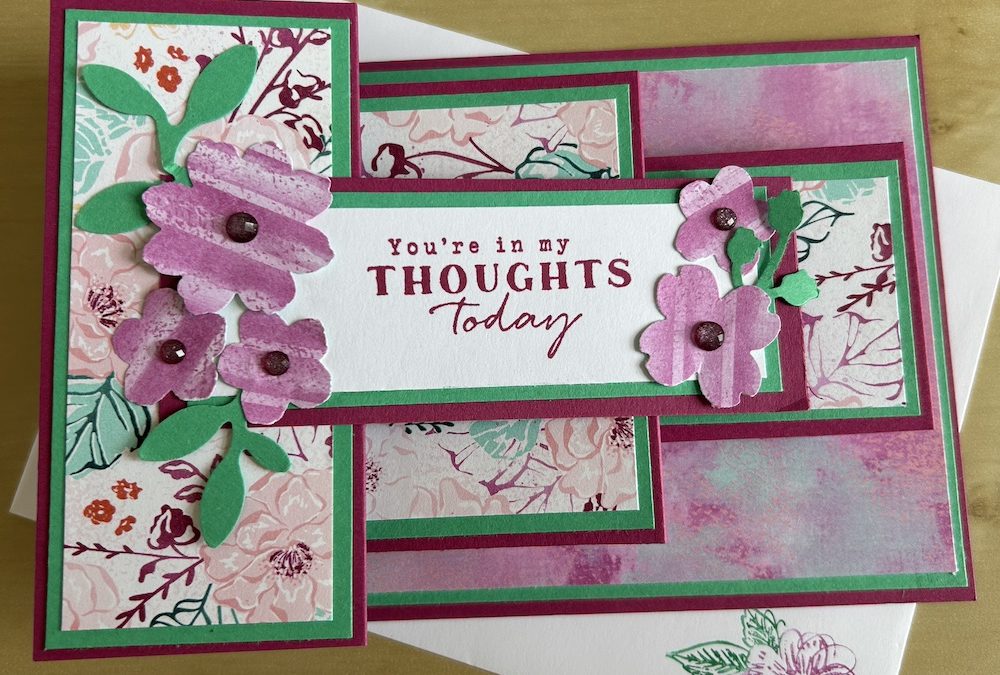
This is the fun Z fold pop-up card we made at my in-person class yesterday. It gets its name from the shape made by the card when opened and looked at from above.
I saw a similar card on YouTube made by Taffy Crafting which had four pop up layers, but I prefer odd numbers and wanted to make it our usual size to fit a C6 envelope, so I have adapted the measurements she gave.
I filmed a video on how to make this Z fold pop-up card (see below) – but you may notice that I decided I didn’t like the DSP back sheet I had used, so I changed it after the video to complete the card shown in the picture!
I made a prototype for this card using some retired/unavailable products to trial the sizes I had worked out.
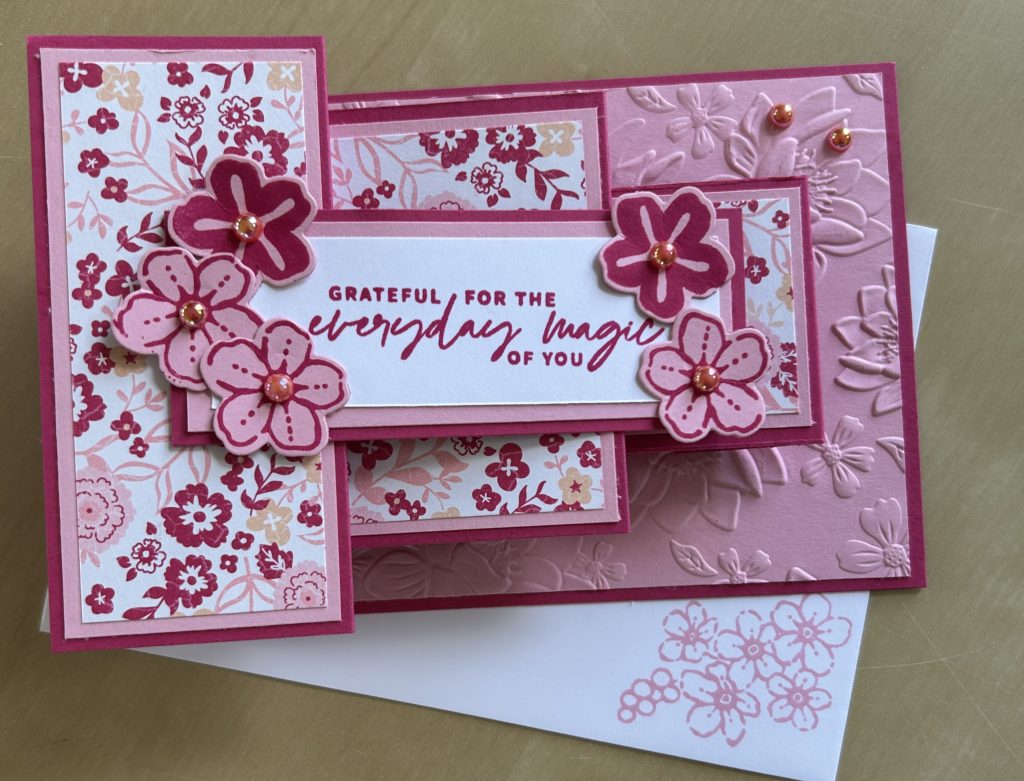
I was fairly happy with it, but I felt the third z fold pop-up layer got a little lost behind the sentiment panel. So for the video card, I have made the third z fold pop-up section slightly bigger than in my prototype.
Here are all the measurements:
- Base cardstock A: 24.8cm x 10.5cm (4 ¼” x 9 ¾”)
- Cardstock B: Main panel layer: 14.5cm x 10cm (5 ½” x 4”)
- DSP (if using): 14cm x 9.5cm (5 ¼” x 3 ¾”)
- Side panel cardstock B layer x 2: 4.5cm x 10cm (1 ¾” x 4”)
- Side panel DSP layer x2: 4 x 9.5cm (1 ½” x 3 ¾”)
- Back Basic White panel: 13.8cm x 9.5cm (5” x 3 ¾”)
- Pop up 1 cardstock A: 14cm x 8cm (6” x 3”)
- Pop-up 1 cardstock B layer: 5.5cm x 7.5cm (2 ¼” x 2 ¾”)
- Pop-up 1 DSP: 5cm x 7cm (2” x 2 ½”)
- Pop up 2 cardstock A: 11cm x 5cm (5” x 2”)
- Pop up 2 cardstock B layer: 5.5x 4.5cm (2 ¼” x 1 ¾”)
- Pop up 2 DSP: 5 x 4cm (2” x 1 ½”)
- Sentiment Cardstock A: 10.5cm x 4cm (1 ½” x 4 ¼”)
- Sentiment Cardstock B: 10cm x 3.5cm (1 ¼” x 4”)
- Basic White Stamped panel: 9.5cm x 3cm (1” x 3 ¾”)
Whew! There are a lot of pieces, but they are relatively straightforward to put together. The video below takes you through making up the card step-by-step. Written instructions are below.
Start by making up the Z fold card base. Score Cardstock A on the long side at 5cm and 10cm (2” and 4”). Fold as a valley then a mountain fold and burnish.
Either emboss the cardstock B panel using any suitable embossing folder, and stick to the base, or stick the cardstock panel to the back of the card and add the DSP layer on top – your choice!
Stick the two side cardstock B panels to the side folds of the card. Add the DSP layers on top.
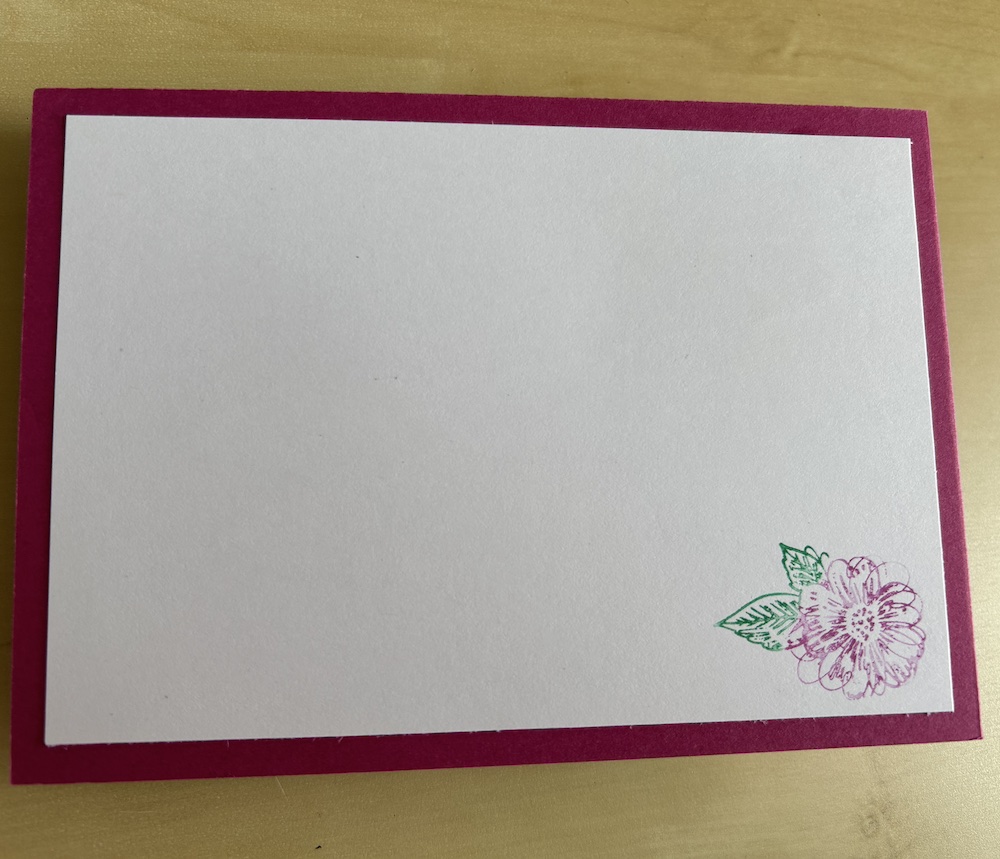
Stamp your flower (or other) image on the Basic White panel and add a sentiment if you would like. I used the flower from the Thoughtful Expressions stamp set stamped after colouring with Stampin Write markers. See the video for details. I stamped the envelope in the same way.
Stick the completed panel to the rear of your card.
Prepare pop-up 1: Score the cardstock A panel on the long side at 3.5, 9.5 and 13cm (1 ½” 4” and 5 ½”). Fold each as a mountain fold, making sure the card edges are aligned. Burnish. Add the cardstock B layer and the DSP layer to the largest (second) section on the pop-up as shown in the video.
Prepare pop-up 2: Score the cardstock A panel on the long side at 2, 8 and 10cm (1”, 3 ½” and 4 ½”). Fold each as a mountain fold, ensuring the card edges are aligned. Burnish. Add the cardstock B layer and the DSP layer to the largest (second) section on the pop-up as shown in the video.
Add strips of tear & tape to the two extreme side panels/tabs of each pop-up as shown in the video. Place the larger panel on the card lining up centrally against the card fold leaving a tiny gap. Stock down by folding over the card – see the video if you are unsure how to do this.
Fold the final two panels underneath the decorated panel and close the card flat to fix the second side tab to the card. Again, see the video if you are unsure how to do this.
Add the second pop-up panel to the side of the first pop-up panel in the same way, lining up so that it is central and leaving a tiny gap, then folding under the final two panels to stick it down.
Adhere the two cardstock sentiment panels together. Stamp your sentiment in a co-ordinating ink onto the Basic White panel and stick it on top of the first two panels. Add glue to only the extreme lefthand side of the completed sentiment panel and stick it to the front of your card as shown.
Punch, or stamp and die-cut, some flowers and leaves to add as decoration. Finish off with some gems.
Your Z fold pop-up card is complete!
I hope you like this card and will have a go at making one – please show me what you come up with.
Thank you for taking the time to read my post.

Don’t forget – you get a FREE pdf when you place any order with me as your demonstrator. And, if your order is over £40, you will also get to choose stuff from my online shop to the value of your order!
Product List  |  |  | ||
 |  |  |  |
 Designer Series Paper")
")

