Following on from the W fun fold landscape card I made last week, in our Craftalong this week I decided to play with making a W fun fold portrait card.
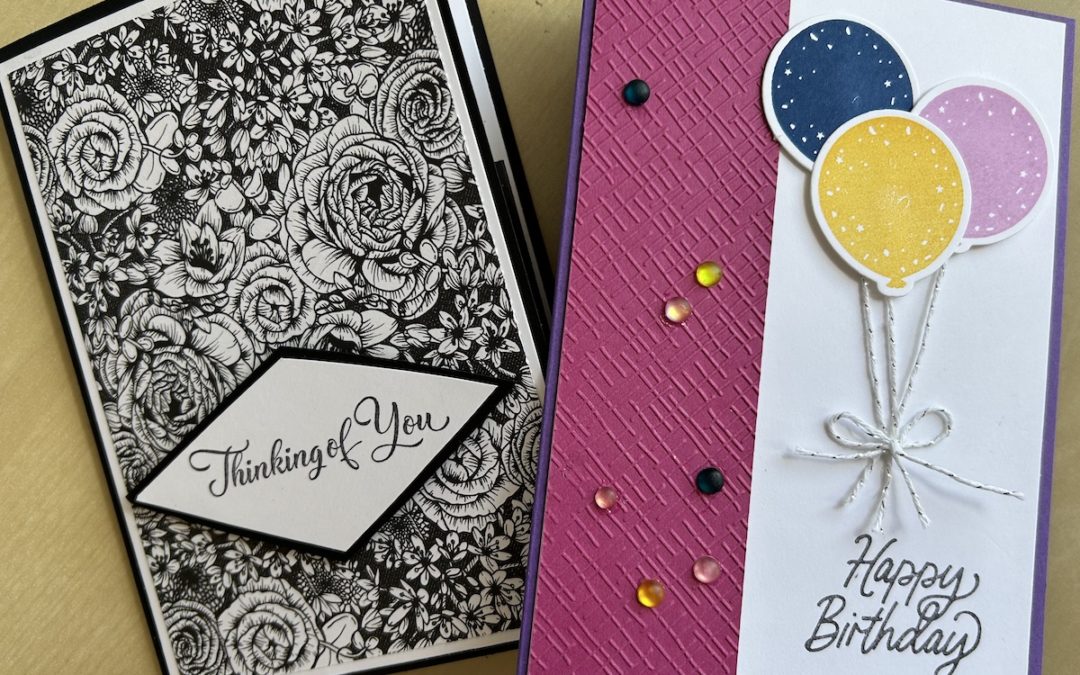
It was fairly easy to adjust the measurements. No video this time but the measurements you need are below. I made two very different-looking cards, one a birthday card using the new Bright and Beautiful suite and one using some retired black and white DSP to make a sympathy card. You can see the cards in the main picture above.
The measurements you need for the birthday card are:
- Highland Heather card base: 21cm x 14.8cm scored in half at 10.5cm
- Basic White front panel: 14.3cm x 10cm
- Polished Pink front panel: 4cm x 14.3cm
- Basic White main inside panels (x2): 14.3cm x 5cm
- DSP main inside panels (x2): 14.3cm x 5cm
- Highland Heather W fold strip: 20cm x 4 cm
- Highland Heather W fold panels (x2): 5cm x 8cm
- Basic White W fold panels (x2): 4.5cm x 7.5cm
- DSP W fold panels (x2): 4cm x 7cm
- Scraps of Basic White for stamping
To make the card:
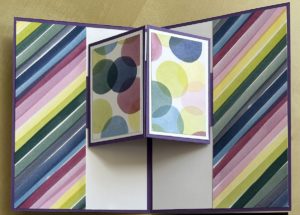
- Stick the two Basic White panels inside your case card next to the centre fold in the middle of the card, leaving the same gap above, to the middle and below. You can stamp these first if you wish
- Score the W fold strip at 5cm, 10cm and 15cm. Fold valley, mountain and valley to form the W.
- Add tape to the two outer panels on the back of the two outer sides of the W and on the two centre panels on the other side.
- Place the strip where you want it in the card, roughly in the centre. Use your piece of DSP to show you where to stick the W fold piece. Make the gap to the edge of the card the same as for the Basic White panel and make sure they meet in the centre. Hold the W piece in place and stick down to the card base.
- Stick the DSP piece over the top.
- Remove the tape from the other end of the W piece and fold your card closed to stick that down in the correct place. Stick the other piece of DSP on top.
- Stick the Basic White and DSP layers on your W panel pieces and stick them to your card using the tape.
Here’s the completed inside of that card (before any stamping or writing!):

For the front of the card:
- Emboss the strip of Polished Pink with the hatched Basic embossing folder
- Stick the white panel to your card front. Add the pink embossed piece on top to the left hand side.
- Stamp three middle-sized balloons in three different coordinating colours on scraps of Basic White and die cut them out.
- Stamp the “Happy Birthday” sentiment in the lower right hand corner.
- Add 7-8cm of twine to the back of each balloon. Stick the balloons to the card using dimensionals.
- Use a glue dot to hold the ends of the twine in place then add a twine bow using another glue dot.
- Add sequins or gems as you want to complete your card.
- Don’t forget to decorate your envelope too!
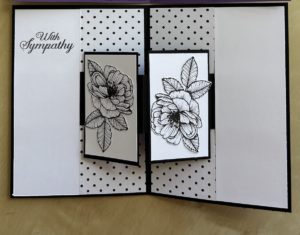
For the sympathy card I used the retired True Love DSP but you can use any black and white DSP with any flower stamp. To make the card you need:
- Basic Black card base: 21cm x 14.8cm scored in half at 10.5cm
- Basic White front panel: 14.3cm x 10cm
- DSP front panel: 13.8cm x 9.5cm
- Basic White main inside panels (x2): 14.3cm x 5cm
- DSP main inside panels (x2): 14.3cm x 5cm
- Basic Black W fold strip: 20cm x 4 cm
- Basic Black W fold panels (x2): 5cm x 8cm
- Basic White W fold panels (x2): 4.5cm x 7.5cm
- Scraps of Basic White and Basic Black for stamping and decoration
The card is made up in much the same way as the birthday card above except that this time I reversed the main panels, leaving the white panels outside and using the DSP panels behind the W fold. I fussy cut flowers from the DSP to decorate the W fold panels, or you could stamp images for those panels:

I layered the DSP onto the Basic White panel then stuck it to the card front. I stamped the “Thinking of You” sentiment on a scrap of Basic White then used my paper trimmer to cut it into a diamond shape. I layered this onto a Basic Black scrap and trimmed that before sticking it to the card front with dimensionals.
I hope you enjoyed these different W fun fold cards and that you’ll have a go making them yourself.
Product List
|
|
|
|||
|
|
|
|
|
|
|
|
|
|


