We had great fun making a triangles card in my FREE Craftalong. This free, private online class runs on Zoom the first week of every month – sign up to my emails to get all the information about the next one. I provide a list of the supplies you’ll need in the email sent the week before the event so you have plenty of time to collect things together.
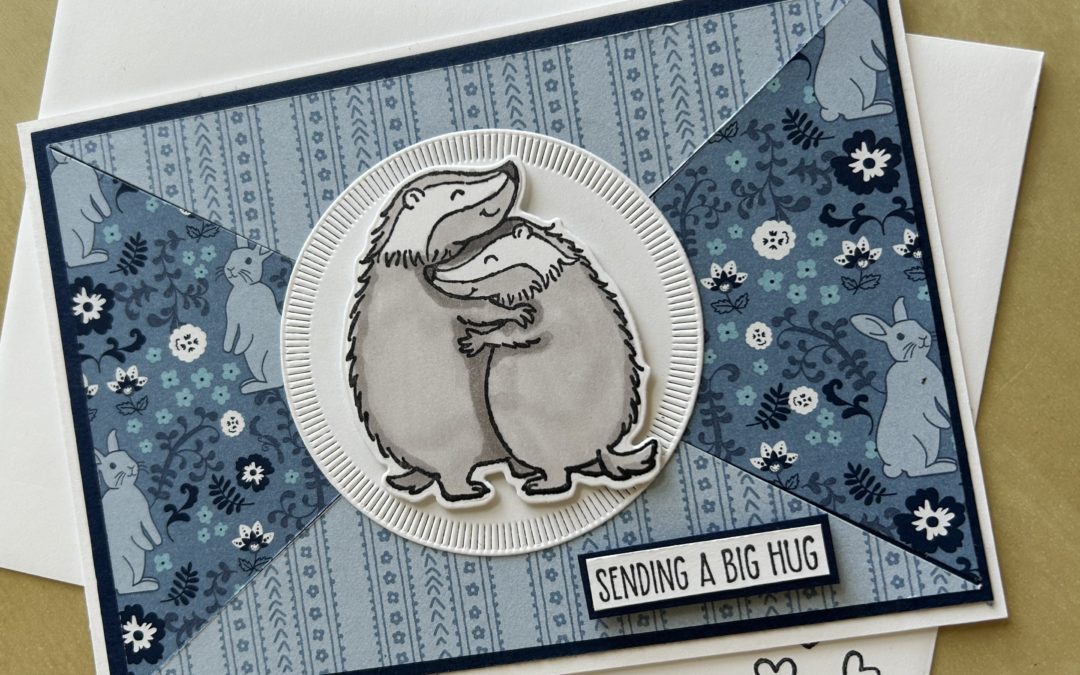
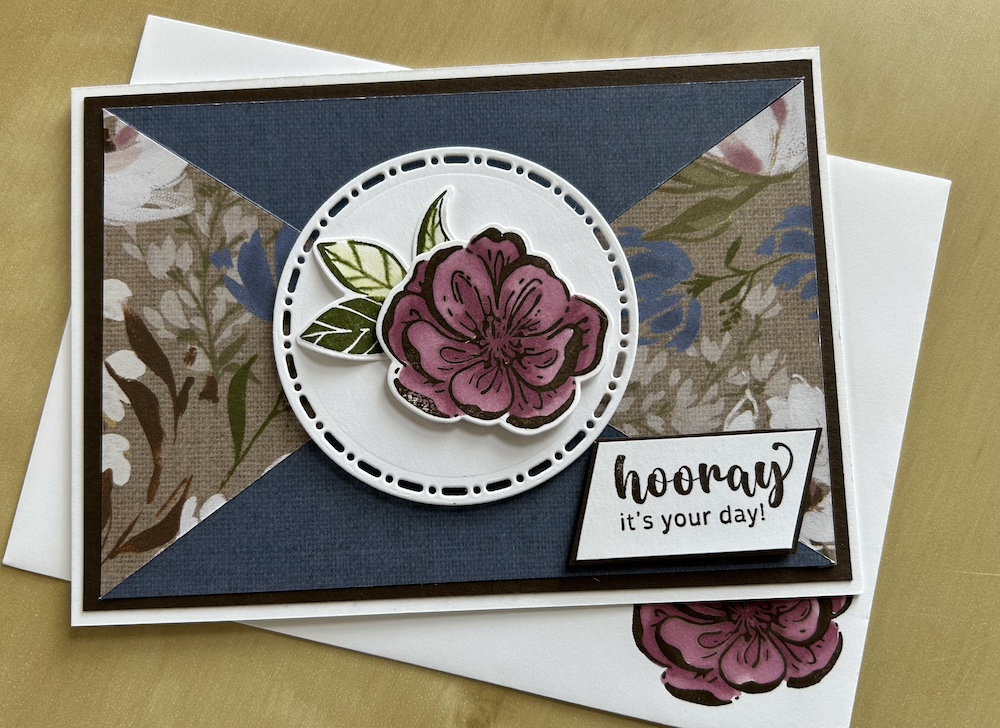
This type of card is a great way to show both sides of our lovely DSP. I made my prototype, shown in the picture above, using the Countryside Inn DSP and the Hearts & Hugs bundle. Below is the card I made in the Craftalong using the Wildly Flowering DSP and Irresistible Blooms stamp set and die. Full measurements and instructions are given below.
You could also make a triangles card as a vertical card using the same technique, and use any mix of DSP and stamp sets you want. I think it is one of the most versatile designs there is!
To make a triangles card you need:
- Basic White card base: 10.5cm x 29.6cm (11” x 4¼”) – half an A4 sheet cut longways
- Double sided DSP piece: 13.8cm x 9.5cm (5” x 3¾”) – if your DSP is directional, make sure the pattern is landscape
- Coordinating card layer: 14.3cm x 10cm (5¼” x 4”) – use one of the colours from your DSP
- Basic White circle approx. 2 ¾” – 3” – die-cut using Spotlight on Nature or Stylish Shapes dies or use a punch
- Stamp set with a medium to large image – I used Hearts and Hugs for the sneak peek card and I’ll be using Irresistible Blooms for the Craftalong.
- Paper trimmer
- Memento ink
- Colouring Blends or markers
Instructions
Score the Basic White card base at 14.8cm (5½”), fold and burnish.
Adhere the Coordinating card layer to the front of your card base.
On one side of your DSP use a pencil to mark a line from the upper-left corner to the bottom-right corner.
Place the piece of DSP in your trimmer with the corners opposite the ones with the pencil line (i.e top right to bottom left) lined up on your trimmer guide. Make sure the corners are exactly in line with the guide and have your trimmer blade ready in the centre of the DSP. This is important as it stops the corners of the DSP getting damaged by the blade.
Cut across the diagonal by moving your trimmer blade up and down.
Then take the first half you have cut and place it so that the pencil line is lined up along the guide from the corner to the middle of the long cut side. Start your blade on the long side and cut.
Repeat with the second half.
Arrange your cut pieces so that one pair of opposite triangles shows one pattern of the DSP and the other pair shows the reverse side of the DSP. Make sure any directional pattern is correct.
Stick these to your card base being careful to line up the points of each triangle.This is the basis of your triangles card. You can use any decoration you then want.
Stamp your image in Memento either on a scrap of Basic White or directly to your cut or punched circle.
Colour using Stampin Blends.
Add the completed centre piece to your card front using dimensionals.
Stamp a sentiment onto a scrap of Basic White. Stick this on a scrap of your coloured cardstock and trim to give a thin outline. Add to the bottom right of the card using dimensionals.
You can add embellishments such as ribbon or gems if you wish.
Don’t forget to decorate the inside of your card and your envelope!
I hope you like this card and will have a go at making one – please show me what you come up with.
Thank you for taking the time to read my post.

Don’t forget – you get a FREE pdf when you place any order with me as your demonstrator. And, if your order is over £40, you will also get to choose stuff from my online shop to the value of your order!
Product List  |  |  | ||
 |  |  |
")
")
 Designer Series Paper")
 Designer Series Paper")
