Did you have a good Easter? We had a lovely time with family and not TOO much chocolate….! My husband and daughter loved their octagonal Easter egg boxes, filled with Lindor chocolates.
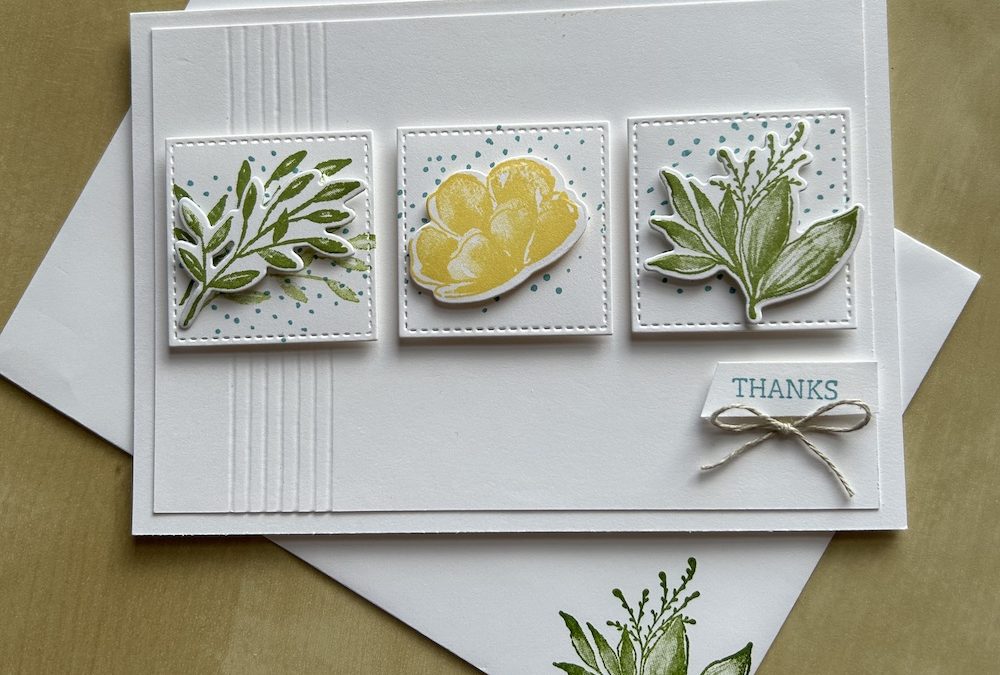
So after the excesses of Easter I thought I would show you how to make a simple three panel card that I made to give as a thank you card. The three panels are cut using the second size Stylish Shapes square die. To decorate the three panel card, I have used the Regal Flora stamp set and dies (now retired? not sure), but you could use any small flower and foliage stamp set, or indeed any stamp set with three small images, for this card.
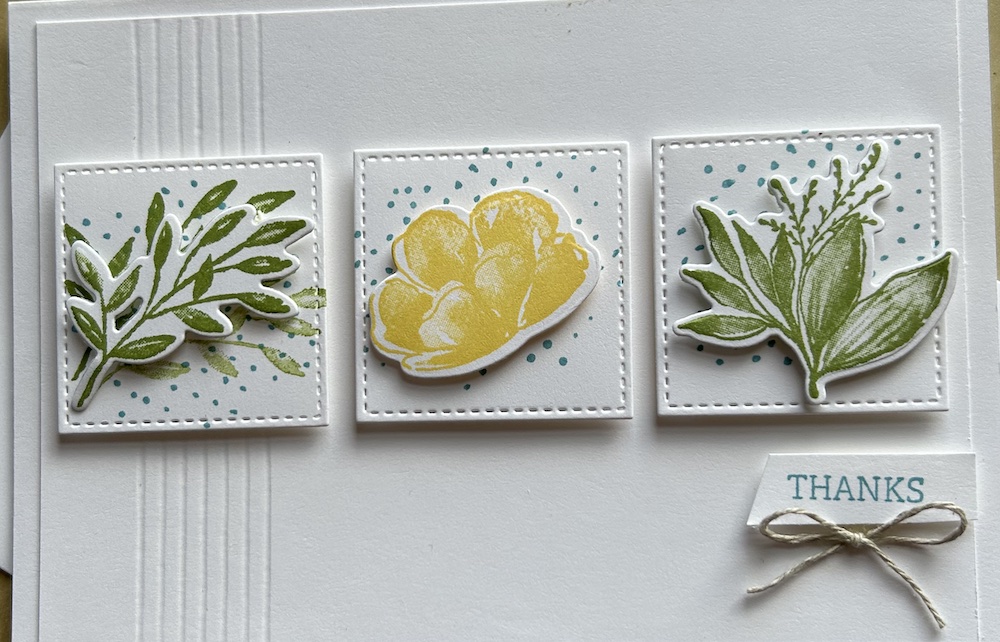
This three panel card design can be made for just about any occasion, birthdays, anniversaries, get well soon, sympathy, and so on just by changing the sentiment. A very useful design indeed!
You will need:
- Thick Basic White card base 21cm x 14.8cm scored at 10.5cm (8½” x 5½” scored at 4¼”)
- Thick Basic White panel 9.7cm x 14cm (3¾” x 5”)
- Basic White for stamping and die-cutting approx 9.5cm x 13.8cm (3¾” x 5”)
- Old Olive, Daffodil Delight and Balmy Blue ink pads
- Length of linen thread
Fold and burnish the card base.
Use your Simply Scored scoring board to score seven lines vertically down your Thick Basic White panel starting at around 5/8″ and scoring on each score line.
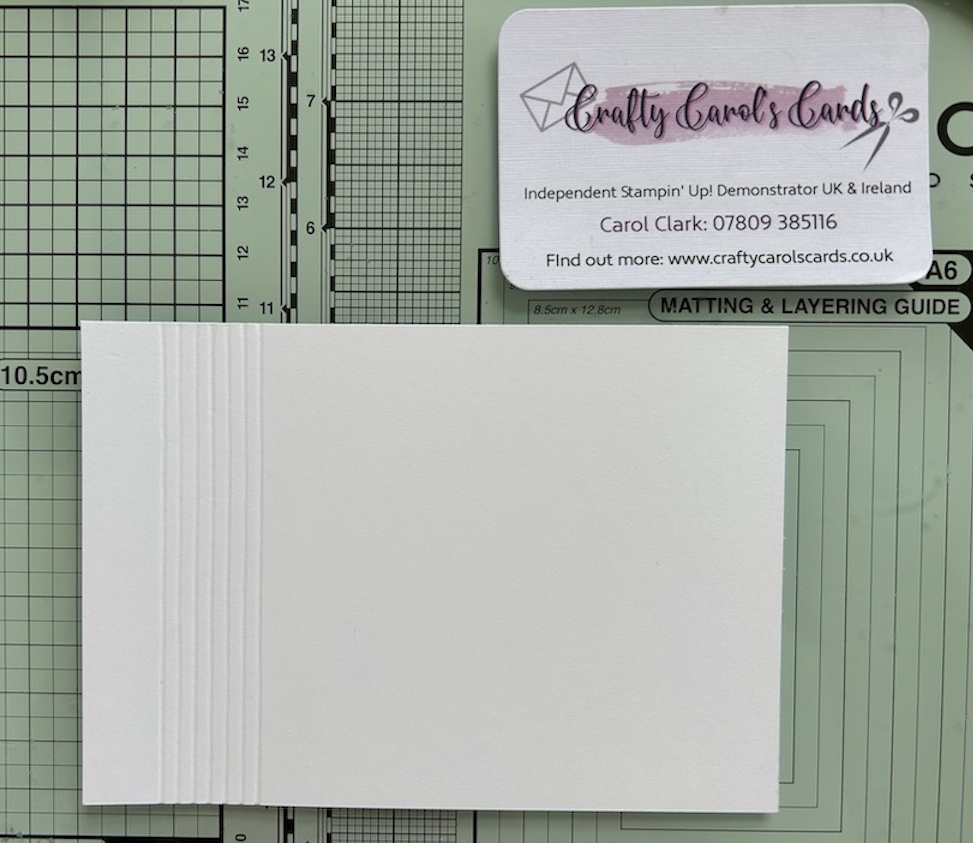
Use multipurpose glue to stick the scored panel to the front of your base card.
On your Basic White panel, use the second size up Stylish Shapes square die to mark out three squares so you know where to stamp.
Stamp the dotty background in Balmy Blue inside these three squares. (I stamped directly but it might look better stamped off – your choice!)
Stamp a different image on top in each square. I used Old Olive and Daffodil Delight ink pads and stamped one simple flower, two leaf sprigs, the second stamped off, and the lily of the valley stamp, all from the Regal Flora stamp set. Then I stamped all three images again in the remaining Basic White area.
Die-cut the three squares and your three images.
Lay the three die-cut square panels on your card to work out where they need to go so that there is the same gap at the sides and between them. Stick the three panels on using dimensionals, starting with the centre one, then add the two side panels.

Add your die-cut images on top of the corresponding panel again using dimensionals.
Stamp your chosen sentiment in Balmy Blue on a remaining scrap of Basic White. Use your snips to trim the left-hand end diagonally. Add it to your card using dimensionals, lining it up with the edge of the panel.
Finish the three panel card by tying a small bow in linen thread and adding it centrally under the sentiment using a glue dot.
Don’t forget to decorate your envelope!
I hope you like this card and will have a go at making one – please show me what you come up with.
Thank you for taking the time to read my post.

Don’t forget – you get a FREE pdf when you place any order with me as your demonstrator. And, if your order is over £40, you will also get to choose stuff from my online shop to the value of your order!
Product List ![Regal Flora Dies [ 164033 ]](https://assets1.tamsnetwork.com/images/EC042017NF/164033s.jpg "Regal Flora Dies [ 164033 ]") | ![Basic White A4 Thick Cardstock [ 159230 ]](https://assets1.tamsnetwork.com/images/EC042017NF/159230s.jpg "Basic White A4 Thick Cardstock [ 159230 ]") | ![Basic White A4 Cardstock [ 166781 ]](https://assets1.tamsnetwork.com/images/EC042017NF/166781s.jpg "Basic White A4 Cardstock [ 166781 ]") | ||
![Old Olive Classic Stampin' Pad [ 147090 ]](https://assets1.tamsnetwork.com/images/EC042017NF/147090s.jpg "Old Olive Classic Stampin' Pad [ 147090 ]") | ![Linen Thread [ 104199 ]](https://assets1.tamsnetwork.com/images/EC042017NF/104199s.jpg "Linen Thread [ 104199 ]") |
![Regal Flora Cling Stamp Set (English) [ 164157 ]](https://assets1.tamsnetwork.com/images/EC042017NF/164157s.jpg "Regal Flora Cling Stamp Set (English) [ 164157 ]")
![Daffodil Delight Classic Stampin' Pad [ 147094 ]](https://assets1.tamsnetwork.com/images/EC042017NF/147094s.jpg "Daffodil Delight Classic Stampin' Pad [ 147094 ]")
![Balmy Blue Classic Stampin' Pad [ 147105 ]](https://assets1.tamsnetwork.com/images/EC042017NF/147105s.jpg "Balmy Blue Classic Stampin' Pad [ 147105 ]")

