I love to use heat embossing in card-making. But this technique is not just about making stamped images shine. There is so much more you can do. The post and video below show you my first five ideas – part 2 will be along next week!
The only essential equipment you need for heat embossing is a heat gun (remember a hairdryer is not a suitable substitute), a Versamark ink pad or other embossing ink pad and some embossing powder. Stampin’ Up! do two great packs each of three different powders. You also need either an embossing buddy or a used tumble dryer sheet. These are used to remove static from the surface you will use for heat embossing to prevent embossing powder from sticking where you don’t want it. Sadly Stampin’ Up! no longer sell their embossing buddy but you can buy them from other craft outlets.
Here are two key tips the using the heat tool. First, always preheat your tool by turning it on and waiting until the air current is hot before bringing it near your image, otherwise your card or paper is more likely to warp. Secondly, hold your tool around 2 inches away from your embossing and keep moving it around, don’t keep it still in one spot or you risk damaging your paper or card and the embossing itself. It doesn’t matter whether you heat from underneath or from on top. These produce slightly different effects, but in general, I heat from the top. I will never ever tire of watching the magic as the powder melts!
Here are the first five heat embossing ideas I used in this video:
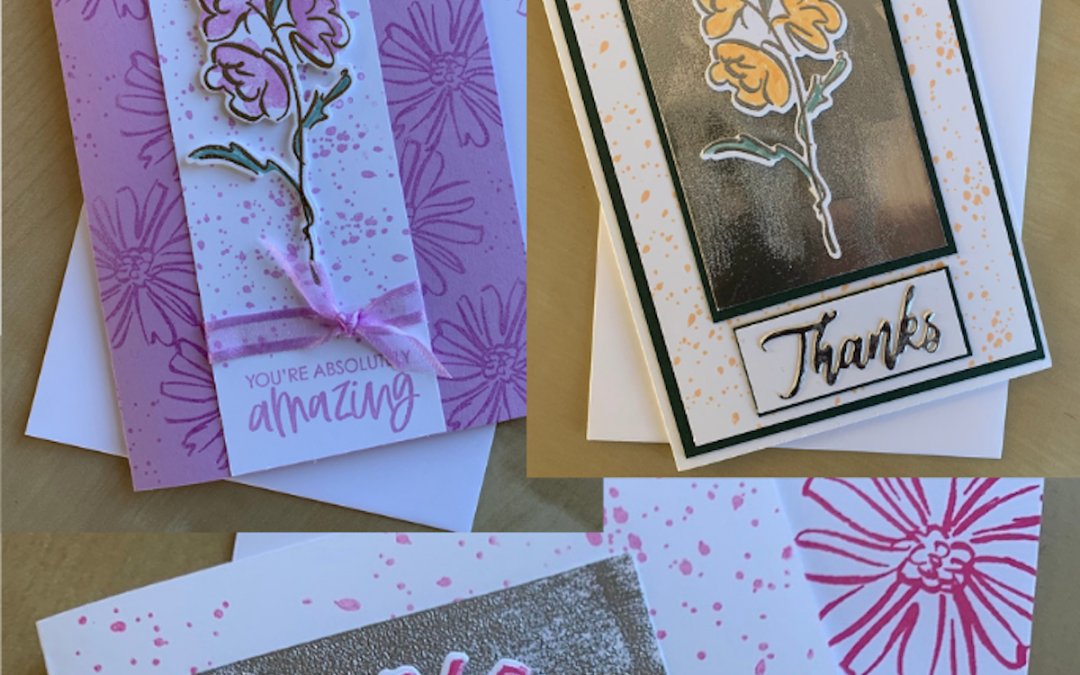
- Emboss a stamped image. This is the “usual” way people use heat embossing – to add shine
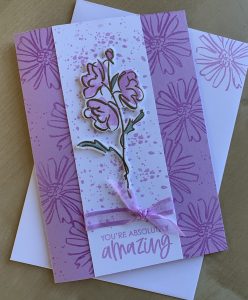 and colour to an image by stamping in Versamark then adding embossing powder. It is easy and quick to do and produces a lovely result. You can colour the image afterwards with Stampin’ Write markers, blender pens or watercolour pencils – and the embossing helps you stay within the lines!
2. Versamark ink painting. You can get an ink refill for Versamark pads just as you can for any other pad. And it can be used in a very similar way, for painting. Use a fine paintbrush to add the ink to your image or background. You can either infill an image or paint patterns with Versamark ink then add embossing powder as before.
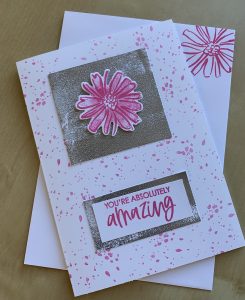 3. Make an embossed background. This is a lovely way to use heat embossing and there are almost unlimited ways to use this technique. In the video, I use plain Basic White cardstock. I wipe my Versamark pad across the cardstock then add the embossing powder before heating it.
This does tend to warp the cardstock becuase of how much coverage you are using, so make sure you heat from both sides of the cardstock. You can flatten the card again afterwards before using it if you need to by weighting it down with a couple of punches or other weights.
You can vary the effect in so many ways by adjusting how much Versamark you put onto your cardstock and in which colour embossing powder you use. Watch the Part 2 video for even more ideas!
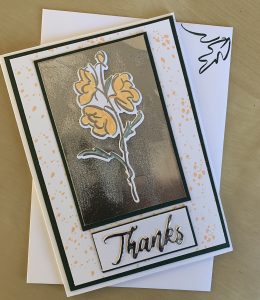 4. Embossing foil. In a similar way to the above, you can wipe your Versamark pad across foil
sheets.
In the video, I used silver embossing powder on silver foil because I love a colour-on-colour effect. But again you can vary the final effect by using gold, copper, white or black on silver foil or silver, copper, white or black on gold foil and so on.
5. Clear embossing on an inked image. My final idea is to use clear embossing powder on an inked image, This produces a lovely subtle shine and is wonderful for backgrounds – you can see it in the first card above.
The trick with this technique is to ink then add the embossing powder immediately – our Stampin’ Up! inks can dry quickly so you need to act fast.
In part 2 I’ll show you how you can buy yourself time to add embossing powder to an inked image as well as five more techniques.
In the meantime, here is the part 1 video. Enjoy!
Product List
|
|
|
|
|
|
|
|
|


Thank you Carol, this is very helpful – I struggle to get great results with heat embossing!