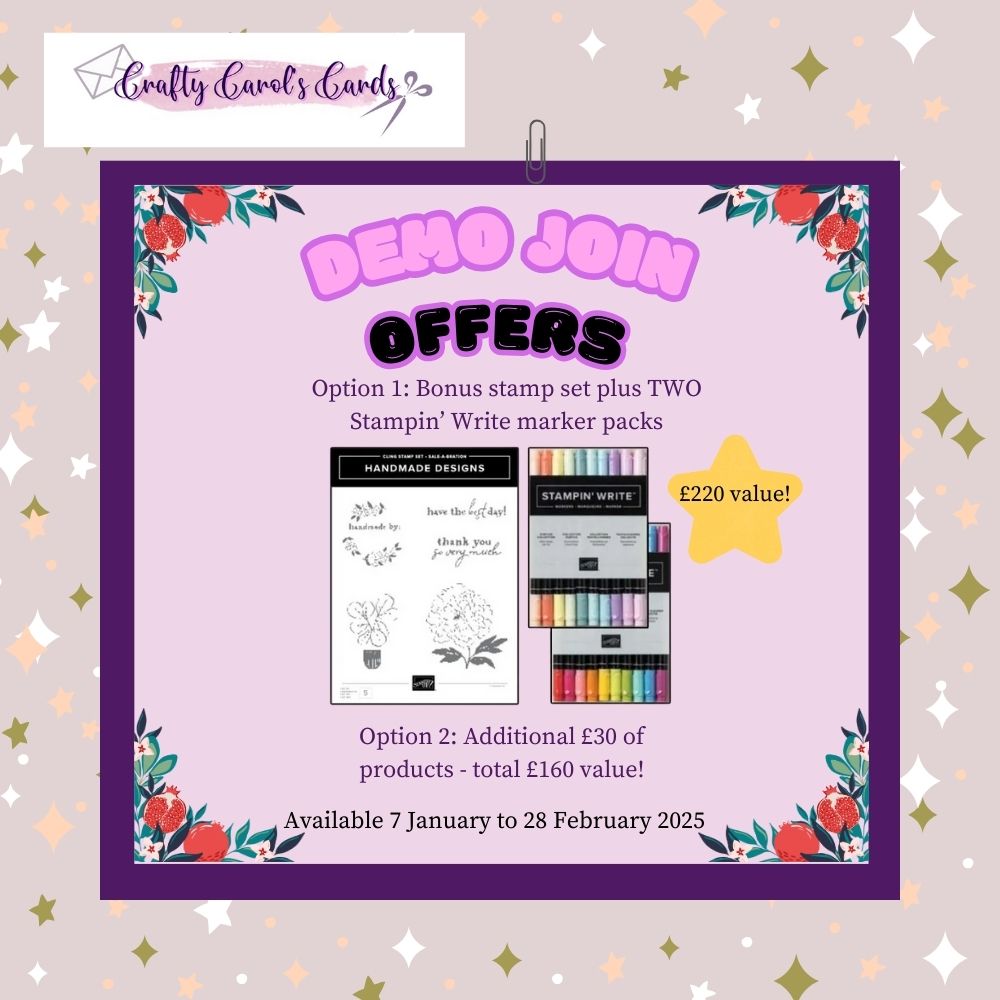
Do you have any Stampin Write markers? I often use the Blends for colouring, but Stampin Write markers are also fabulous for colouring and for so much more. Here are ten techniques you can try! Plus, there is a fabulous joining offer from Stampin’ Up! that is available until the end of this month (28 February 2025). You can obtain £130 products for just £99 PLUS you wil get a bonus stamp set and TWO Stampin’ Write marker packs of your choice (value £220!)
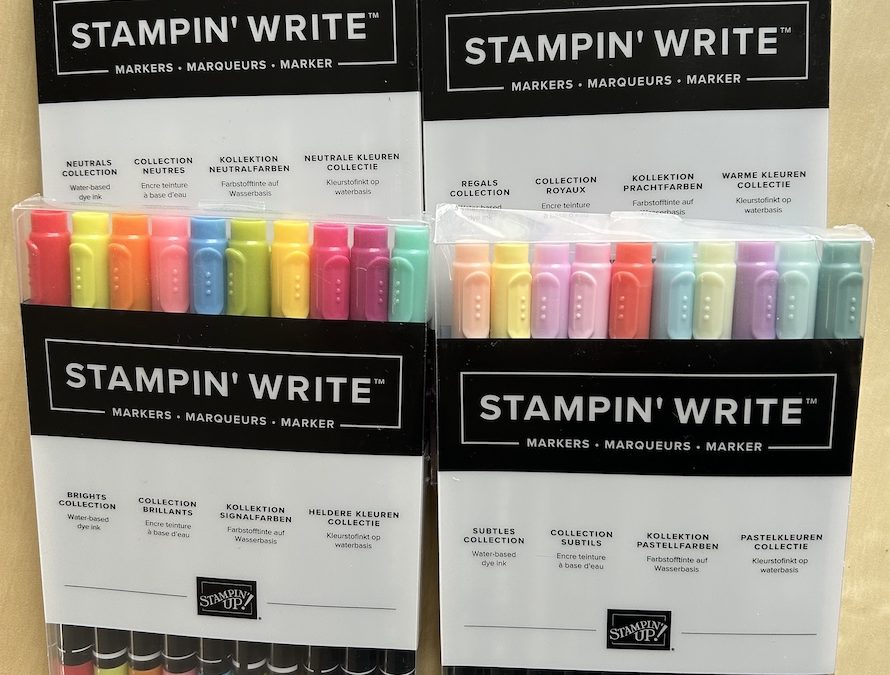
The packs come in colour families, Regals, Brights, Subtles and Neutrals, plus In Color packs of five markers and a separate Basic Black marker. They can be a great (and cheaper) alternative if you don’t have all the stamp pads or to use while you build up your stock.
I demonstrated TEN techniques for using Stampin Write markers in my LIVE today. I’d love you to join me every week on Tuesdays at 2pm on YouTube or Facebook. You can watch today’s video below.
These markers are water-based, so if you make a mess, it is easy to clean! It also means you can use your glass mat as a base for adding colour and then wipe it clean afterwards.
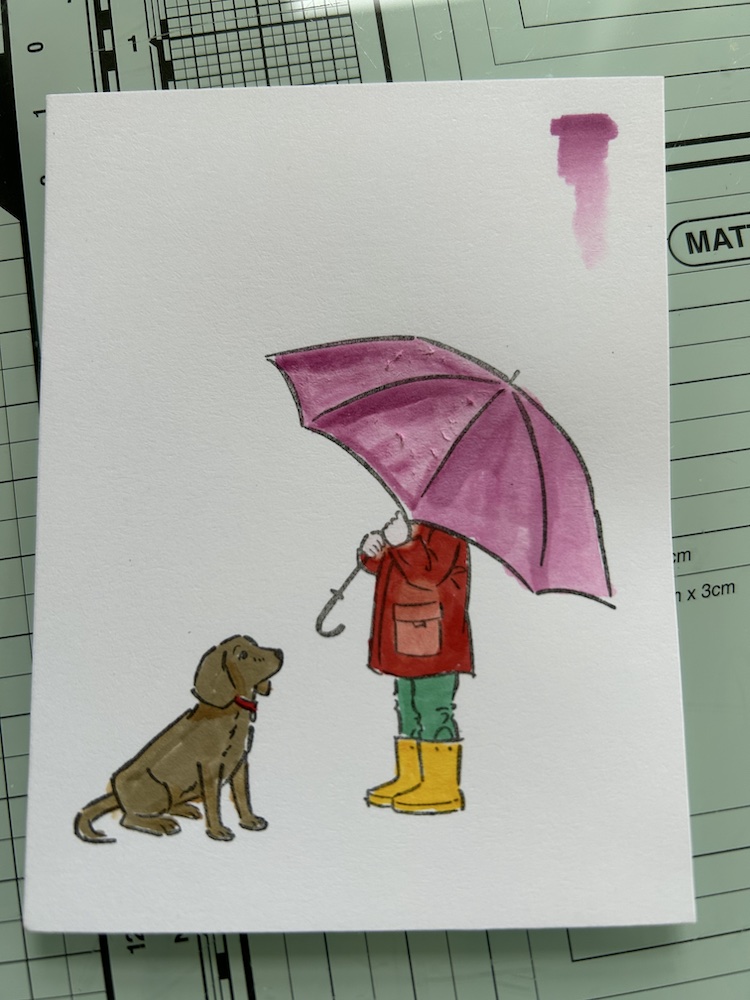
The first three techniques show different ways to colour using the markers. Important note – when colouring using the markers, it is best to stamp your image with StazOn instead of Memento. The latter is a water-based ink and can leach into your colouring, though if you are careful with your colouring and let the Memento dry first, it can be OK to use.
Technique 1: Colouring images
Stampin Write markers are similar to felt tips pens and you can colour images in exactly the same way. They are especially useful for small and detailed images. Mix with techniques 2 and 3 to get depth effects.
Technique 2: Watercolouring with an aqua painter
Want a softer colour? Scribble some colour from your pen onto a stamping block then use your water painter to pick up the colour and colour in your image. I used this for the dog and the coat pocket in the picture above. Clean the water painter between colours by scribbling onto a scrap of paper or a tissue until clean.
Technique 3: Colour with a blender pen
This is an alternative, and gives a softer colour, to picking up the ink with a water painter. Again, add some colour from your pen onto a stamping block, or directly onto your glass mat, then pick it up with your blender pen. I used this for the umbrella in the picture above. (Take care as you can roughen the paper if you do things too fast, as you can see!) You can get a lovely gradient effect with this technique. Clean your blender pen by scribbing onto a scrap of paper.
The next three techniques describe the different effects you can get when writing with the pens.
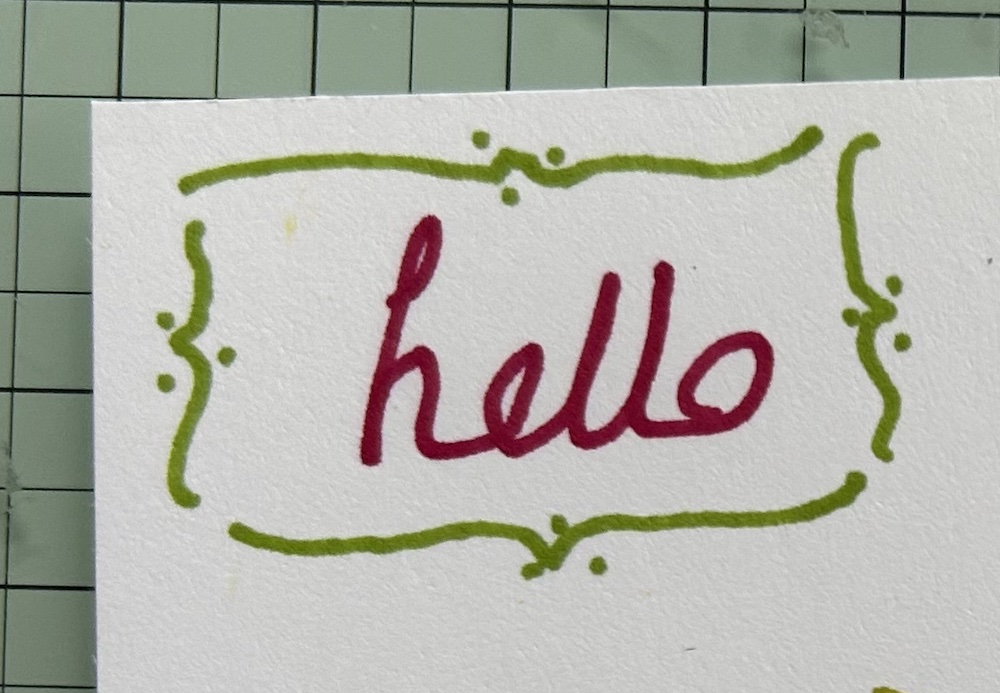
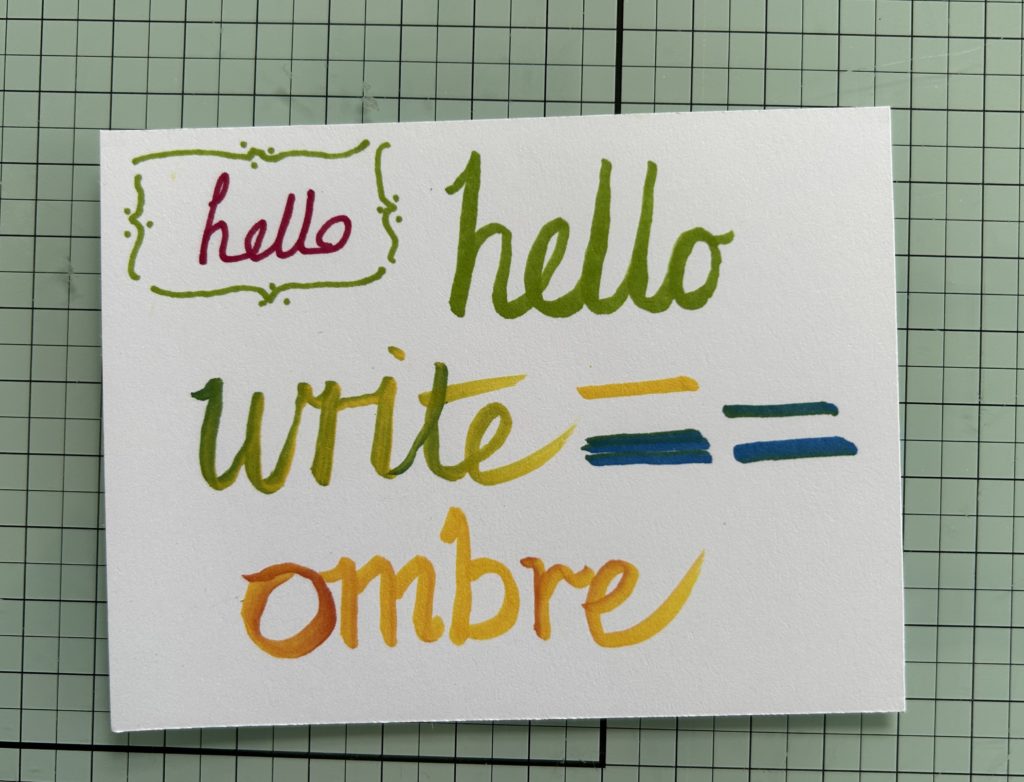
Technique 4: Journalling and doodling lines
The thin tip is great for doodling and journalling. Make each letter a different colour, or use colour for emphasis in your journaling. You can add lines to your cards as an outline or for emphasis, such as underlining words – the possibilities are legion!
Technique 5: Brush lettering and mixing colours
The brush end of the pens can be used for brush lettering. Each colour can be used on its own, or you can use two colours together to produce a variegated effect. In the latter case, use the lighter colour brush end to pick up the darker colour from the second pen brush end. Clean your tips by scribbling on a scrap piece of paper until the colour runs true again.
Technique 6: Fix mistakes
The thin tip ends are useful to use to fix any mistakes in your stamping. Got a light or missing area after stamping? No problem – use your Stampin Write markers to fill in any light or missing areas. It’s worth buying the separate Basic Black marker just for this!
Before:
After:
The final four techniques are about producing different effects using your markers.
Technique 7: Block stamping
Even if you don’t have any background stamps you can use your Stampin Write markers to make a blocked background. Simply colour your chosen block with your marker, spritz with water and stamp. Why not use several different colours to ake a fun card?

Using this technique on watercolour paper is even better!

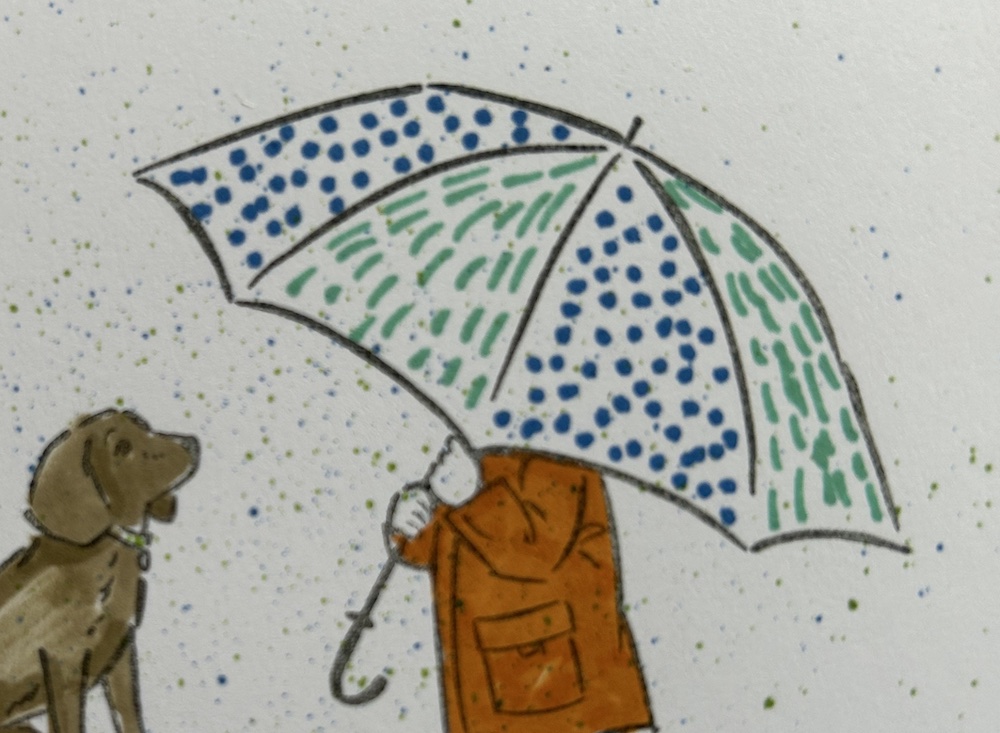
Technique 8: Add patterns
Use your markers to make fun patterns within images – dots, dashes, lines, crosshatching – whatever you want. The umbrella from the Umbrella Days stamp set is ideal for this, but it can also be an effective technique for flowers and other nature stamps. For example, adding lines to trees and branches to indicate texture, or adding dotted centres to flowers.
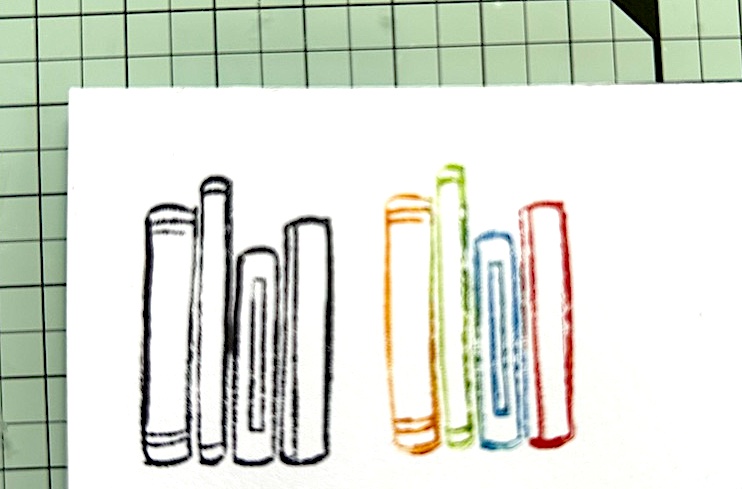
Technique 9: Colour your stamps
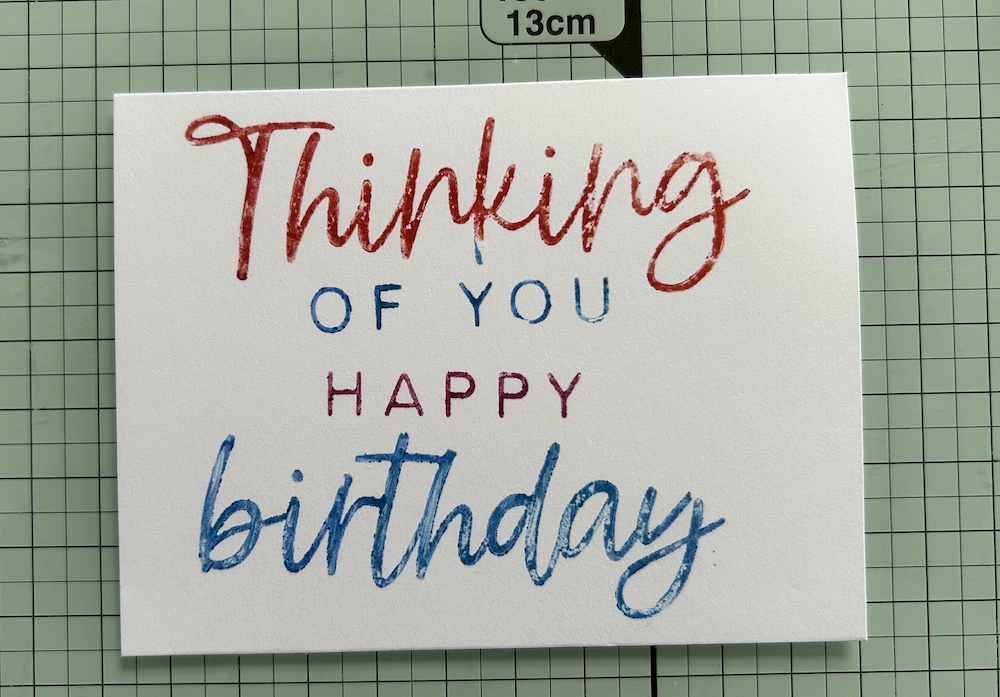
You can colour your stamps directly with the markers then stamp with them. Remember to huff over your coloured stamp first to reactivate any ink that might be drying out! I love to use this technique with text stamps, either to emphasise one word within a phrase, or to pick one word I want to use out of a sentiment and just stamp that one word. Much easier than trying to use an ink pad to do this! You can also mix the colours on any stamp, such as a flower and leaf image, with a pnk flower and green leaf.
Technique 10: Splatter effect
The final technique is probably my favourite! You can use the pens to produce a splatter of ink to jazz up your cards. Simply flick the tip of the pen against the edge of its lid, flicking towards your card. This produces a fun splatter effect which can enhance your card to finish it off. This technique can be a bit messy, so remember to move anything important away from your workspace. use some scrap paper to cover the work area if you want, but as the ink in the markers is water-soluble it is easy to clean up any mess, especially with a glass mat!
Here is the video that shows these techniques and will hopefully answer any questions you have:
I hope you have a go at some or all of these techniques using Stampin Write markers – let me know how you get on! Why not make use of this great Saleabration joining offer – just two weeks left.
Thank you for taking the time to read my post.

Don’t forget – you get a FREE tutorial of eight cards when you place an order with me. There’s a different set every month. And, if your order is over £40, you will also get to choose stuff from my online shop to the value of your order!
Product List  |  |  |  | |
 |  |  |  |


