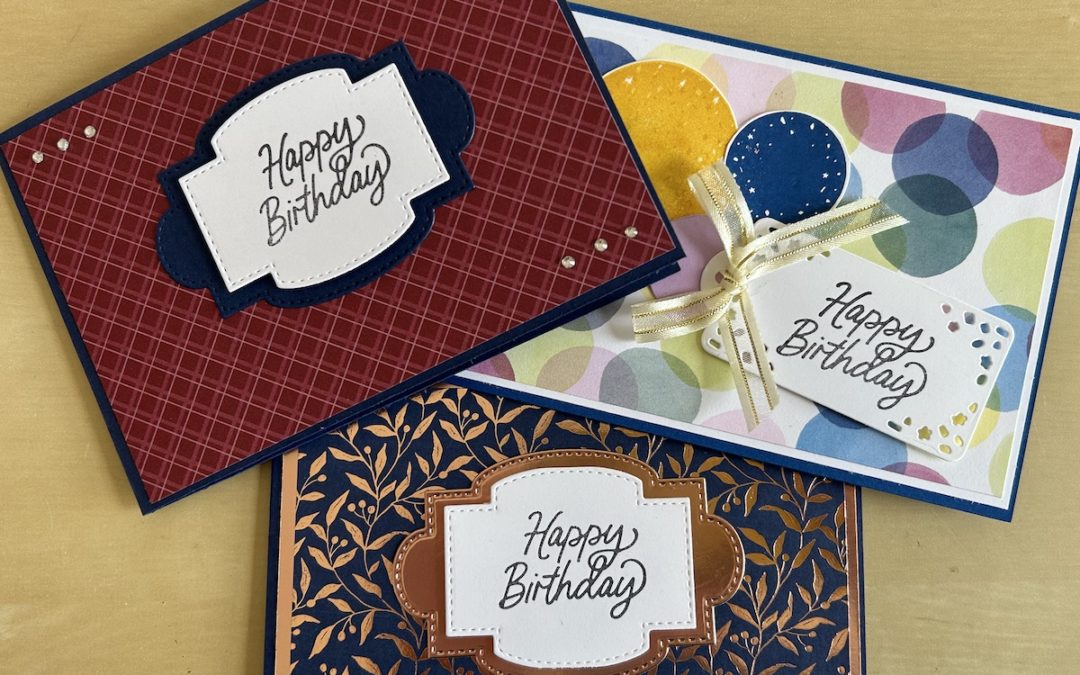

This month’s Tech 4 Stampers Blog Hop is all about cards for men. It can sometimes be difficult to design cards for men. I love a fun fold card so I decided to make a W fun fold card.
The beauty of this fun fold is that you can make it fancy and feminine or plainer and male and it can be used for many different occasions. The picture shows three different cards using the same fun fold. I’ve used a blue (Night of Navy or Blueberry Bushel) as the base for the cards. The gold-adorned one uses a retired DSP, the red one uses Neutrals DSP and the third uses the Bright and Beautiful DSP that is part of the Bright and Beautiful suite in the new catalogue.
The video below shows you how to make the card and I’ve also given you full instructions below.
Here are the measurements you need:
- Blue cardstock base (A4 sheet cut in half lengthways) 29.5cm x 10.5cm
- Blue cardstock (length of A4) 29.5cm x 4.5cm
- Blue cardstock pieces (4) 6cm x 7cm
- Basic White panels (3) 14.3cm x 10cm
- DSP front panel 13.8cm x 9.5cm
- DSP and/or Basic White inside pieces (4) 5.5cm x 6.5cm
- Basic White or foil scraps for decoration/stamping
- Fold and burnish your base cardstock in half.
- Adhere the front DSP panel to one Basic White panel and stick to the front of your card.
- Score the 4.5cm strip of cardstock at 7.4cm, 14.8cm and 22.2cm and fold into a W shape.
- With the W folds pointing towards you, add strips of tear-n-tape to each end panel of your strip (shown in the video if you are not sure).
- Turn over and add tear-n-tape to each panel as shown in the picture below.
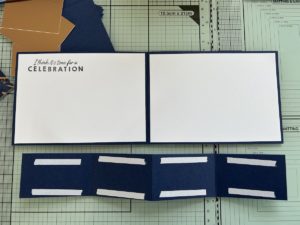
Stick the two other Basic White panels to the inside of your card. Stamp a sentiment where you wish it to be (it depends on where you want your panels to be, top or bottom). Here are two options:
To stick the W fun fold strip into your card:
- Remove the backing from the edge strips.
- Place one side with the open edge pointing to the edge of the card where you want the strip to lie. You can line it up at the edge or have it slightly further back – your choice. You can see both in the pictures above.
- Holding the strip closed, close your card to stick the other side down. See the video if you are unsure.
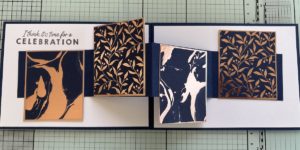
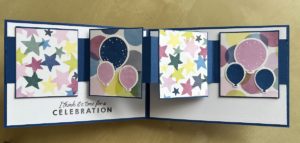
- Stick your DSP or stamped panels to your blue cardstock pieces.
- Add the panels to the strip using the tape previously added. You can have them in a line or staggered – see the photos above.
- Finally, decorate the front of your card as you wish. You can see three different ideas in the picture for this post above.
Here is the video of how to make this card if you find that easier to follow!
I hope you enjoyed this W fold card and that you have a go at making this easy fun fold.
Please go and visit the other wonderful ideas from my fellow demonstrators.
Product List
|
|
|
|||
|
|
|
|
|
|
")
 Designer Series Paper")
")


Love these Carol
Lovely idea Carole!
Great Cards and a video too!
Fabulous array of fun folds, TFS Carol.
What a fabulous fun fold! Love it