This month’s T4S blog hop theme is Sketch. Sketches are a great way to get some inspiration as they give you a basic card layout which you can then adapt to your heart’s content. You can find plenty of free sketch ideas on page 24 of the annual catalogue, and there are various websites where you can find different sketches, many of which are free.

This month, the group had the same sketch to work from, which is shown below.

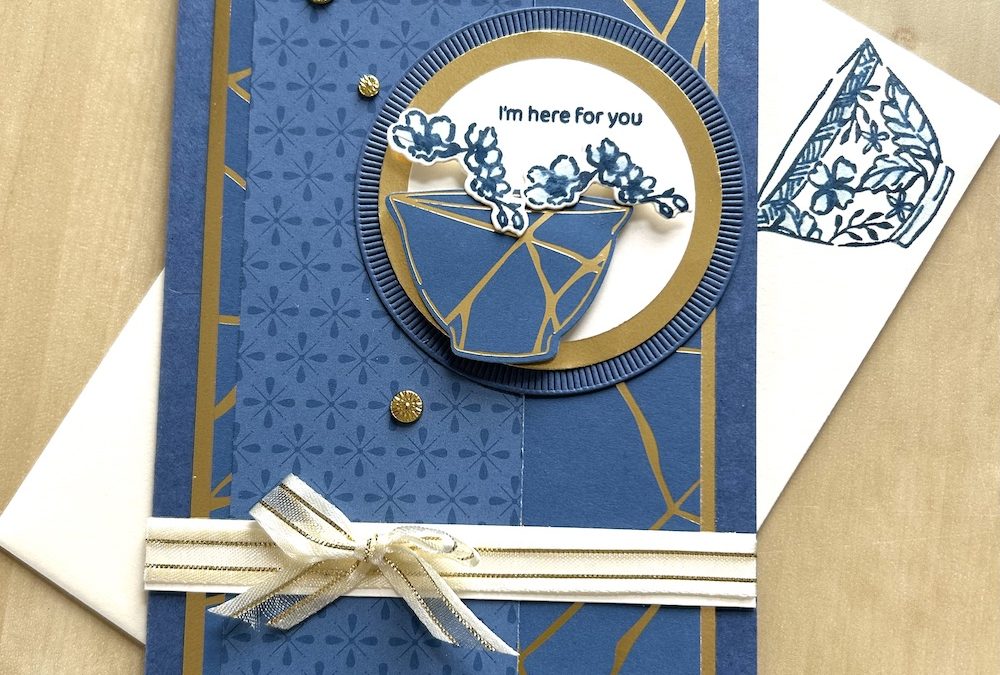
I decided to use the Kintsugi suite for my card. This suite contains the Inspiring Imperfections stamp set and dies bundle, the Joined Together embossing folder, the totally gorgeous Kintsugi Inspirations DSP and some fabulous flower accent gems.
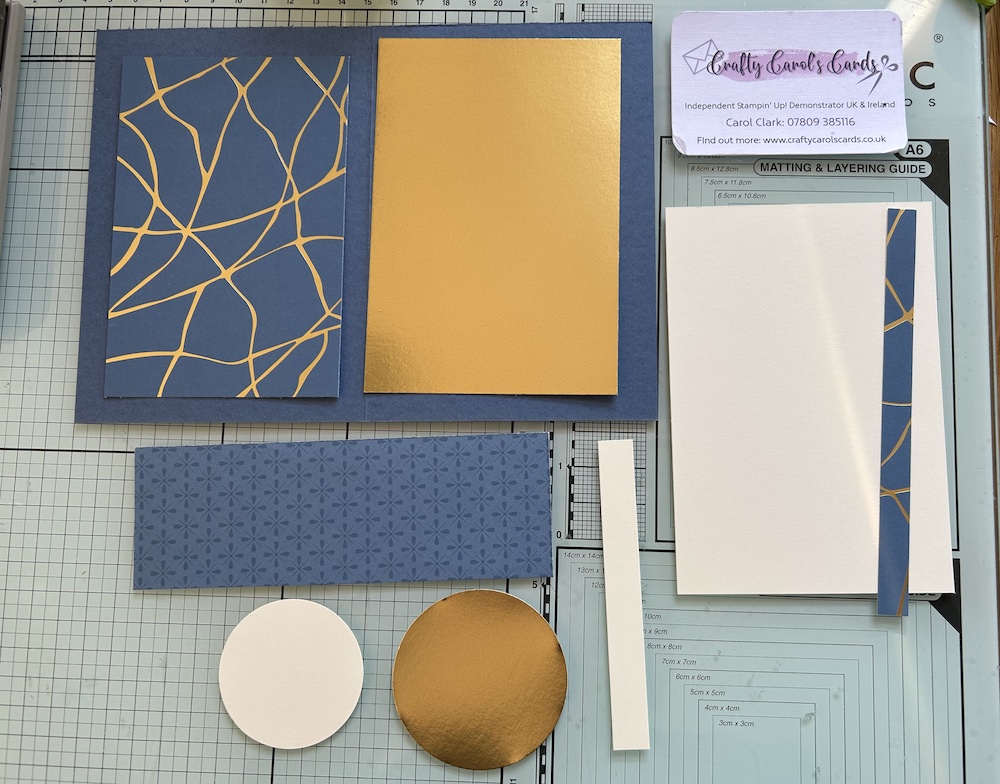
To make my version of this Sketch card you will need:
- Misty Moonlight card base 21cm x 14.8cm scored at 10.5cm (8½” x 5½” scored at 4¼”)
- Gold foil layer 9cm x 13.3cm (3½” x 5¼”)
- DSP 1 layer 8.5cm x 12.8cm (3¼” x 5″)
- DSP 2 strip 5cm x 14.8cm (2″ x 5½”)
- Gold foil scrap approx 6.5cm (2½”) square
- Very Vanilla card scrap approx 6cm (2¼”) square
- Very Vanilla panel for inside 9.5cm x 13.8cm (3¾” x 5”)
- Very Vanilla strip 1.2cm x 10.5cm (½” x 5½”)
Here are all the pieces you need:
Instructions
Score and burnish the card base.
Stick the DSP layer to the gold foil layer and adhere to the centre of your card front.
Add the long strip of DSP towards the left-hand side on the front, as in the Sketch.
Punch a 2 3/8″ circle from gold foil and a 2″ circle from Very Vanilla. I added a larger size circle again, die-cut from Misty Moonlight using the Spotlight on Nature dies.
Stick the smaller circle(s) to the larger circle.
Stamp your greeting on the Very Vanilla circle.
Either stamp a small bowl or die-cut one from the DSP and add to your circle using dimensionals.
Stamp the small flower cluster twice in Misty Moonlight. Add some colour using a blender pen (see the video if you are unsure) and die-cut. Adhere them to come out of the bowl using dimensionals.
Add your completed circle to the Sketch card, placing it as in the Sketch above.
Wrap some gold ribbon around the Very Vanilla strip and attach to your card front. Tie a bow in the ribbon and add to the strip as shown in the Sketch.
I added some Gold Flower accents after I’d finished the video too!
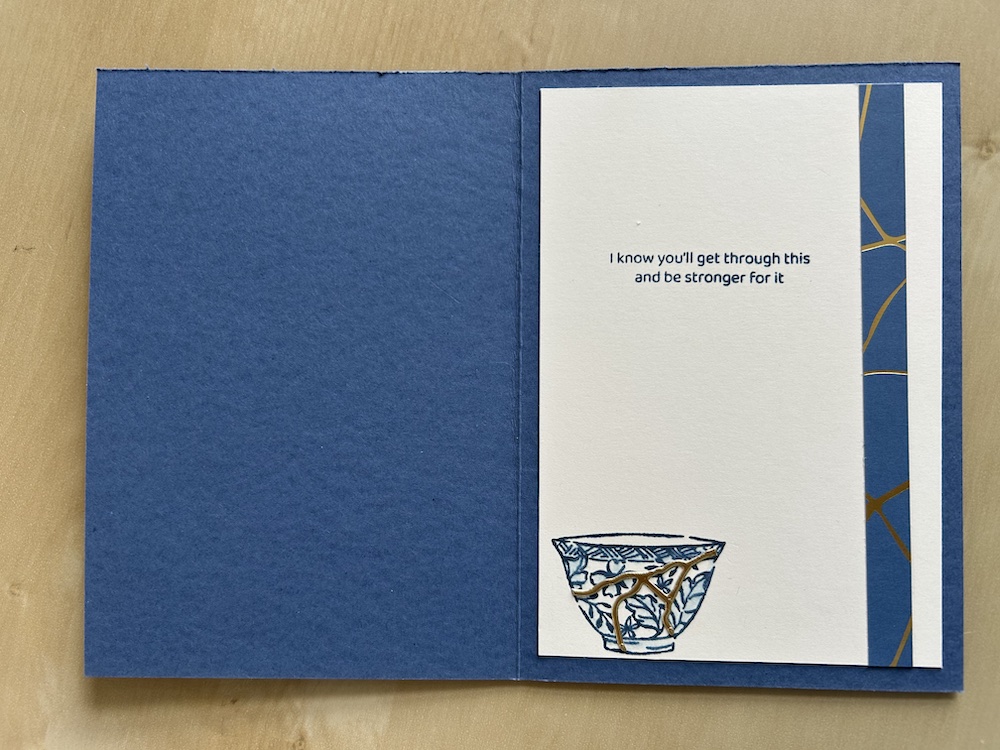
For the inside of the card Very Vanilla panel, I stamped my sentiment in Misty Moonlight. I added a bowl stamped in Misty Moonlight coloured using the blender pen, and added a strip of DSP as decoration as shown. I also added a “crack” cut from gold foil:
Don’t forget to decorate your envelope! I stamped the bowl in Misty Moonlight and coloured it using my blender pen.
Here’s the video from my Live of how to make up this Sketch card:
Please now go and look at the other gorgeous cards my fellow blog hoppers have made using the links below.
I hope you like this card and will have a go at making one – please show me what you come up with.
Thank you for taking the time to read my post.

Don’t forget – you get a FREE pdf when you place any order with me as your demonstrator. And, if your order is over £40, you will also get to choose stuff from my online shop to the value of your order!
Product List ![Gold Foil Sheets [ 132622 ]](https://assets1.tamsnetwork.com/images/EC042017NF/132622s.jpg "Gold Foil Sheets [ 132622 ]") | ![Misty Moonlight A4 Cardstock [ 153086 ]](https://assets1.tamsnetwork.com/images/EC042017NF/153086s.jpg "Misty Moonlight A4 Cardstock [ 153086 ]") | ![Very Vanilla A4 Cardstock [ 166785 ]](https://assets1.tamsnetwork.com/images/EC042017NF/166785s.jpg "Very Vanilla A4 Cardstock [ 166785 ]") | ||
![2 3/8" (6 Cm) Circle Punch [ 161354 ]](https://assets1.tamsnetwork.com/images/EC042017NF/161354s.jpg "2 3/8\" (6 Cm) Circle Punch [ 161354 ]") | ![2" (5.1 Cm) Circle Punch [ 133782 ]](https://assets1.tamsnetwork.com/images/EC042017NF/133782s.jpg "2\" (5.1 Cm) Circle Punch [ 133782 ]") | ![Very Vanilla C6 Envelopes [ 106589 ]](https://assets1.tamsnetwork.com/images/EC042017NF/106589s.jpg "Very Vanilla C6 Envelopes [ 106589 ]") |
![Kintsugi Inspirations 12" X 12" (30.5 X 30.5 Cm) Specialty Designer Series Paper [ 165159 ]](https://assets1.tamsnetwork.com/images/EC042017NF/165159s.jpg "Kintsugi Inspirations 12\" X 12\" (30.5 X 30.5 Cm) Specialty Designer Series Paper [ 165159 ]")
![Inspiring Imperfections Bundle (English) [ 165167 ]](https://assets1.tamsnetwork.com/images/EC042017NF/165167s.jpg "Inspiring Imperfections Bundle (English) [ 165167 ]")
![Misty Moonlight Classic Stampin' Pad [ 153118 ]](https://assets1.tamsnetwork.com/images/EC042017NF/153118s.jpg "Misty Moonlight Classic Stampin' Pad [ 153118 ]")
![Gold Striped 3/8" (1 Cm) Mesh Ribbon [ 165599 ]](https://assets1.tamsnetwork.com/images/EC042017NF/165599s.jpg "Gold Striped 3/8\" (1 Cm) Mesh Ribbon [ 165599 ]")


Love your card, Carol! fits the sketch to a tee!
Fabulous card Carol
Beautiful card, as always. Love this suite!