
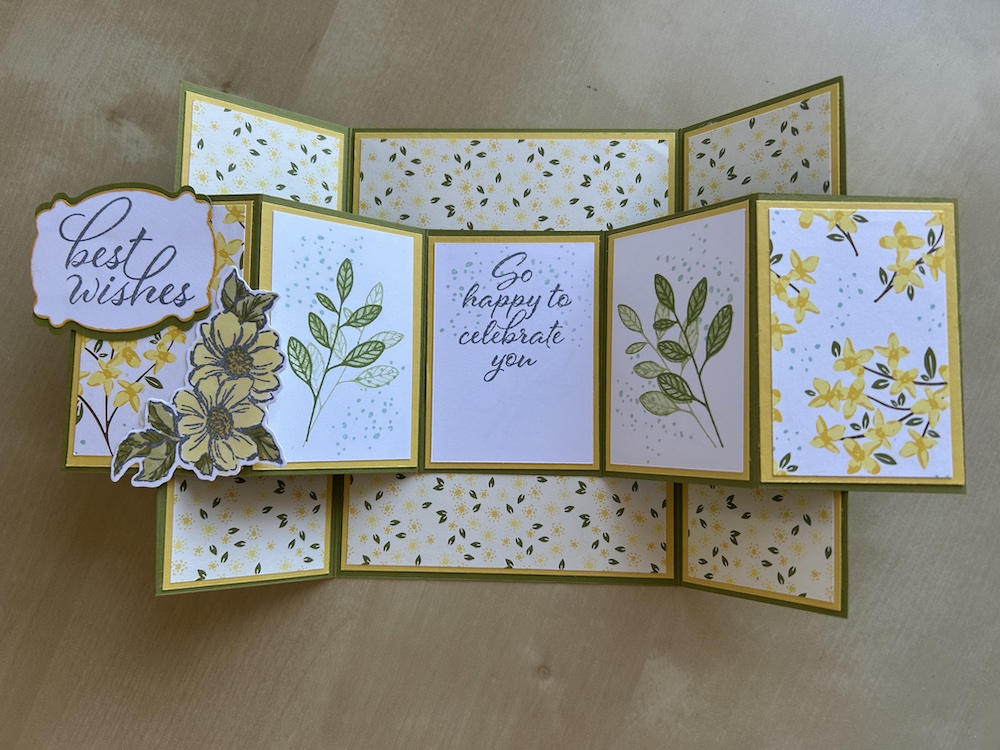
This month the T4S blog hop theme is Fancy Fold. I love a fun fold card so this is right up my street! Today I am making a Double Gatefold card.

I first saw a similar card made by the lovely Tami White, but I have adapted it for UK sizes and changed the way it is decorated. I’ve called it a double gatefold card. It does require quite a few pieces and looks complicated, but it is straightforward to put together. (I’ve also included how I work out the measurements for a card at the end of this post for anyone who is interested.)
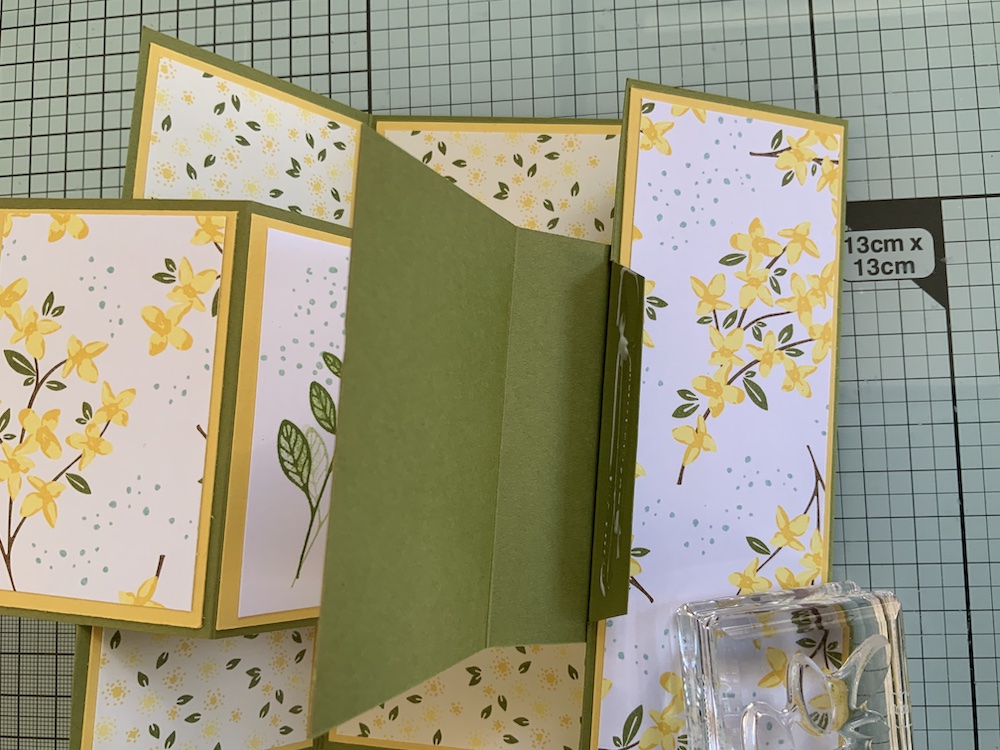
The double gatefold card has a second inner fun fold piece that opens out and fits between the normal gatefold sides. I’ve used Old Olive and Daffodil Delight cardstock teamed with Floral Delight DSP and the Layering Leaves stamp set for my double gatefold card.
To make this double gatefold card you will need a slightly scary number of pieces, but don’t panic, all will be revealed in the instructions! My making this card can also be seen in the video in this post if you prefer that:
- Old Olive main Card base: 24cm x 14.8cm (9½” x 5½”)
- Old Olive inner card base: 8cm x 28cm (10 5/8″ x 3″)
- Daffodil Delight main card inside centre mat: 10.6cm x 14.4cm (4 1/8″ x 5 3/8″)
- Daffodil Delight main card side panel mats (x4): 5.1cm x 14.4cm (2″ x 5 3/8″)
- Floral Delights DSP for main card inside centre panel: 10.2cm x 14cm (4″ x 5¼”)
- Floral Delights DSP for main card inside side panels (x2): 4.7cm x 14cm (4″ x 5¼”)
- Floral Delights DSP for main card outside side panels (x2): 4.7cm x 14cm (4″ x 5¼”)
- Daffodil Delight inner colour card panels (x4): 5.1cm x 7.6cm (2″ x 2 7/8″)
- Daffodil Delight inner colour card centre panel: 5.6cm x 7.6cm (2″ x 2 7/8″)
- Basic White inner card centre panel: 5.2cm x 7.2cm (1 7/8″ x 2¾”)
- Basic White inner card inside side panels: 4.7cm x 7.2cm (1 7/8″ x 2¾”)
- Floral Delights DSP for outside inner card panels (x2): 4.7cm x 7.2cm (1 7/8″ x 2¾”)
- Scraps of Basic White for the outside sentiment and any decoration
Here are all the pieces laid out:
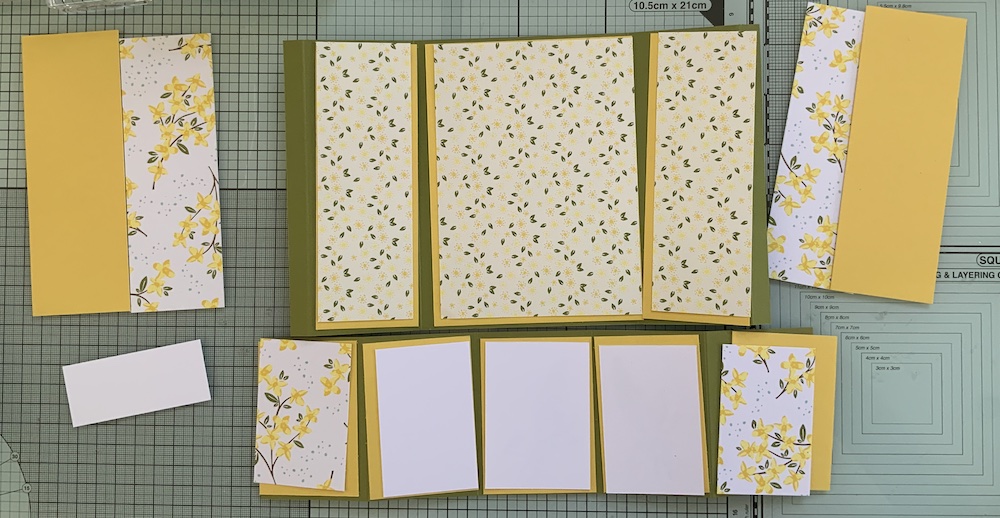
I chose a sheet of the DSP for inside the main gatefold card and a contrasting sheet for the outside panels and for the inner card, but you could use the same DSP throughout. I feel the card looks best using the same DSP for the outer side panels of the main card and for the smaller inner card.
Instructions
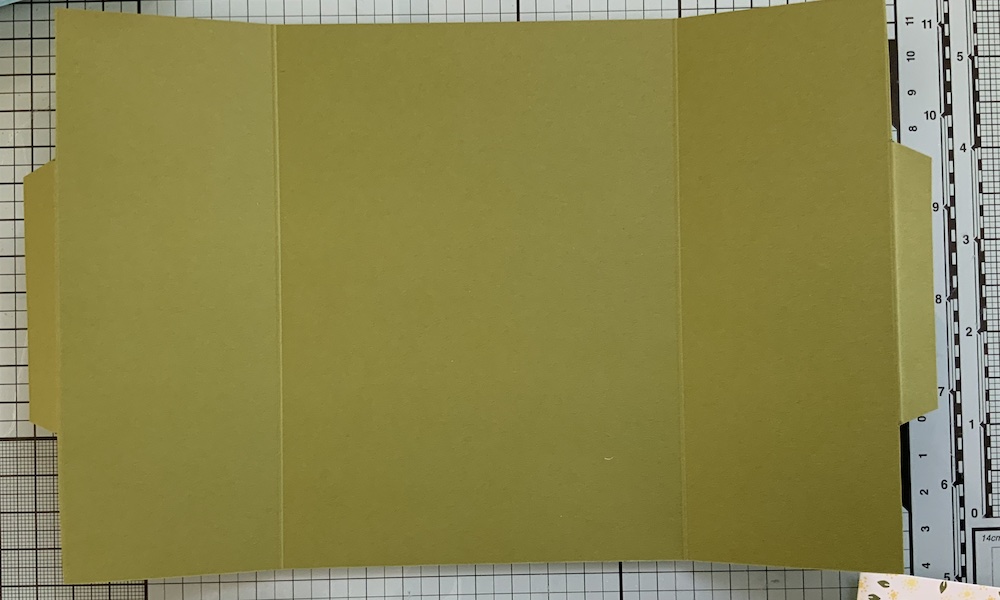
Score the main base cardstock on the long side at 1cm and 6.5cm (½” and 2 5/8″) from each end. Fold the inner score line as mountain and the outer one as a valley and burnish well.
Measure 3.8cm (1¾”) in from each outer corner and make a small pencil mark. Cut away these four corners as shown to leave two central tabs:
Adhere the centre panel mat to the centre panel then add the centre DSP panel on top.
Repeat for the two inside side panels.
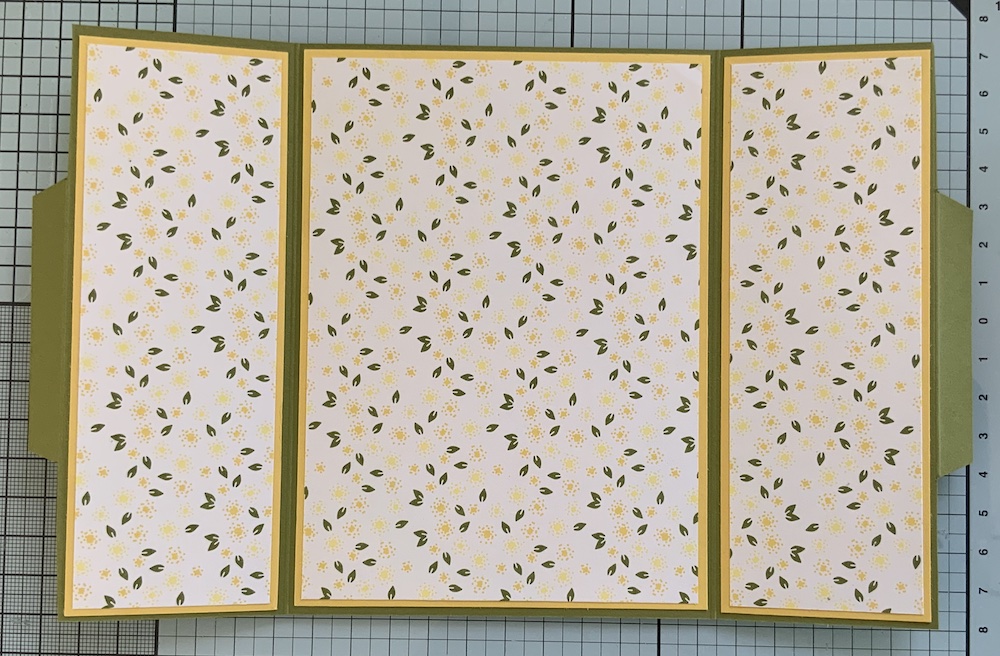
Use the final two mats for the outside side panels and add the chosen DSP on top. This completes the base card.
For the inner card, score on the long side at 5.5cm and 11cm (2 1/8″ and 4¼”) from each end. Fold as mountain, valley, valley and mountain and burnish well.
Stick the Daffodil Delight cardstock centre mat to the centre panel. Adhere the four smaller mats to the four other panels.
Adhere the DSP pieces to the outer mats.
Stamp your chosen decoration on the two side pieces of Basic White and colour as necessary. I used the Layering Leaves stamp set.
Stamp your chosen sentiment on the centre panel, decorate if you wish, then adhere all these panels to your card.
Align your inner card on top of the base card so it lies centrally to form the double gatefold card. Add glue to the back of the centre panel only and stick in place centrally onto the back panel of the base card (you can just see my pencil mark below).
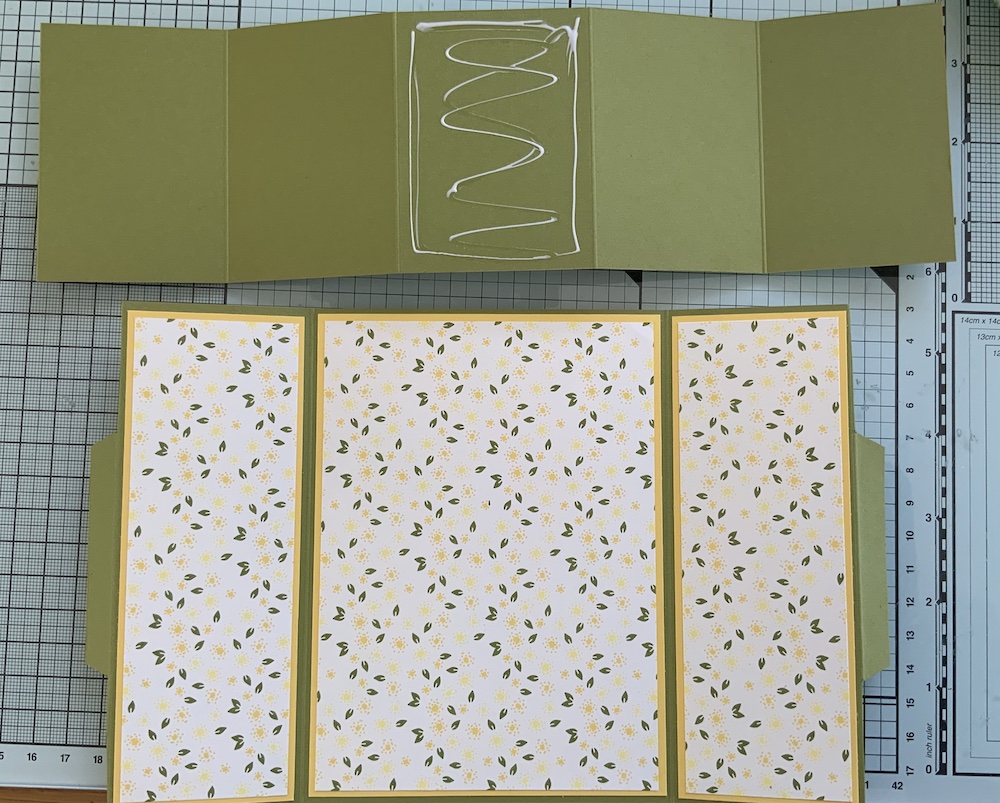
Fold your double gatefold card closed. Add glue to the remaining tabs on the edges of the base card.
Fold the right-hand tab back so it sticks behind the right hand inner card front panel. and stick the left one behind the left-hand (front) panel. Test that the card still opens and closes correctly. See the video if you are unsure.
Stamp your chosen sentiment for the outside of the card on a scrap of Basic White then trim, die-cut or fussy cut. I punched it out, added a coloured edge and an Old Olive mat behind it – see the video for details.
Add to the left hand front panel of the inner card.
Add any further decoration you want. I added a cheeky flower image from a new bundle which will be in the annual catalogue in May (see it in the video below)! You could also add some gems if you wish, but use flat ones as the card already has quite a bit of bulk.
You may wish to add a belly band if posting this card as it does have a tendency to spring open due to its bulk.
Don’t forget to decorate your envelope!
Here is the video from the Craft with Carol Live of making this card. Please join me on my Youtube channel or Facebook page (@craftycarolscards) every Tuesday at 2pm for more fun crafting,
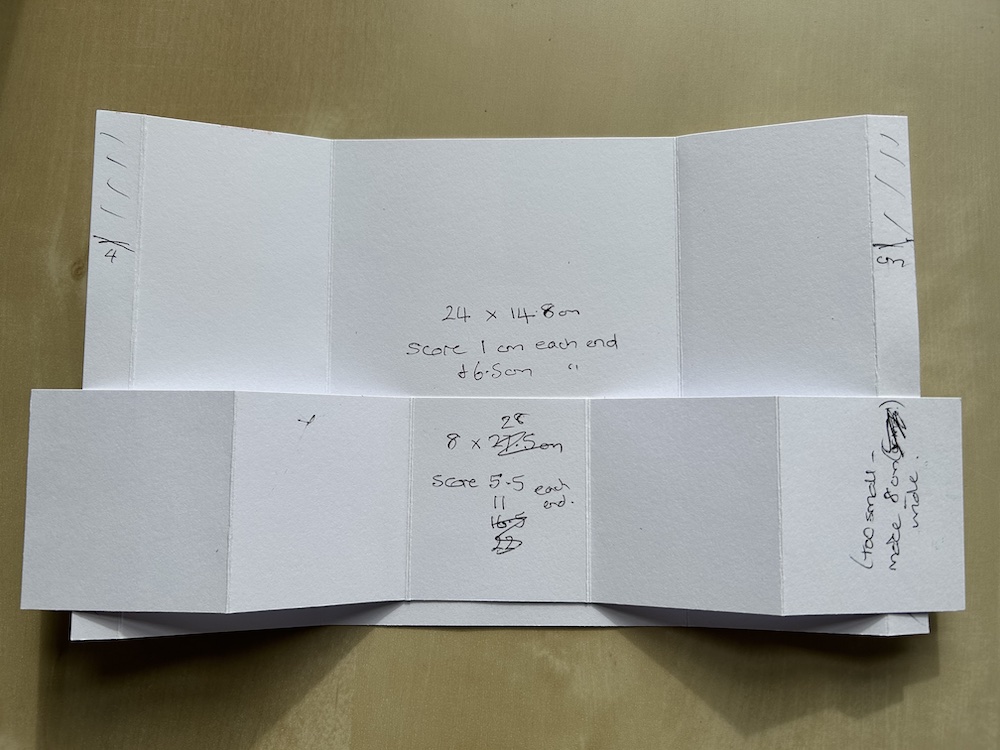
I also wanted to share how I work out UK measurements for a new card – I make myself a template. I start working from my basic UK card size of 10.5cm wide and 14.8cm tall. I work out roughly how big the constituent pieces then need to be, then I use some old card or paper to make up the fold. I can then play around with it and adjust as necessary.
Here are my “working out” pieces for this card so you can see what I mean!
Please now go and look at the other gorgeous cards my fellow blog hoppers have made using the links below.
I hope you like this card and will have a go at making one – please show me what you come up with.
Thank you for taking the time to read my post.

Don’t forget – you get a FREE pdf when you place any order with me as your demonstrator. And, if your order is over £40, you will also get to choose stuff from my online shop to the value of your order!
Product List ![Old Olive A4 Card Stock [ 106576 ]](https://assets1.tamsnetwork.com/images/EC042017NF/106576s.jpg "Old Olive A4 Card Stock [ 106576 ]") | ![Daffodil Delight A4 Card Stock [ 121680 ]](https://assets1.tamsnetwork.com/images/EC042017NF/121680s.jpg "Daffodil Delight A4 Card Stock [ 121680 ]") | ![Basic White A4 Cardstock [ 166781 ]](https://assets1.tamsnetwork.com/images/EC042017NF/166781s.jpg "Basic White A4 Cardstock [ 166781 ]") | ||
![Old Olive Classic Stampin' Pad [ 147090 ]](https://assets1.tamsnetwork.com/images/EC042017NF/147090s.jpg "Old Olive Classic Stampin' Pad [ 147090 ]") | ![Tuxedo Black Memento Ink Pad [ 132708 ]](https://assets1.tamsnetwork.com/images/EC042017NF/132708s.jpg "Tuxedo Black Memento Ink Pad [ 132708 ]") | ![Multipurpose Liquid Glue [ 154974 ]](https://assets1.tamsnetwork.com/images/EC042017NF/154974s.jpg "Multipurpose Liquid Glue [ 154974 ]") |
![Layering Leaves Photopolymer Stamp Set (English) [ 161277 ]](https://assets1.tamsnetwork.com/images/EC042017NF/161277s.jpg "Layering Leaves Photopolymer Stamp Set (English) [ 161277 ]")
![Floral Delight 12" X 12" (30.5 X 30.5 Cm) Designer Series Paper [ 164700 ]](https://assets1.tamsnetwork.com/images/EC042017NF/164700s.jpg "Floral Delight 12\" X 12\" (30.5 X 30.5 Cm) Designer Series Paper [ 164700 ]")
![Daffodil Delight Classic Stampin' Pad [ 147094 ]](https://assets1.tamsnetwork.com/images/EC042017NF/147094s.jpg "Daffodil Delight Classic Stampin' Pad [ 147094 ]")


Wow! loving the card
Thanks Elaine!
Sorry I’m a bit late hopping around – love this fold and love how you decorated yours. I did mine with the Wildflower bundle. Beautiful as always. Tfs.