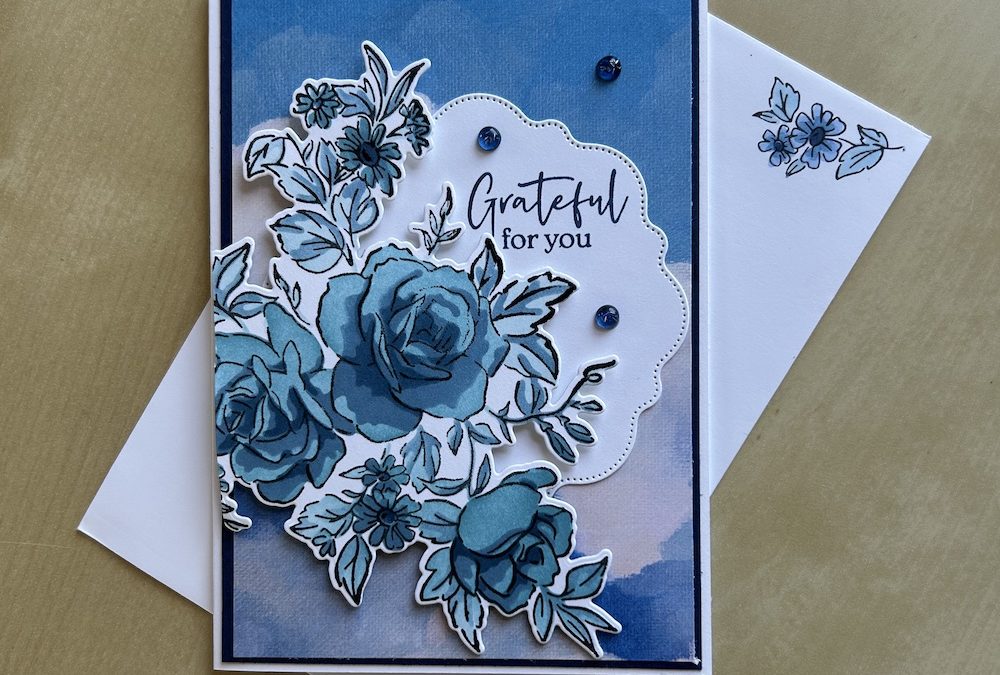
This month the T4S blog hop theme is Blue and White combo. I love mixing my colours, so this was quite a challenge for me. I decided to use FOUR of our many blue colours in this card. I have made it a Grateful for you card, but it could be made for any occasion.

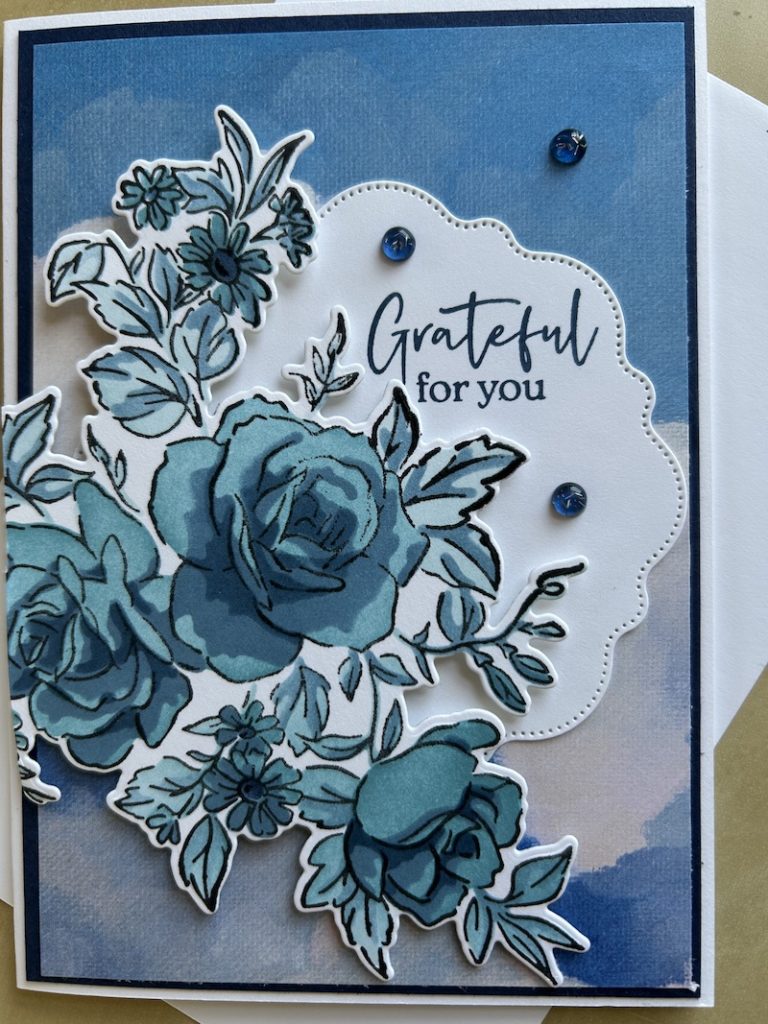
I decided to use the gorgeous Layers of Beauty bundle, with the lovely stamp set, dies, and masks and a background using Everyday Skies Designer Series Paper. I also added a die-cut from the Thoughtful Expressions dies. Here is a closer look at the front of the card – the masks make colouring so easy and so effective:
To make this Blue & White combo card you will need:
- Basic White card base 21cm x 14.8cm (8½” x 5½”)
- Night of Navy panel 10cm x 14.3cm (4” x 5¼”)
- Everyday Skies DSP 9.5cm x 13.8cm (3¾” x 5”)
- Basic White piece for die-cutting and stamping 21cm x 10cm
- Basic White scrap for sentiment if required
- Memento, Misty Moonlight, Boho Blue and Balmy Blue ink pads
- Some gems
Instructions:
1. Score the base card at 10.5cm (4¼”), fold and burnish well.
2. Adhere the Night of Navy panel then the DSP panel to the front of the card.
3. Die-cut the largest Thoughful Expressions shaped circle die from one edge of the Basic White panel. Adhere centrally to the card front.
4. Stamp the image in Memento ink onto the remaining Basic White piece.
5. Use blending brushes and the masks to colour the image, starting with Balmy Blue for the flower mask 1, then adding Boho Blue for the second flower mask 2, then Misty Moonlight for the final mask 3. I used Balmy Blue for the first leaves mask 4 then added Boho Blue on the second leaves mask 5. Or you can leave the leaves uncoloured if blue leaves are a step too far for you!.
6. When colouring is complete, die cut this while flower piece.
7. Stamp your chosen sentiment directly to the top right of the die-cut shaped circle in Misty Moonlight. (If you prefer, stamp onto a scrap of Basic White then fussy cut.)
8. Add your flower die-cut on the side and bottom left hand side of the card front as shown in the picture using dimensionals. Trim off any parts that overlap the edge of the card.
9. Add the sentiment if using a separate one.
10. Finish the blue & white combo card by adding a few gems. (If you don’t have any blue gems, colour some clear or irridescent gems using your markers.)
Don’t forget to decorate your envelope! I stamped the small flower and leaves image from the Layers of Beauty set to decorate mine.
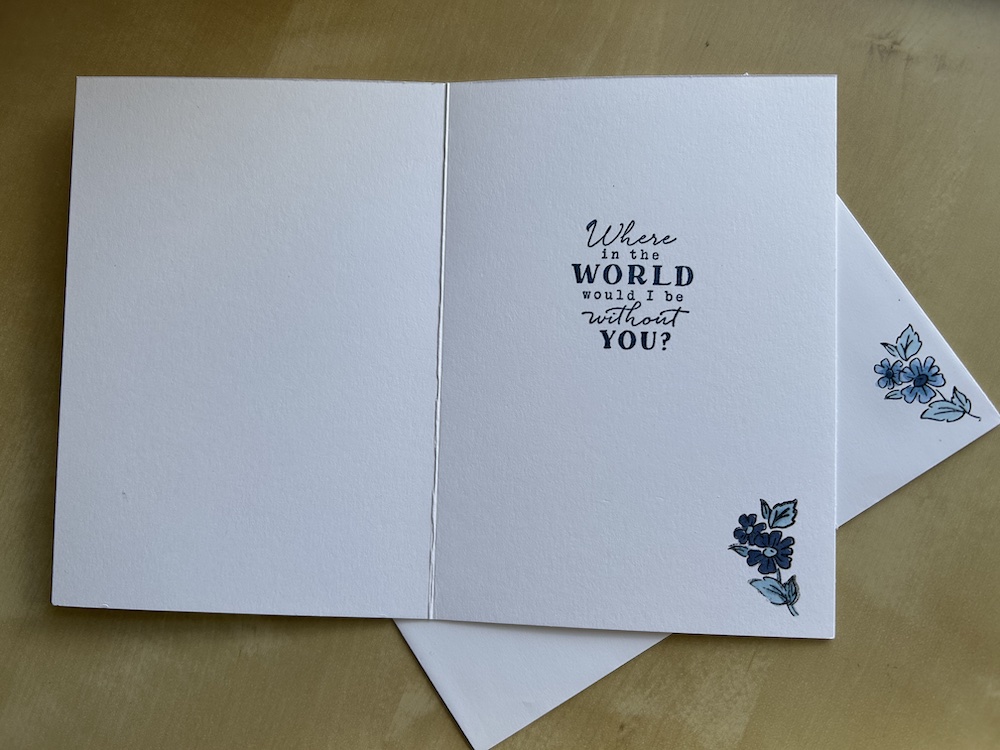
I also used the same stamp for inside the card, coloured with Stampin’ Blends adn added a sentiment from the Thoughtful Expressions stamp set. But I couldn’t decide which mix of colours I liked best for this flower stamp, sop I used different ones on the card and on the envelope. What do you think?
Here is the video of how to make this Blue & White combo card:
The links for the products I used are listed below.
Please now check out the wonderful blue & white projects made by my fellow T4S stampers via the links below.
See you again soon!
Thank you for taking the time to read my post.

Don’t forget – you get a FREE tutorial of eight cards when you place an order with me. There’s a different set every month. And, if your order is over £40, you will also get to choose stuff from my online shop to the value of your order!
Product List ") |  |  | ||
 |  |  |  |
 Designer Series Paper")


I love your card Carol.
Beautiful card, Carol, as always. tfs
Beautiful card and great to have the video along with the instructions