Another month, another T4S blog hop! This month’s theme is Nature, which gives a lot of scope for different cards! I wanted to use the gorgeous Lovely Garden DSP as my background and the Spotlight on Nature bundle for decoration.

I decided to use the Spotlight on Nature bundle for my fun Z-fold nature card as this bundle has the gorgeous Spotlight on Nature stamp set and a set of stunning circle dies. (You could also use the Stylish Shapes or any other circle dies.)
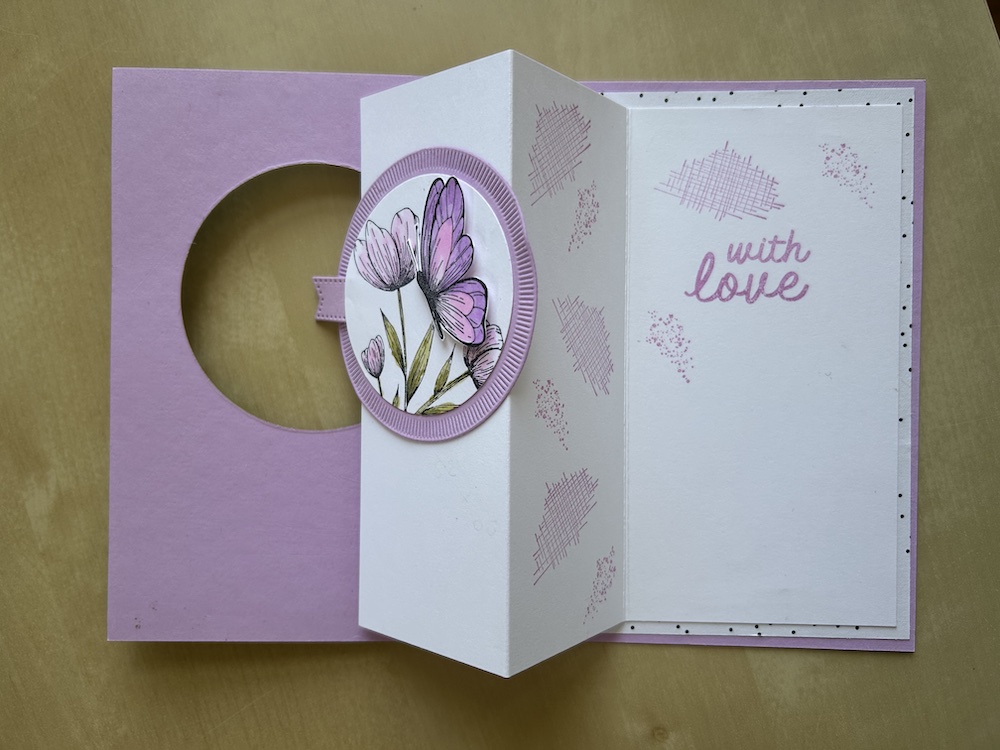
This fun Z-fold card has a tab that when pulled opens the card. The circle slots through the opening on the front of the card as shown:
To make my Z-fold nature card you will need:
- Fresh Freesia card base 21cm x 14.8cm scored at 10.5cm (8½” x 5½” scored at 4¼”)
- Lovely Garden DSP 1 front: 10cm x 14.3cm (3¼” x 5″)
- Lovely Garden DSP 2 inside: 10cm x 14.3cm (2″ x 5½”)
- Basic White card 17cm x 13.5cm (6 ¾” x 5”)
- Spotlight on Nature (or Stylish Shapes) dies
- Scraps of Basic White and Fresh Freesia for decoration
Here are the pieces I used:

Instructions
Score and burnish the card base.
Add glue only to the outside edges of the DSP 1 front piece and stick to your card front.
Place a middle-sized Spotlight on Nature (or Stylish Shapes) circle die in the centre upper half of your nature card front and die-cut out. Keep the card circle, but you can throw the DSP circle away or use it elsewhere.
Adhere the second piece of DSP to the inside back of the card.
Score the Basic White piece on the long side at 5cm and 10cm (2″ and 4″). Fold into a Z shape and burnish.
Stamp any sentiment or decoration you wish on the back and middle panel of this piece.
Add glue to the back of the back panel and stick to the inside back of your base card, placing it just inside the back right-hand side edge, ensuring that there is the same gap above, below and to the right-hand side – check the video if you are unsure.
Close your nature card. Add glue only to the part of the Z-fold piece that shows through the front aperture. Stick the colour die-cut circle on top, fitting it carefully into the aperture. Check that the card opens without the circle catching on the edge.
Punch a 2¼” circle from Basic White. Stamp your choice of image onto this circle and colour using Stampin Blends. I stamped the Spotlight on Nature flower. I also stamped the butterfly from the Spotlight on Nature stamp set onto another scrap of Basic White and cut it out.
Die-cut or fussy cut a small banner piece and stick behind the left-hand edge of your punched circle.
Stick your completed punched circle to the centre of the die-cut circle either flat or using dimensionals. Pulling the tab will open the fun Z-fold nature card.
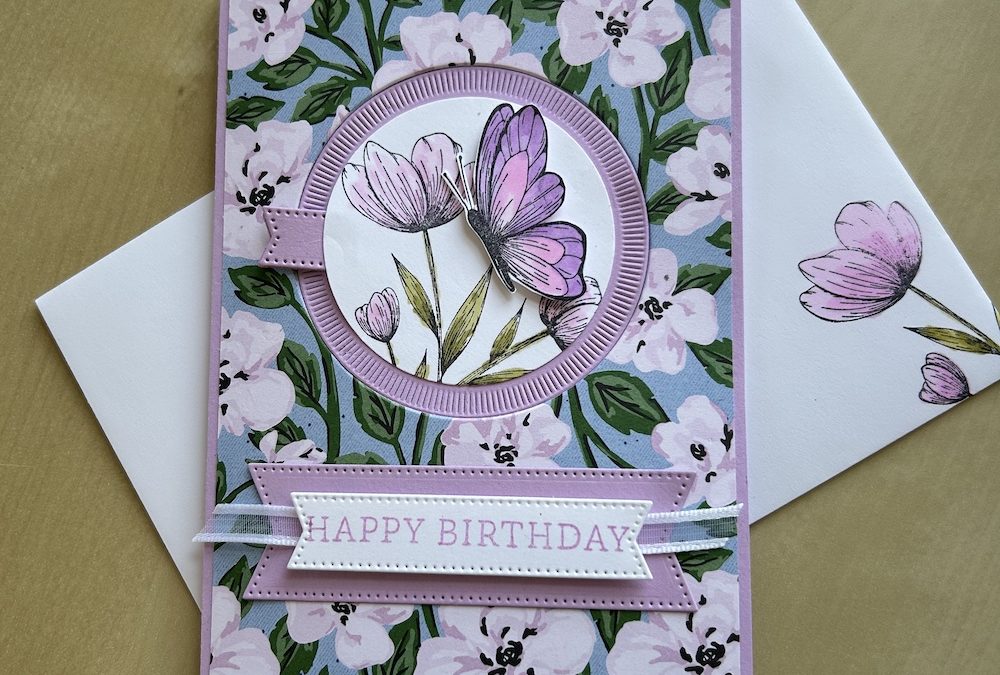
Stamp your sentiment on a scrap of Basic White. Add to a layer of Fresh Freesia and stick to the front of your card using dimensionals. You can add some gems or ribbon if you wish.
Don’t forget to decorate your envelope! I used some DSP to line the envelope flap and stamped the front.
Here’s the video from my Live today on how to make this fun Z-fold nature card:
Please now go and look at the other gorgeous cards my fellow blog hoppers have made using the links below.
I hope you like this card and will have a go at making one – please show me what you come up with.
Thank you for taking the time to read my post.

Don’t forget – you get a FREE pdf when you place any order with me as your demonstrator. And, if your order is over £40, you will also get to choose stuff from my online shop to the value of your order!
Product List ![Spotlight On Nature Bundle [ 163581 ]](https://assets1.tamsnetwork.com/images/EC042017NF/163581s.jpg "Spotlight On Nature Bundle [ 163581 ]") | ![Stylish Shapes Dies [ 159183 ]](https://assets1.tamsnetwork.com/images/EC042017NF/159183s.jpg "Stylish Shapes Dies [ 159183 ]") | ![Fresh Freesia A4 Cardstock [ 155614 ]](https://assets1.tamsnetwork.com/images/EC042017NF/155614s.jpg "Fresh Freesia A4 Cardstock [ 155614 ]") | ![Basic White A4 Cardstock [ 166781 ]](https://assets1.tamsnetwork.com/images/EC042017NF/166781s.jpg "Basic White A4 Cardstock [ 166781 ]") | |
![2 1/4" (5.7 Cm) Circle Punch [ 143720 ]](https://assets1.tamsnetwork.com/images/EC042017NF/143720s.jpg "2 1/4\" (5.7 Cm) Circle Punch [ 143720 ]") | ![Tuxedo Black Memento Ink Pad [ 132708 ]](https://assets1.tamsnetwork.com/images/EC042017NF/132708s.jpg "Tuxedo Black Memento Ink Pad [ 132708 ]") | ![Stampin' Cut & Emboss Machine [ 149653 ]](https://assets1.tamsnetwork.com/images/EC042017NF/149653s.jpg "Stampin' Cut & Emboss Machine [ 149653 ]") |
![Lovely Garden 12" X 12" (30.5 X 30.5 Cm) Designer Series Paper [ 165524 ]](https://assets1.tamsnetwork.com/images/EC042017NF/165524s.jpg "Lovely Garden 12\" X 12\" (30.5 X 30.5 Cm) Designer Series Paper [ 165524 ]")
![Fresh Freesia Classic Stampin' Pad [ 155611 ]](https://assets1.tamsnetwork.com/images/EC042017NF/155611s.jpg "Fresh Freesia Classic Stampin' Pad [ 155611 ]")


What a fabulous fancy fold! Love it. x
Thanks Leighsa. It’s fun to make!
Beautiful card Carol! The colors are amazing!