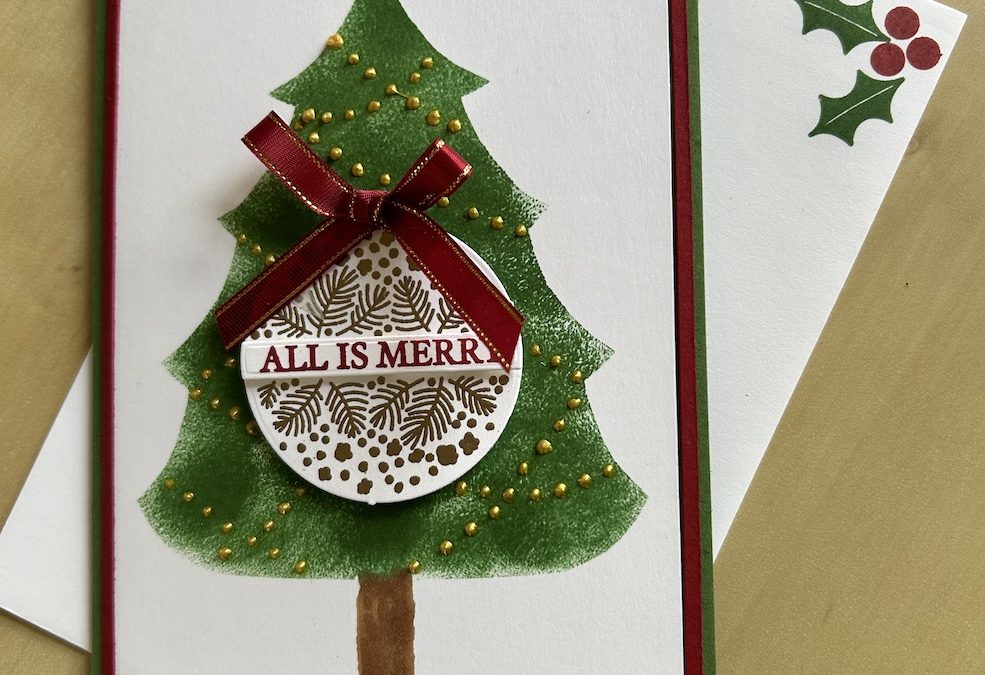
For today’s live, I decided to show how to make a simple Christmas tree stencil card and how to use it in two different ways. I also used the Hang an Ornament stamp bundle of stamp set and dies, the gorgeous Cherry Cobbler and Gold ribbon and Garden Green and Cherry Cobbler ink.
To make this card you need:
- Garden Green card base 21cm x 14.8cm scored at 10.5cm (8½” x 5½” scored at 4¼”)
- Cherry Cobbler panel 10cm x 14.3cm (4” x 5¼”)
- Basic White panels x 2: 9.5cm x 13.8cm (3¾” x 5”)
- Piece of copy paper 9.5cm x 13.8cm (3¾” x 5”)
- Basic White scrap approx 7.5cm x 7.5cm (3″ x 3″)
- Basic White small stsrip for sentiment
- Cherry Cobbler and Gold Ribbon
- Blending brush
- Garden Green and Cherry Cobbler ink pads
- Gold embossing powder
The instructions are given below and/or you can watch the video at the bottom of this post or on my YouTube channel @craftycarolscards – and please subscribe!
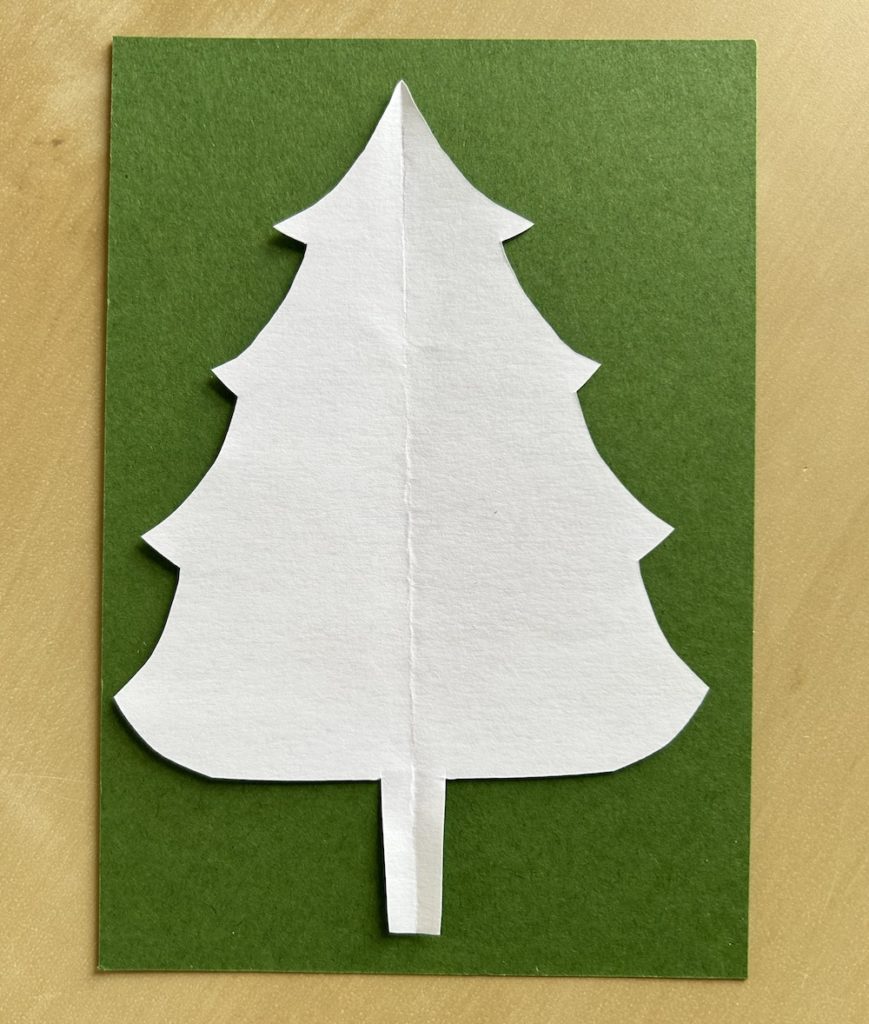
Fold the copy paper in half lengthways. Draw the outline of a Christmas tree on one half, making sure not to allow any branches to touch the edge of the paper. Draw a small trunk at the bottom but not touching the edge. Carefully cut out around the outline through the double-folded paper to produce a symmetrical Christmas tree “hole” and a separate tree.
You can then use the stencil in two ways. One way is to place the stencil over a piece of coloured cardstock 9.5cm x 13.8cm (3¾” x 5”) and use it to draw around a tree you can then cut out.

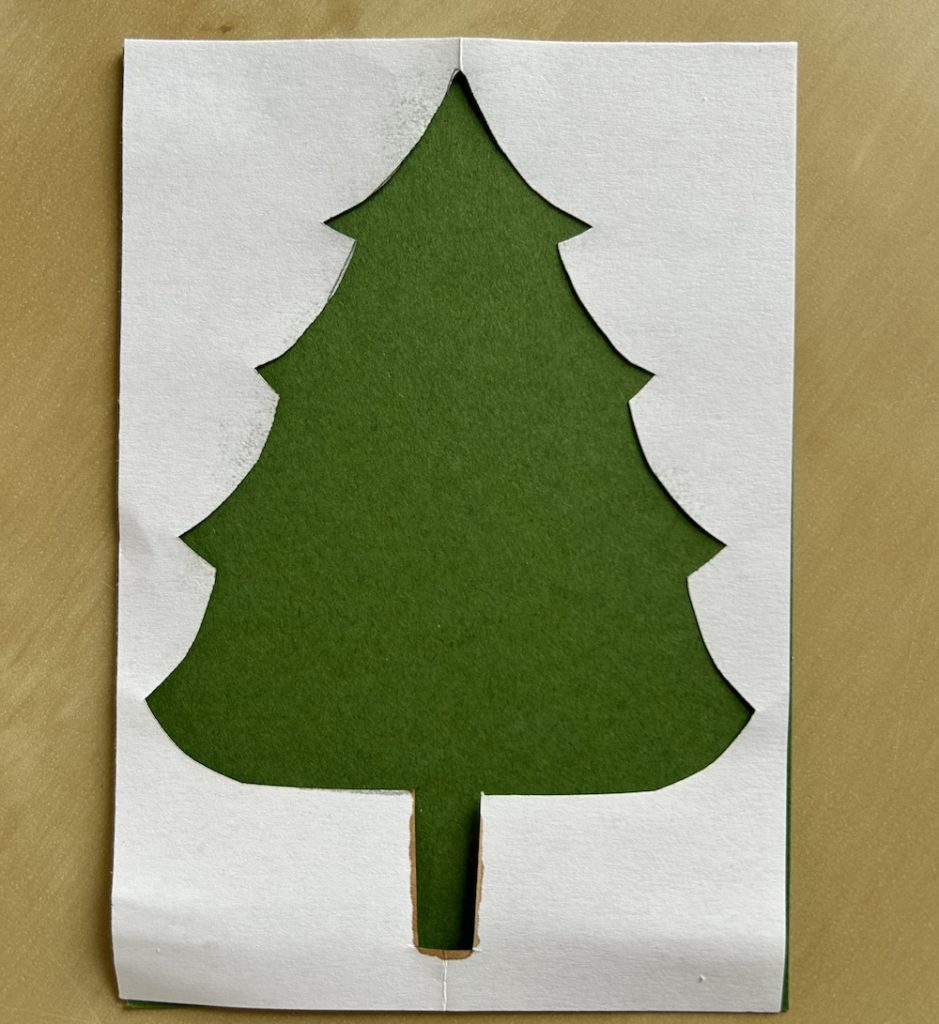
Or use the negative cut to make a blended ink tree as I did.
Fix the stencil over one Basic White panel (shown here against colour so you can see it!). I used temporary adhesive to hold it in place. Load your blending brush with Garden Green ink and dab it all over the tree to give a rough covering – see the video if you are not sure about this. This gives texture to the tree, rather than the smooth colour you get using the blending brush in the normal way. Colour the trunk brown either in the same way using a second blending brush, or use a marker or blend.

Stamp your ornament in Versamark on the embossed-buddied Basic White square and emboss in gold embossing powder. Stamp the sentiment in Cherry Cobbler on the scrap of Basic White. Die cut both out.
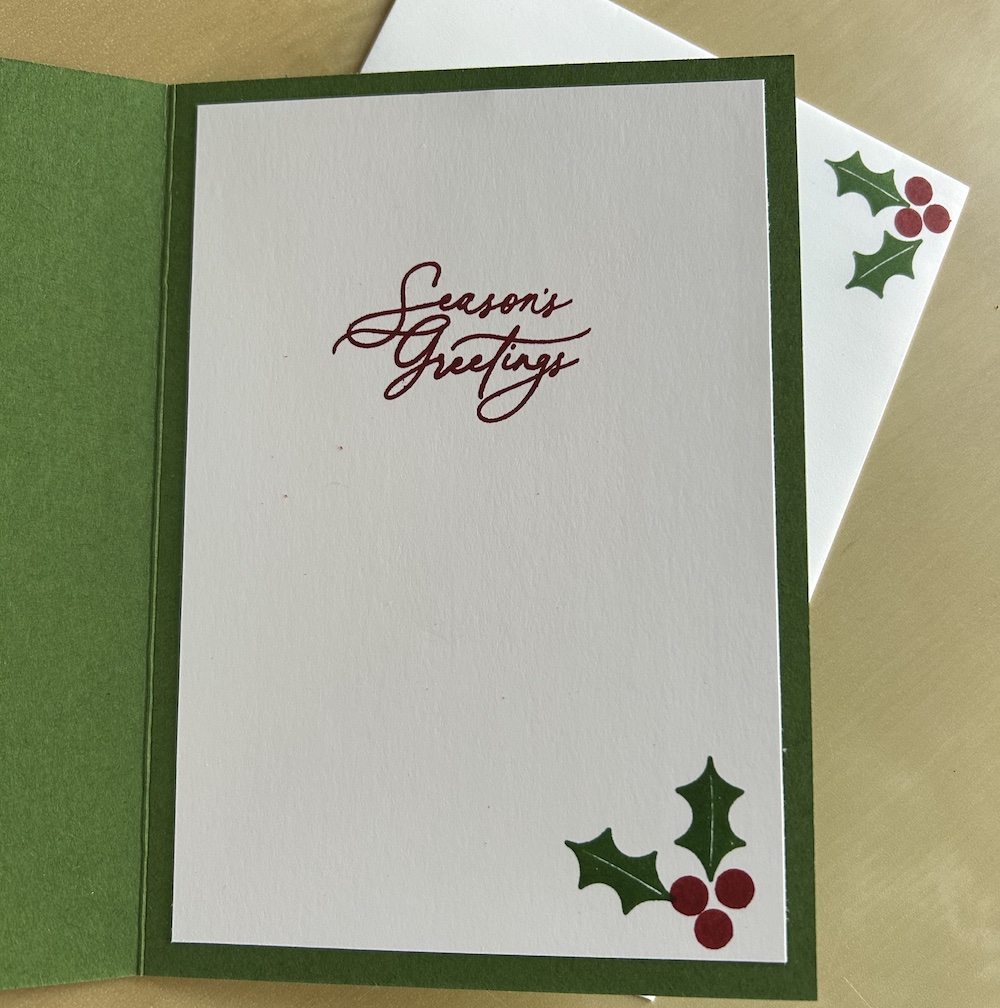
Finish the inside panel by stamping a greeting (I used Seasons Greetings from the Greetings of the Season stamp set) and decorate the inside with a stamped holly cluster, which can also be used to decorate the envelope.

Stick the Cherry Cobbler panel to the card front. Add your tree panel on top. (NB I forgot the Cherry Cobbler panel in the video but I did add it afterwards!)
Add the die-cut ornament to the tree centre using dimensionals. Add the sentiment strip across the ornament again with dimensionals.
Tie a bow in Cherry Cobbler and Gold ribbon and add to the top of the ornament using a glue dot.
Finish the card by adding some metallic gold enamel effects dots as lines of lights across the tree. Do this last so you can then leave the card to dry completely!
Here is the video:
I hope you like this card and will have a go at making one – please show me what you come up with.
Thank you for taking the time to read my post.

Don’t forget – you get a FREE pdf when you place any order with me as your demonstrator. And, if your order is over £40, you will also get to choose stuff from my online shop to the value of your order!
Product List

![Hang An Ornament Bundle (English) [ 164090 ] Hang An Ornament Bundle (English) [ 164090 ]](https://assets1.tamsnetwork.com/images/EC042017NF/164090s.jpg)
![Greetings Of The Season Photopolymer Stamp Set (English) [ 164325 ] Greetings Of The Season Photopolymer Stamp Set (English) [ 164325 ]](https://assets1.tamsnetwork.com/images/EC042017NF/164325s.jpg)
![Cherry Cobbler & Gold 1/4" (6.4 Mm) Satin Ribbon [ 164028 ] Cherry Cobbler & Gold 1/4" (6.4 Mm) Satin Ribbon [ 164028 ]](https://assets1.tamsnetwork.com/images/EC042017NF/164028s.jpg)
![Metallic Enamel Effects Basics [ 161610 ] Metallic Enamel Effects Basics [ 161610 ]](https://assets1.tamsnetwork.com/images/EC042017NF/161610s.jpg)
![Garden Green A4 Card Stock [ 108605 ] Garden Green A4 Card Stock [ 108605 ]](https://assets1.tamsnetwork.com/images/EC042017NF/108605s.jpg)
![Cherry Cobbler A4 Card Stock [ 121681 ] Cherry Cobbler A4 Card Stock [ 121681 ]](https://assets1.tamsnetwork.com/images/EC042017NF/121681s.jpg)
![Basic White A4 Cardstock [ 159228 ] Basic White A4 Cardstock [ 159228 ]](https://assets1.tamsnetwork.com/images/EC042017NF/159228s.jpg)
![Garden Green Classic Stampin' Pad [ 147089 ] Garden Green Classic Stampin' Pad [ 147089 ]](https://assets1.tamsnetwork.com/images/EC042017NF/147089s.jpg)
![Cherry Cobbler Classic Stampin' Pad [ 147083 ] Cherry Cobbler Classic Stampin' Pad [ 147083 ]](https://assets1.tamsnetwork.com/images/EC042017NF/147083s.jpg)
![Blending Brushes [ 153611 ] Blending Brushes [ 153611 ]](https://assets1.tamsnetwork.com/images/EC042017NF/153611s.jpg)

