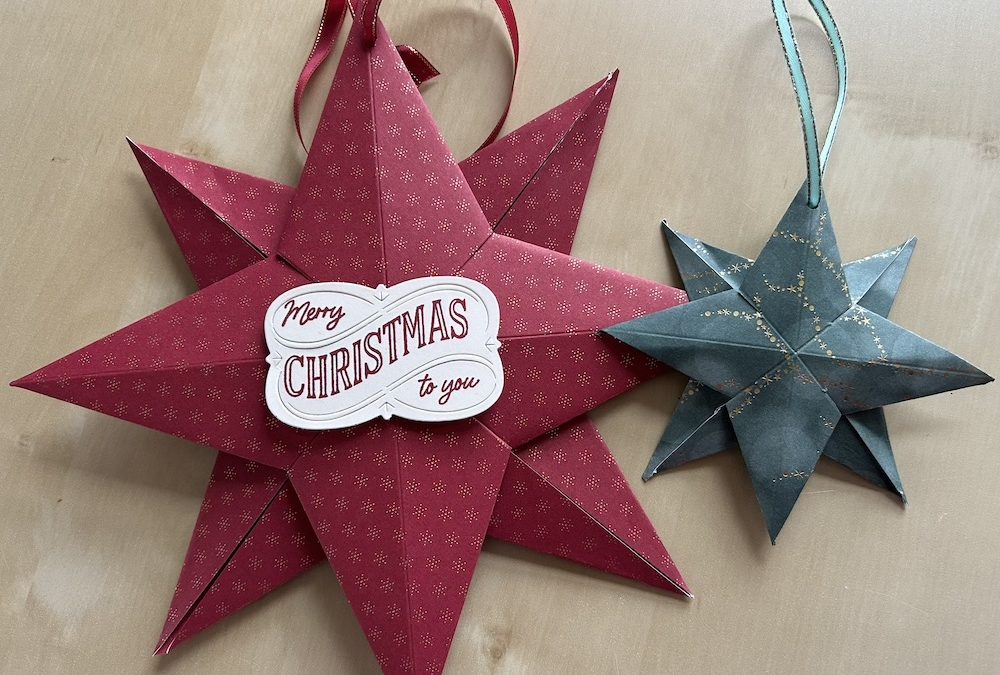
I made these fun fold stars for the second project in week 10 of my Christmas Countdown. I can’t decide whether to call them star ornaments or decorations! We made these at my FREE Craftalong yesterday – why not join us next month? Sign up for my emails to get the list of all the supplies you need to make the projects each month.
These stars (ornaments/decorations) are so easy to make and a great way to use up some DSP as they take just two sheets of 6” x 6” paper. Choose a patterned paper that does not have a directional pattern. I used the old retired Lights Aglow DSP for mine. You can add an optional decoration to the front as well if you wish.
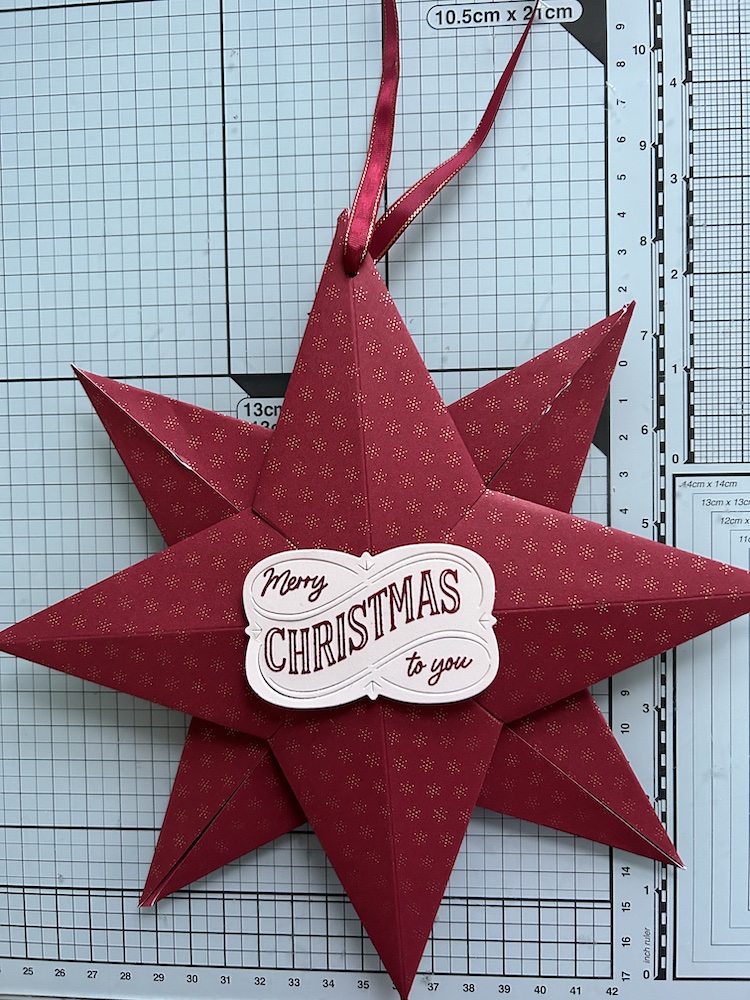
You can make the large stars using two 6″ x 6″ sheets of DSP as in the video, or make small stars using half a sheet of DSP (two 3″ x 3″ pieces). I have written a pdf with full and detailed instructions for both – find this in my online store.
To make the stars:
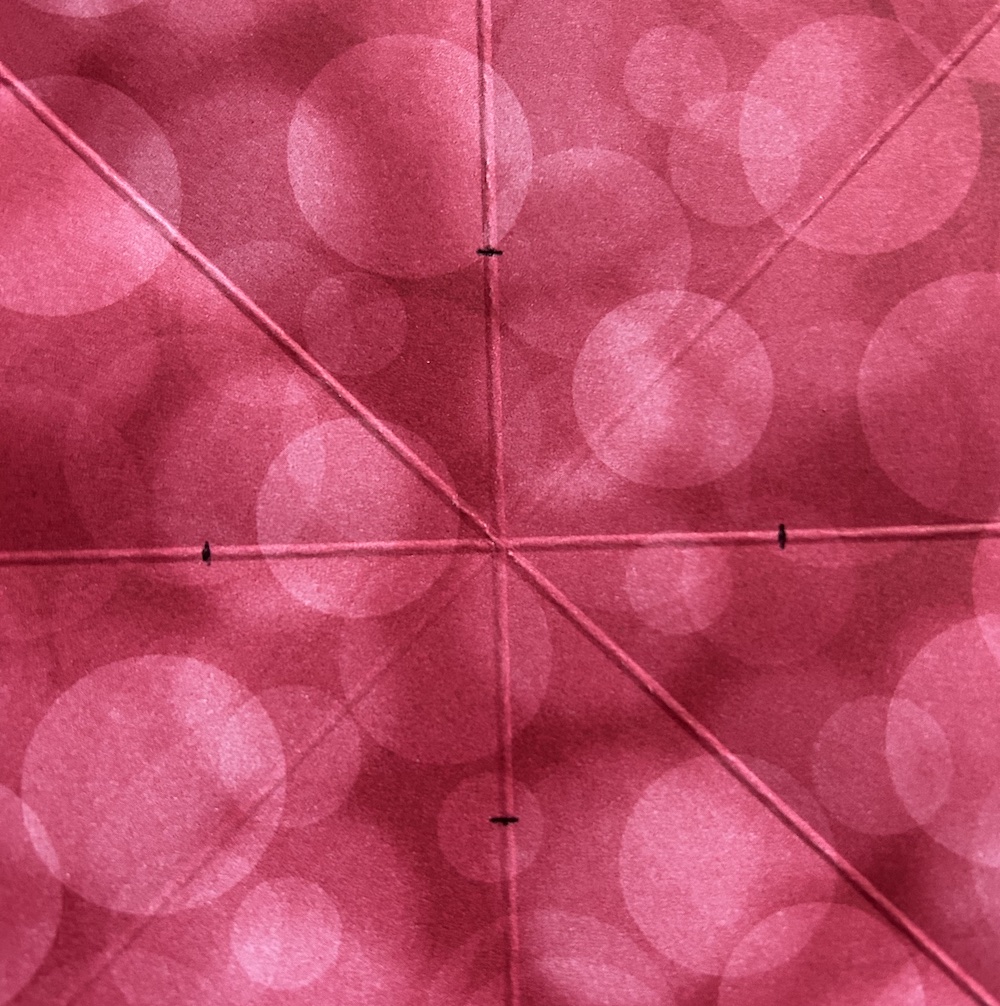
Score each sheet of DSP on both diagonals and at 3″ (1 1/2″ for the small stars) on both sides.
Use a ruler to mark at 2″ down (1″ for the small stars) on the score line on each side of the paper (not on the diagonal score lines):
Cut from each edge to the score line.
Fold back each cut segment so that the edge touches the diagonal score line, carefully creating a sharp point at the top. Burnish well:
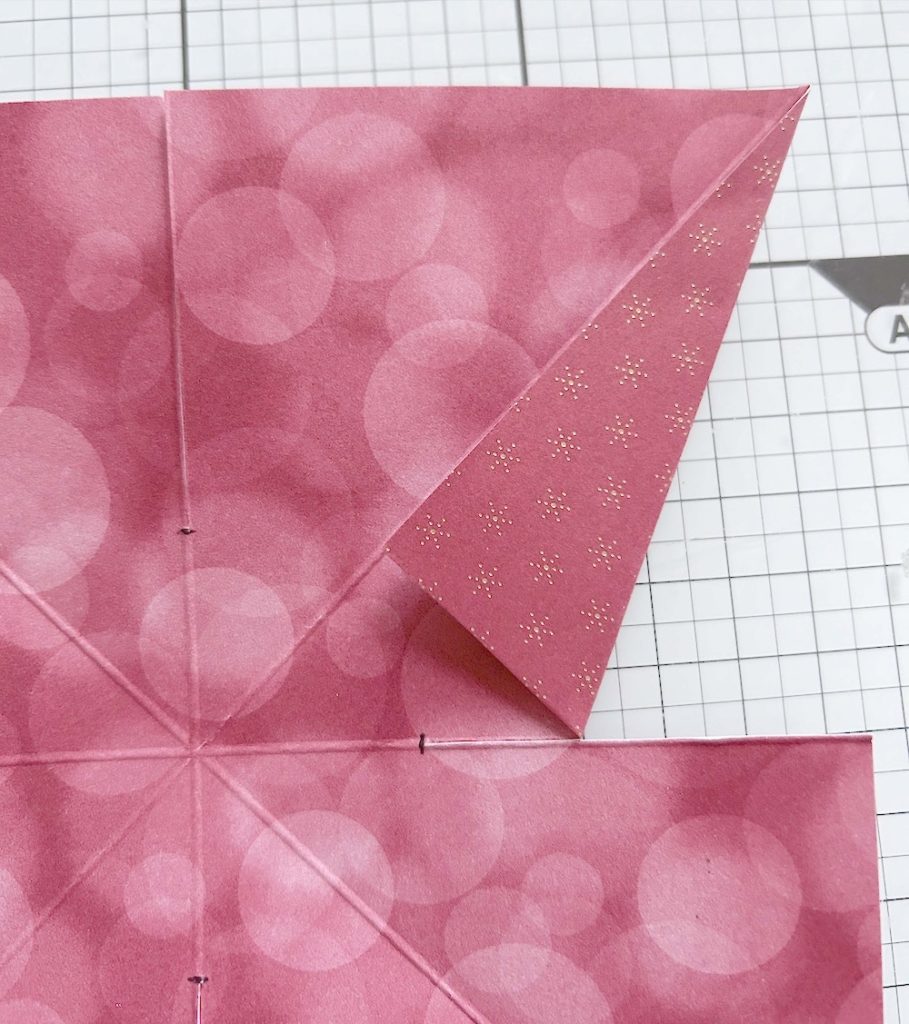
Repeat this fold seven times more to form the four corners. You can stick these flaps down using glue if you wish but I found they stayed well folded enough not to bother.
Fold outwards across the diagonal score lines to shape your star.
Repeat this whole process with the second sheet.
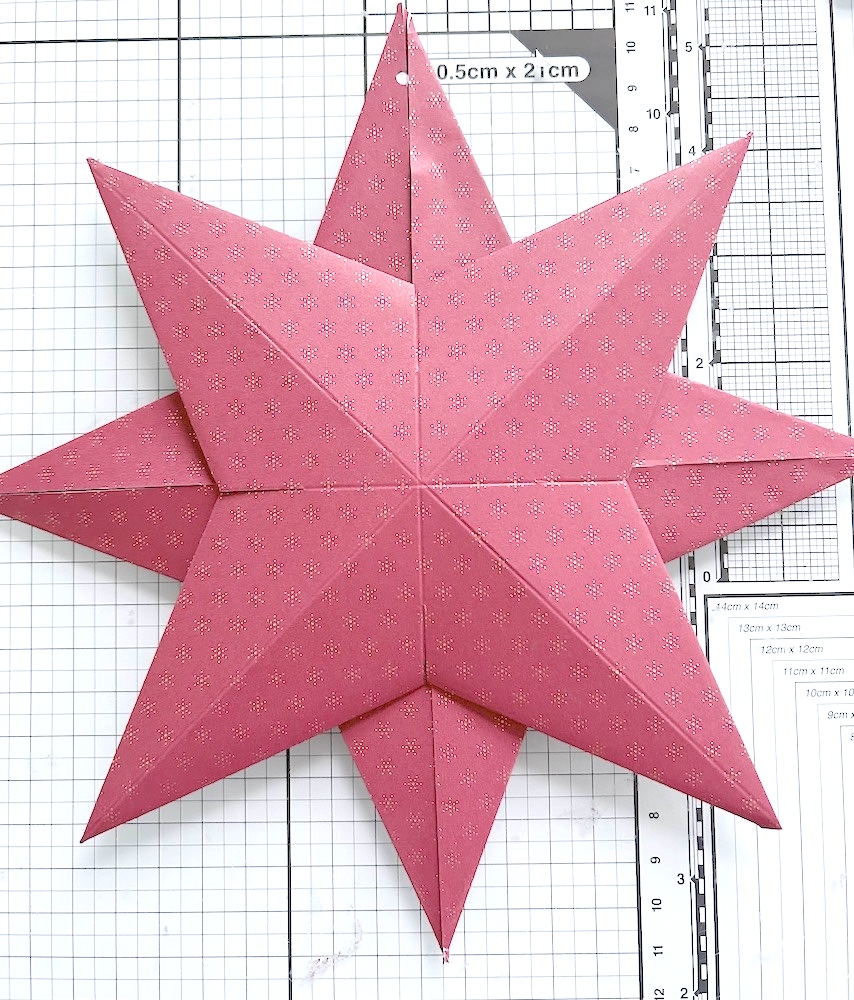
Add bulk to the centre using a small piece of foam or several dimensionals together and stick the two stars to each other to form your eight pointed star.
Punch a small hole at the end of one point and add approx 16″ of ribbon. Tie in a knot and use to hang your stars.
Add a die-cut sentiment if you wish.
Here is the video:
The smaller stars are great for adding to your Christmas tree. I’m using the large ones to hang over my fireplace.
I hope you have a go at making these stars! Let me know.
Thank you for taking the time to read my post.

Don’t forget – you get a FREE tutorial of eight cards when you place an order with me. There’s a different set every month. And, if your order is over £40, you will also get to choose stuff from my online shop to the value of your order!
Product List  |  |  |
 Specialty Designer Series Paper")

