Christmas is coming! I I plan to put up my tree next week, so I wanted to make some pretty decorations.
In today’s post and video, I show you how to make a beautiful star decoration out of just one sheet of 6” x 6” DSP. This star can be used either as a decoration, as a present topper or even as a table centrepiece – your choice! Thank you to my lovely upline Gillian who showed me how to make them.
It seems incredible, but these stars really are made from just one small sheet of DSP. Choose a sheet that has a pleasant and contrasting but coordinating coloured pattern on the reverse side – directional or stripy-type patterns won’t usually look good.
Watch the video to best see how to make these lovely stars, but I have included instructions below too.
Instructions
First cut your DSP into twelve 1/2” strips. Try and cut them as carefully as you can, but if they are not exactly even it won’t matter too much. Split the strips into two piles of six.
Both sides of the star are made in the same way. If using speciality, shiny DSP I found it best to use tiny pieces of tear’n’tape to stick down the crossing strips, otherwise Tombow works well.
Take two strips and fold them in half. Open them up and then stick them together with the folds in the middle into a cross shape.
Lay your cross so the cross piece goes above the upright element. Take another strip and lay it upright to the right of the middle upright piece leaving just a tiny gap between these two upright pieces. Stick it down to the crosspiece.
Add the next strip upright to the left of the centre upright strip. Stick it to the centre crosspiece. You should now have three upright strips and one cross piece.
Turn it so the three strips are lying across your mat and the original crosspiece becomes a centre upright strip.
Take your next strip and weave it (over, under, over) through the three crosspieces to the right of the new centre strip. Stick it down to all three pieces. Add another strip in the same way to the right of your centre strip.
You now have one side of your star prepared.
To form the points, take two adjacent strips at one corner. Curl them gently with your fingers to loosen the paper, then bend each strip, turning it at the top so that the pattern on the back of the DSP faces to the front. Stick the two ends together to form a point – see the video if you are unclear how to do this. You will need to hold the point for a few seconds to make sure it is sticking.
Repeat for the other three corners. One side is now complete. You will have a piece with four pointed corners and two pieces forming a cross in the centre.
Make up the second six strips in the same way to form the second side for your star.
Now place the stars together, back to back, turning one through 45 degrees, so that each centre cross ends line up with a point on the opposite side.
Weave each strip through its corresponding point and stick down, being careful to ensure they are in the centre of the point.
Trim the tiny excess bits to recreate each point.
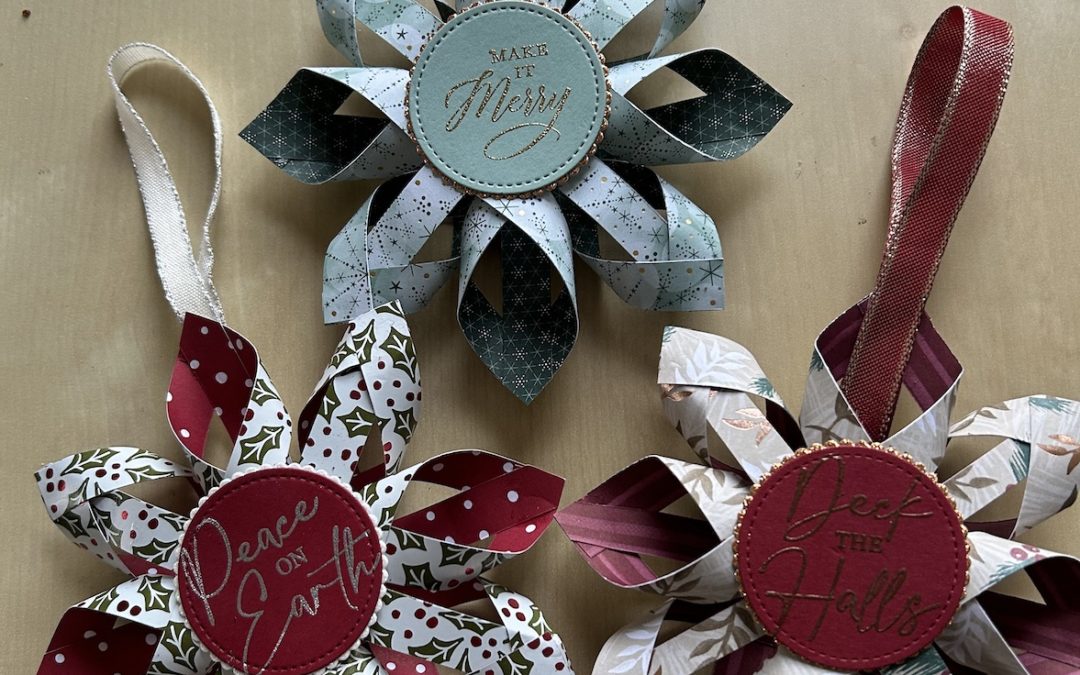
Make up the centre as you wish. I used a retired scalloped circle die to cut a glimmer paper element then I added a coordinating die cut stitched circle for the centre. (You could use two sizes of stitched shapes instead.)
I embossed a sentiment in a metallic embossing powder on the cardstock circle (from the Christmas Classics stamp set), stuck it on the glimmer paper, then added it to the star using one dimensional. Put your finger carefully through one point to help add the centre embellishment so you don’t squash your star.
If you wish to hang up your star, add a piece of ribbon to one point, otherwise you can use it as a present topper or table centre as it is.
I hope you have a go at this project. They are great fun to make and look so pretty!
Product List  |  |  |  |  |
 |
")
 Specialty Paper")

