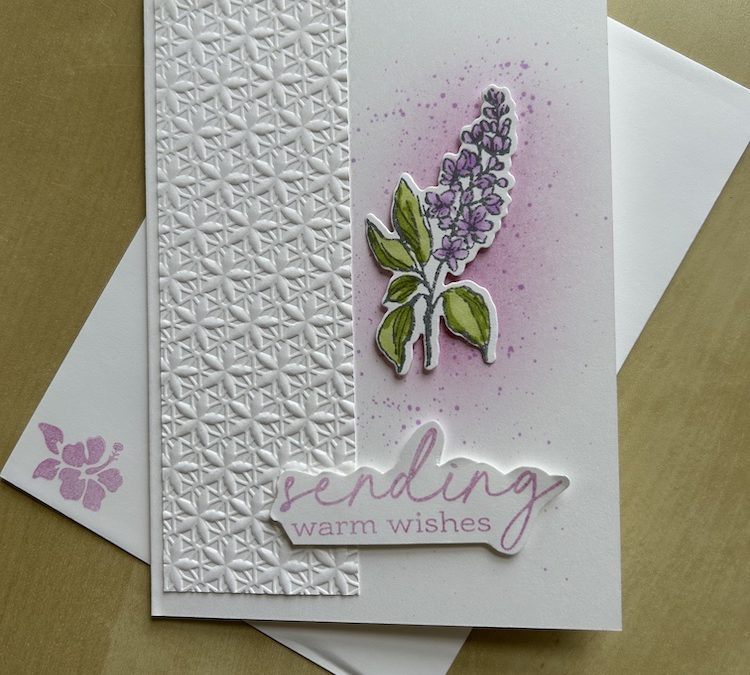
We made this splatter card in the free Craftalong on Zoom today. I run a free online class on the first Thursday of every month. Sign up for my emails below to ensure you get all the information for next month of you missed today’s class! This type of card can be made for any occasion.
I added some blended ink to the splatter card base to provide a colour base, then used the same colour Stampin’ Blend to flick splatters of colour over the top. The flower and the sentiment are both from new stamp sets/bundles from the new annual catalogue, starting from 6th May, Gallery Blooms and Notes & Totes. Let me know if you’d like a copy of the catalogue or see it by clicking on the icon on the Home Page.
To make this splatter card you will need:
- Basic White card base 21cm x 14.8cm (8 1/2“ x 5 1/2”)
- Basic White panel 4.5cm x 13.8cm (1 3/4” x 5 1/4”)
- Scraps of Basic White to fit a medium size image and a sentiment of your choice
- Memento ink pad
- Fresh Freesia or your own colour ink pad
- Fresh Freesia or your own colour blend combo pack
- Granny Apple Green or a second colour blend combo pack
- Blending brush
- Snips
- Envelope
Score the card base at 10.5cm (4¼”), fold and burnish.
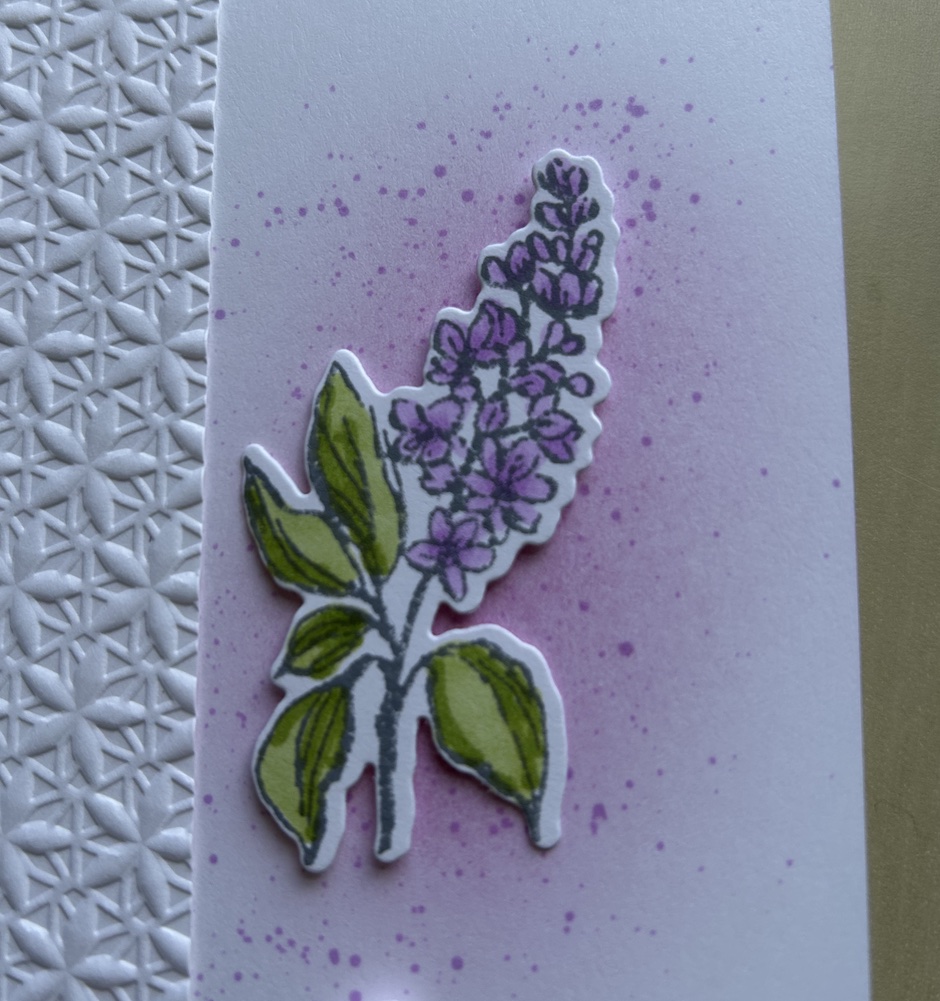
Use a bending brush to pick up your chosen colour ink from the ink pad and blend-colour an area on the right top half of the card front. The area coloured needs to be big enough to show behind the image you have chosen.
Using your Take a Pick tool, gently flick the brush end of the same colour Stampin Blend or Stampin Write marker across the pick end of the tool to produce splatters of colour across the area blended. The close-up below shows the effect you are aiming for to produce the splatter card.
Run your Basic White panel through your Cut’n’Emboss machine using your favourite embossing folder. I used the Fun Patterns embossing folder. Adhere this to the left-hand front of your card.
Stamp your image in Memento ink onto a scrap of Basic White. Coliur using your chosen blends and cut out.
Add on top of your coloured/splattered area using dimensionals.
Stamp your chosen sentiment in your chosen colour ink onto another scrap of Basic White. Carefully cut out around the letters and words. Add to the bottom of your card using dimensionals.
I decided not to use any ribbon or gems as it would take away from the splatter that I wanted to be the centrepiece, but you can add some if you want!
Stamp a greeting inside your splatter card if you wish, using the same colour ink and decorate with a small image stamp if you wish.
Don’t forget to decorate your envelope!
I hope you like this card and will have a go at making one – please show me what you come up with.
Thank you for taking the time to read my post.

Don’t forget – you get a FREE pdf when you place any order with me as your demonstrator. And, if your order is over £40, you will also get to choose stuff from my online shop to the value of your order!
Product List ![Fun Patterns Embossing Folders [ 163790 ]](https://assets1.tamsnetwork.com/images/EC042017NF/163790s.jpg "Fun Patterns Embossing Folders [ 163790 ]") | ![Basic White A4 Cardstock [ 166781 ]](https://assets1.tamsnetwork.com/images/EC042017NF/166781s.jpg "Basic White A4 Cardstock [ 166781 ]") | ![Blending Brushes [ 153611 ]](https://assets1.tamsnetwork.com/images/EC042017NF/153611s.jpg "Blending Brushes [ 153611 ]") | ||
![Tuxedo Black Memento Ink Pad [ 132708 ]](https://assets1.tamsnetwork.com/images/EC042017NF/132708s.jpg "Tuxedo Black Memento Ink Pad [ 132708 ]") | ![Mini Stampin' Cut & Emboss Machine [ 150673 ]](https://assets1.tamsnetwork.com/images/EC042017NF/150673s.jpg "Mini Stampin' Cut & Emboss Machine [ 150673 ]") | ![Paper Trimmer [ 152392 ]](https://assets1.tamsnetwork.com/images/EC042017NF/152392s.jpg "Paper Trimmer [ 152392 ]") | ![Stampin' Dimensionals [ 104430 ]](https://assets1.tamsnetwork.com/images/EC042017NF/104430s.jpg "Stampin' Dimensionals [ 104430 ]") |
![Fresh Freesia Classic Stampin' Pad [ 155611 ]](https://assets1.tamsnetwork.com/images/EC042017NF/155611s.jpg "Fresh Freesia Classic Stampin' Pad [ 155611 ]")
![Fresh Freesia Stampin' Blends Combo Pack [ 155518 ]](https://assets1.tamsnetwork.com/images/EC042017NF/155518s.jpg "Fresh Freesia Stampin' Blends Combo Pack [ 155518 ]")
![Granny Apple Green Stampin' Blends Combo Pack [ 154885 ]](https://assets1.tamsnetwork.com/images/EC042017NF/154885s.jpg "Granny Apple Green Stampin' Blends Combo Pack [ 154885 ]")

