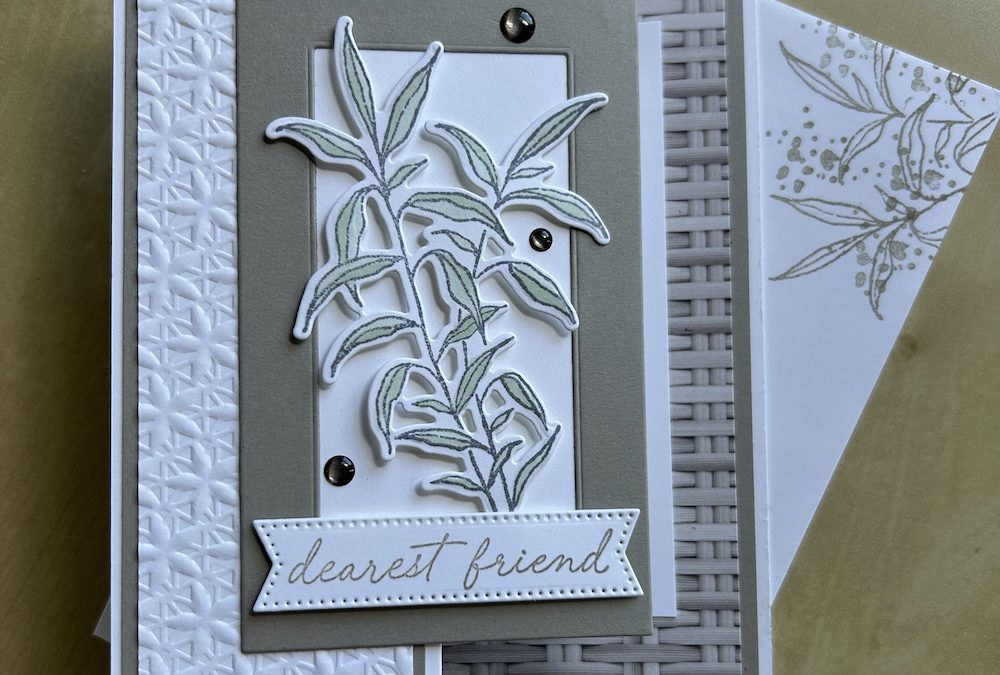
This card uses probably the simplest fun fold there is! The front half of the card is folded back on itself, a very simple fun fold card to make. The decoration uses a lot of pieces so it looks more complicated than it is. I first made this card at our crafty team group get-together, made by the lovely Ann Scott.
The beauty of this card is that it can be made for any occasion.
I’ve used the Gallery Blooms dies to create a frame for the front of the card and decorated it using the Thoughtful Wishes bundle and some of the gorgeous Woven Textures Designer Series Paper. I used the Stylish Shapes dies for cutting out the sentiment and some just retired 23-25 In Color gems for decoration.
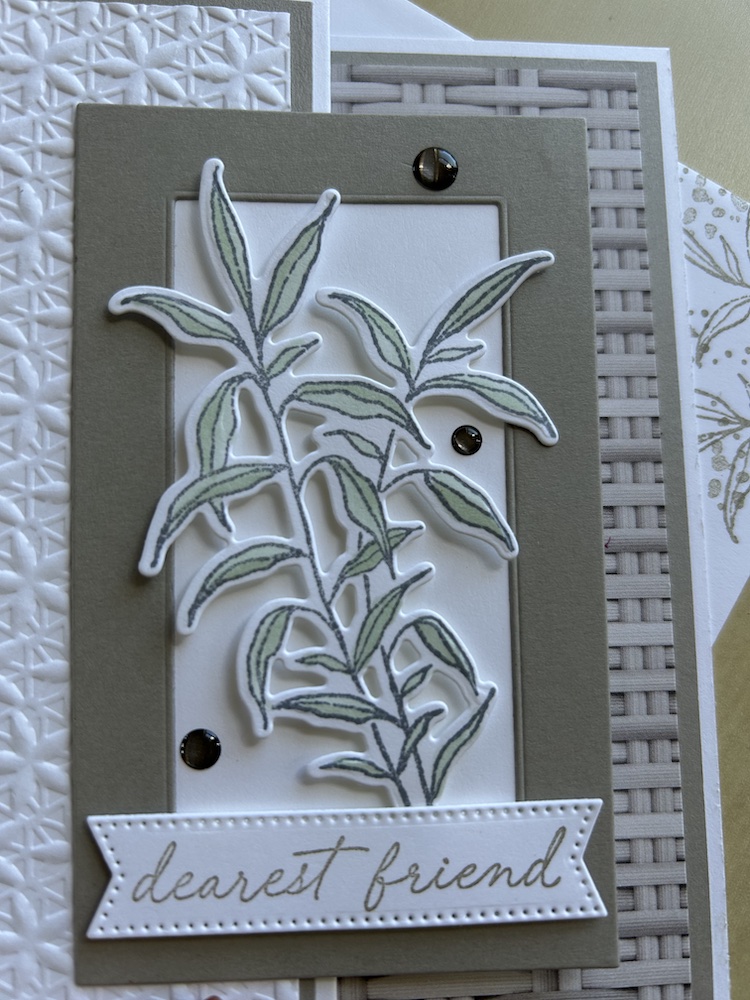
Here is a close-up of the front of the card. Instructions are given below and there is a video at the end of the post showing how to make this simple fun fold card.
To make this card you will need:
- Basic White card base 21cm x 14.8cm (8½” x 5½”)
- Gray Granite card 10cm x 14.3cm (4” x 5¼”)
- Woven Textures DSP 9.5cm x 13.8cm (3¾” x 5”)
- Basic White panel for inside card: 7cm x 11cm (2¾” x 4”)
- Gray Granite panels (x2): 4.8cm x 14.3cm (2″ x 5¼”)
- Basic White panels (x2): 4.4cm x 13.8cm (1¾” x 5″)
- Gray Granite for frame: 7.5cm x 12cm (3″ x 5″)
- Basic White for frame: 6cm x 10cm (2″ x 3¾”)
- Pieces of Basic White for stamping image and sentiment
- Soft Sea Foam Stampin’ Blends
- An embossing folder of your choice
Instructions are given here and/or watch the video below.
Score the Basic White card base at 5.25cm (2 1/8″) and 10.5cm (4¼”). Fold the centre fold inwards then the outer fold outwards and burnish well. This forms the simple fun fold.
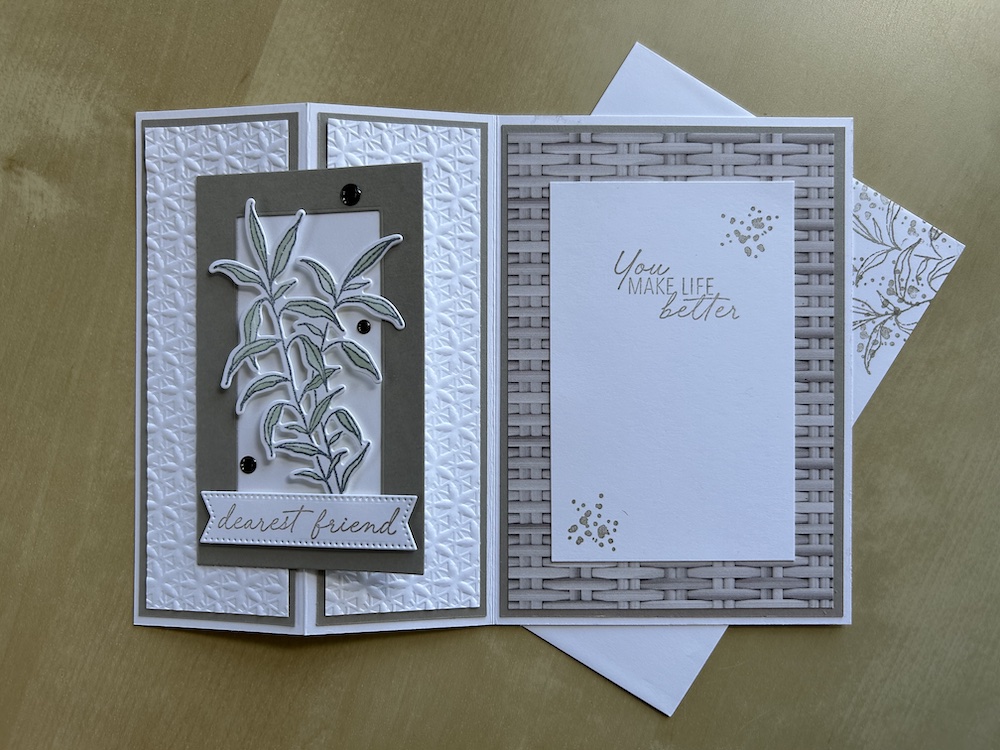
Adhere the DSP to the Gray Granite layer and add to the back panel of the card.
Stamp a sentiment, and decoration if desired, in Gray Granite ink on the inner Basic White piece. Stick this to the back of the card so that it sits centrally on the back panel.
Emboss the two Basic White panels using an embossing folder of your choice – I used one of the Basic Embossing Folders.
Layer these embossed panels onto the Gray Granite panels and adhere to the front and short inside panels of your card base.
Die-cut the smaller frame from the Gray Granite piece using the Gallery Blooms die. Add a thin line of glue around the back of the frame and stick the Basic White frame piece to it leaving the same size border all round.
Add glue only to the left hand reverse side of the completed frame and stick this to the right-hand panel of the fun fold card so that it sits centrally and lies over the inside Basic White panel.
Stamp the Thoughtful Wishes leaf stamp on a scrap of Basic White. Colour using the Soft Sea Foam Stampin’ Blends combo pack and die-cut out.
Add to the frame using dimensionals.
Stamp your chosen sentiment in Gray Granite ink on another scrap of Basic White. Cut out – I used the Stylish Shape die and the partial die-cutting technique to make it the size I wanted (see Tuesday’s video for this technique.). Add to the frame area using dimensionals.
Here is the finished card lying open:
Add a few gems to finish your card.
Don’t forget to decorate your envelope!
Here is the video on how to make this simple fun fold card:
I hope you like this card and will have a go at making one – please show me what you come up with.
Thank you for taking the time to read my post.

Don’t forget – you get a FREE pdf when you place any order with me as your demonstrator. And, if your order is over £40, you will also get to choose stuff from my online shop to the value of your order!
Product List ![Gallery Blooms Bundle [ 165213 ]](https://assets1.tamsnetwork.com/images/EC042017NF/165213s.jpg "Gallery Blooms Bundle [ 165213 ]") | ![Thoughtful Wishes Bundle (English) [ 163314 ]](https://assets1.tamsnetwork.com/images/EC042017NF/163314s.jpg "Thoughtful Wishes Bundle (English) [ 163314 ]") | ![Basics 3 D Embossing Folders [ 161598 ]](https://assets1.tamsnetwork.com/images/EC042017NF/161598s.jpg "Basics 3 D Embossing Folders [ 161598 ]") | ![Gray Granite A4 Cardstock [ 147008 ]](https://assets1.tamsnetwork.com/images/EC042017NF/147008s.jpg "Gray Granite A4 Cardstock [ 147008 ]") | |
![Basic White A4 Cardstock [ 166781 ]](https://assets1.tamsnetwork.com/images/EC042017NF/166781s.jpg "Basic White A4 Cardstock [ 166781 ]") | ![Faceted Gems Trio Pack [ 162148 ]](https://assets1.tamsnetwork.com/images/EC042017NF/162148s.jpg "Faceted Gems Trio Pack [ 162148 ]") |
![Woven Textures 12" X 12" (30.5 X 30.5 Cm) Designer Series Paper [ 165560 ]](https://assets1.tamsnetwork.com/images/EC042017NF/165560s.jpg "Woven Textures 12\" X 12\" (30.5 X 30.5 Cm) Designer Series Paper [ 165560 ]")
![Soft Sea Foam Stampin' Blends Combo Pack [ 154902 ]](https://assets1.tamsnetwork.com/images/EC042017NF/154902s.jpg "Soft Sea Foam Stampin' Blends Combo Pack [ 154902 ]")

