
Here is another card idea using the gorgeous Kintsugi Suite. This suite has the fantastic Kintsugi Inspirations Designer Series Paper, the Inspiring Imperfections stamp set and matching dies, the Joined Together embossing folder and some lovely flower accent gems and I can’t stop playing with it!
I’ve called this card a section card as it uses three sections to add interest to the card front, with a vase and spray decoration on top. As always, you could adapt this to any DSP, cardstock and stamp set you have.
To make this section card you need:
- Cloud Cover base 21cm x 14.8cm scored at 10.5cm (8½” x 5½” scored at 4¼”)
- Cloud Cover panel approx 7cm x 14.3cm (2¾ x 5¼”)
- DSP panel approx 5cm x 14.3cm (2″ x 5¼”)
- Cloud Cover strips x 2: 1cm x 14.3cm (½” x 5¼”)
- Scraps of Petal Pink cardstock (or other contrast cardstock) to match the stamped or die-cut vase you choose
The instructions are given below or see the video at the end of this post.
Emboss the Cloud Cover panel using the Joined Together embossing folder. (If you do not have this folder, any flower or leaf folder would work.)
I added interest by colouring the embossed “cracks” with Wink of Stella, which adds a bit more bling to the card.
Cut this panel in two, making one side slightly bigger than the other,
Stick one strip of Cloud Cover to each panel on the inside – the side that you want to have towards the centre of the card. See the video below if you are not sure.
Place the DSP panel section and the two completed panel sections on your card front and use a pencil to mark where you need your DSP panel section to be. Then stick this down, adding the side sections to each side. (You could use dimensionals to raise each side panel. I stuck mine down flat for depth when posting.)
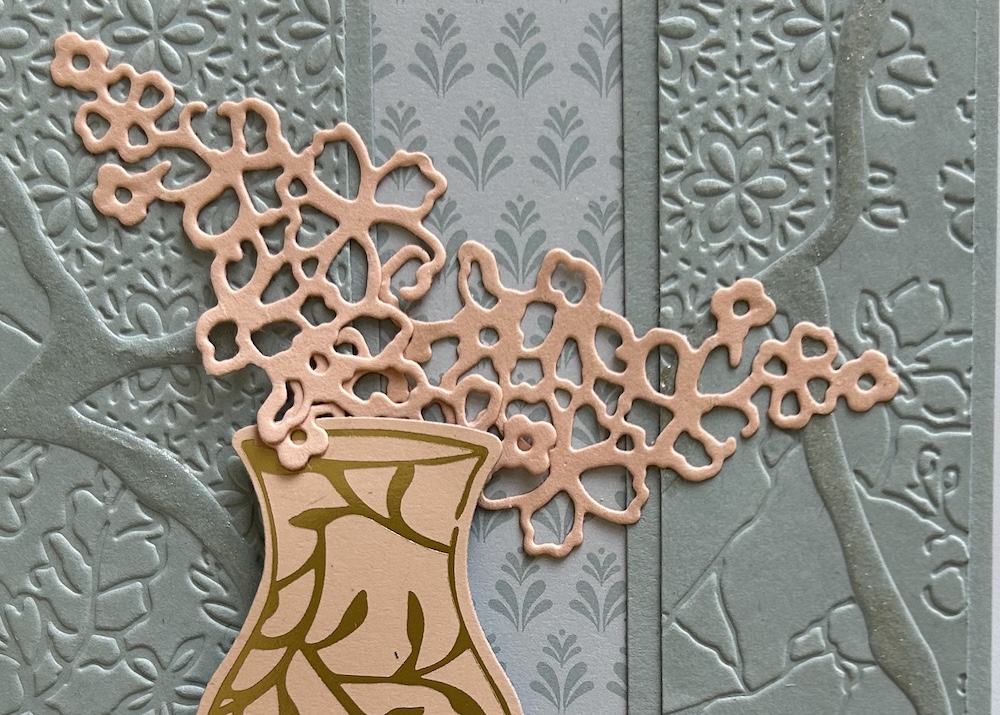
Die-cut a Petal Pink vase from the DSP (or stamp and die-cut). Add to the card front using dimensionals.
Die-cut two flower sprays from Petal Pink cardstock then stick them inside your vase as shown.
I stamped the “thanks” from the larger sentiment in the stamp set in Versamark and heat embossed it with gold embossing powder. I used a post-it note to blank out the remaining part of the sentiment I did not want to use – see the video for how to do this. (Also note – use your embossing buddy! I forgot…)
I trimmed the embossed sentiment, flagged the end and added this under the side of the vase using dimensionals.
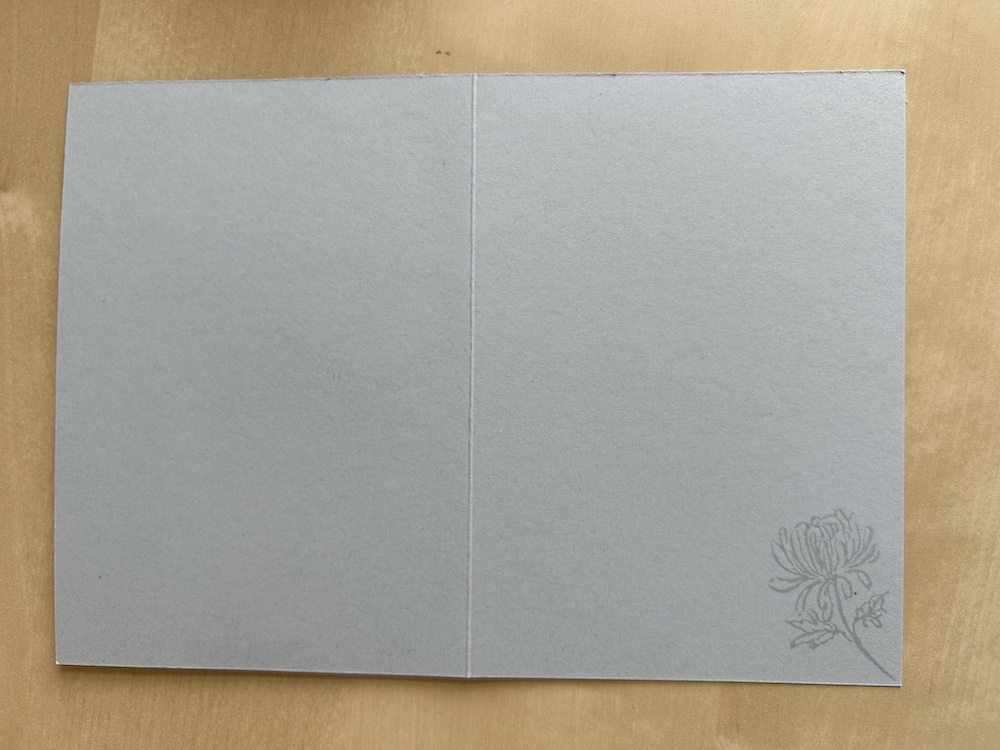
I stamped the flower from the stamp set in Cloud Cover to decorate inside the card and also the envelope.
NOTE: If you do not have the Cloud Cover ink pad, use Misty Moonlight stamped off.
Here is the video of how to make this section card:
I hope you like this card and will have a go at making one – please show me what you come up with.
Thank you for taking the time to read my post.

Don’t forget – you get a FREE pdf when you place any order with me as your demonstrator. And, if your order is over £40, you will also get to choose stuff from my online shop to the value of your order!
Product List ![Cloud Cover A4 Cardstock [ 165293 ]](https://assets1.tamsnetwork.com/images/EC042017NF/165293s.jpg "Cloud Cover A4 Cardstock [ 165293 ]") | ![Petal Pink A4 Cardstock [ 147009 ]](https://assets1.tamsnetwork.com/images/EC042017NF/147009s.jpg "Petal Pink A4 Cardstock [ 147009 ]") | |||
![Metallics Embossing Powders [ 155555 ]](https://assets1.tamsnetwork.com/images/EC042017NF/155555s.jpg "Metallics Embossing Powders [ 155555 ]") | ![Versamark Pad [ 102283 ]](https://assets1.tamsnetwork.com/images/EC042017NF/102283s.jpg "Versamark Pad [ 102283 ]") | ![Paper Trimmer [ 152392 ]](https://assets1.tamsnetwork.com/images/EC042017NF/152392s.jpg "Paper Trimmer [ 152392 ]") | ![Heat Tool - Uk Plug [ 129054 ]](https://assets1.tamsnetwork.com/images/EC042017NF/129054s.jpg "Heat Tool - Uk Plug [ 129054 ]") |
![Kintsugi Inspirations 12" X 12" (30.5 X 30.5 Cm) Specialty Designer Series Paper [ 165159 ]](https://assets1.tamsnetwork.com/images/EC042017NF/165159s.jpg "Kintsugi Inspirations 12\" X 12\" (30.5 X 30.5 Cm) Specialty Designer Series Paper [ 165159 ]")
![Joined Together 3 D Embossing Folder [ 165170 ]](https://assets1.tamsnetwork.com/images/EC042017NF/165170s.jpg "Joined Together 3 D Embossing Folder [ 165170 ]")
![Inspiring Imperfections Bundle (English) [ 165167 ]](https://assets1.tamsnetwork.com/images/EC042017NF/165167s.jpg "Inspiring Imperfections Bundle (English) [ 165167 ]")
![Clear Wink Of Stella Glitter Brush [ 141897 ]](https://assets1.tamsnetwork.com/images/EC042017NF/141897s.jpg "Clear Wink Of Stella Glitter Brush [ 141897 ]")

