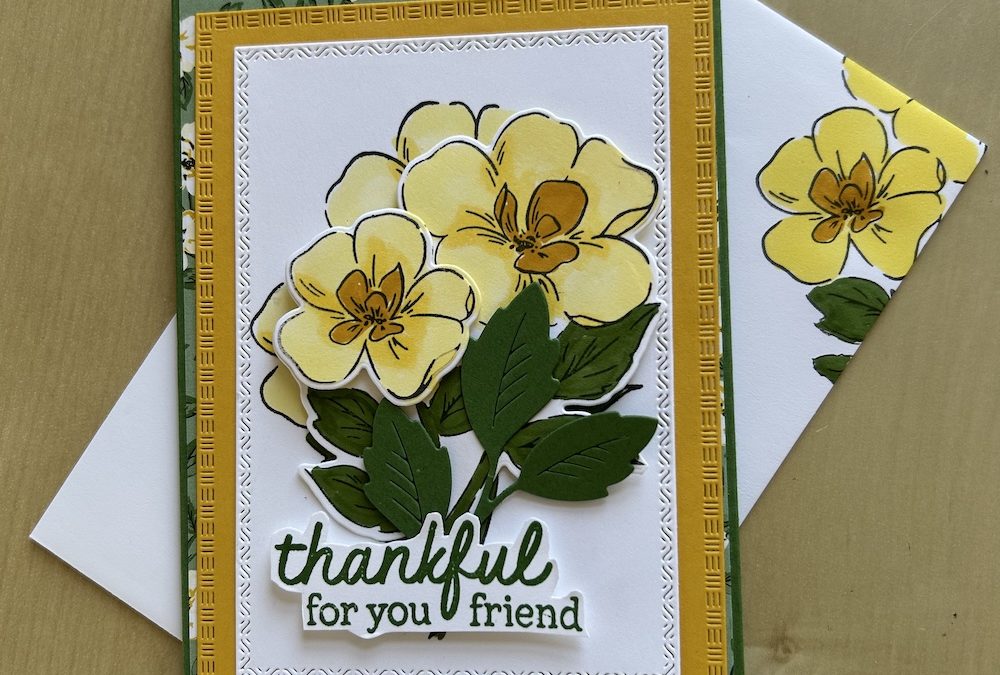
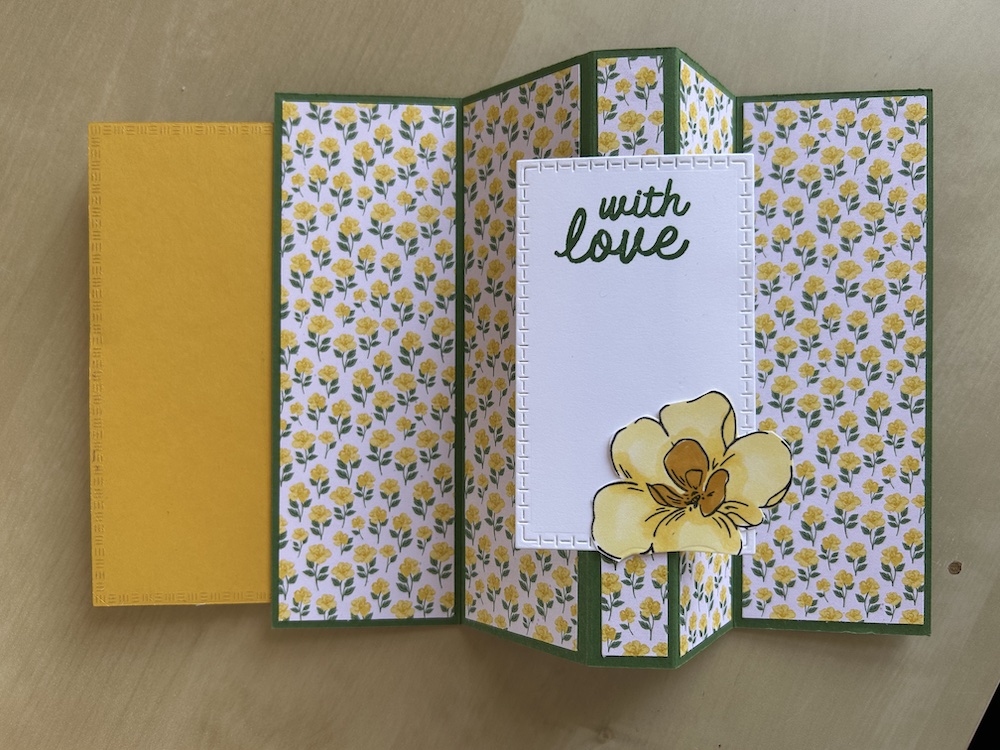
As you know, I love a fun fold card, especially one that has a surprise. This simple pop-up gatefold card certainly meets that requirement. It opens like a normal gatefold card but there is a pop-up element inside the card that appears when it is opened, as you can see.
The measurements and instructions for the pop-up gatefold card are given below and/or you can also watch the video. Please note – at two points on the video I gave the wrong measurements but I have noted the correct ones as text on the video, sorry. The measurements below are correct.
Choose your cardstock colours depending on what DSP you want to use. I used the Lovely Garden DSP with the Thankful Garden bundle and also Textured Notes dies to make my pop-up gatefold card.
To make this pop-up gatefold card you will need:
- Garden Green base cardstock 21cm x 14.8cm (8½” x 5½”)
- Crushed Curry cardstock approx 11cm x 14cm (4″ x 5½”)
- Basic White cardstock approx 1/2 A4 (US) sheet
- Lovely Garden DSP for front: 10cm x 14.3cm (4” x 5¼”) OR 2 x 4.8cm x 14.3cm (1 7/8 x 5¼”)
- Lovely Garden DSP for inside outer panels: 2 x 4.8 x 14.3cm (1 7/8 x 5¼”)
- Lovely Garden DSP for inside mid panels: 2 x 4.1x 14.3cm (1 5/8″ x 5¼”)
- Lovely Garden DSP for inside centre panel: 1.5cm x 14.3cm (¾” x 5¼”)
- Scraps of Basic White for stamping /colour card for die-cutting if required
Score the base cardstock on the long side at 5.25cm, 9.75cm, 11.25 cm and 15.75 cm (2″, 3¾”, 4½” and 6¼”)
Fold the outer two score lines as valley and the two inner ones as mountain. Burnish well. This forms the gatefold pop-up.
Close the two outer panels over to form the usual gatefold card and adhere the DSP to these. (Note: if using the single large panel, cut in half at 5cm (2 5/8″) and stick so that the inner edges line up with the centre cardstock edges – I prefer this look)
Open out the card and stick the remaining DSP panels in place.
Die-cut the largest Textured Notes rectangle from Crushed Curry cardstock and the second largest from Basic White cardstock. Also die-cut the fourth largest rectangle from Basic White – this is for the pop-up inside the card.
Stamp your image on the large Basic White die cut. If wanted, stamp again on a piece of Basic White and stamp the flower heads a third time. Use the dies from the bundle to cut these out – I also fussy cut the larger flower to use inside my card.
Colour using Stampin Write markers or blends.
Adhere the stamped Basic White rectangle to the Crushed Curry one. Stick this to the card front being careful only to glue the left-hand side. Add the second stamped image using dimeniosnals and add a further flower using dimensionals.
You could also add some die-cut leaves if you wish.
Stamp your sentiment in Garden Green and fussy cut out, Add below the flowers using dimensionals,
Stamp a sentiment in Garden Green on the remaining small Basic White rectangle. Add or stamp another flower as decoration.
Stick this to the centre pop-up panel – I used tear & tape, see the video for details.
You could add some gems or ribbon to the front of your pop-up gatefold card if you wish. I had enough going on with my three layers of images!
Don’t forget to decorate your envelope.
Here is the video of how to make this card:
I hope you like this card and will have a go at making one – please show me what you come up with.
Thank you for taking the time to read my post.

Don’t forget – you get a FREE pdf when you place any order with me as your demonstrator. And, if your order is over £40, you will also get to choose stuff from my online shop to the value of your order!
Product List ![Thankful Garden Bundle (English) [ 165534 ]](https://assets1.tamsnetwork.com/images/EC042017NF/165534s.jpg "Thankful Garden Bundle (English) [ 165534 ]") | ![Textured Notes Dies [ 165555 ]](https://assets1.tamsnetwork.com/images/EC042017NF/165555s.jpg "Textured Notes Dies [ 165555 ]") | ![Garden Green A4 Card Stock [ 108605 ]](https://assets1.tamsnetwork.com/images/EC042017NF/108605s.jpg "Garden Green A4 Card Stock [ 108605 ]") | ![Card Stock A4 Crushed Curry [ 131288 ]](https://assets1.tamsnetwork.com/images/EC042017NF/131288s.jpg "Card Stock A4 Crushed Curry [ 131288 ]") | |
![Regals Stampin' Write Markers [ 161699 ]](https://assets1.tamsnetwork.com/images/EC042017NF/161699s.jpg "Regals Stampin' Write Markers [ 161699 ]") | ![Paper Trimmer [ 152392 ]](https://assets1.tamsnetwork.com/images/EC042017NF/152392s.jpg "Paper Trimmer [ 152392 ]") | ![Multipurpose Liquid Glue [ 154974 ]](https://assets1.tamsnetwork.com/images/EC042017NF/154974s.jpg "Multipurpose Liquid Glue [ 154974 ]") |
![Lovely Garden 12" X 12" (30.5 X 30.5 Cm) Designer Series Paper [ 165524 ]](https://assets1.tamsnetwork.com/images/EC042017NF/165524s.jpg "Lovely Garden 12\" X 12\" (30.5 X 30.5 Cm) Designer Series Paper [ 165524 ]")
![Garden Green Classic Stampin' Pad [ 147089 ]](https://assets1.tamsnetwork.com/images/EC042017NF/147089s.jpg "Garden Green Classic Stampin' Pad [ 147089 ]")
![Lemon Lolly Stampin’ Blends Combo Pack [ 161673 ]](https://assets1.tamsnetwork.com/images/EC042017NF/161673s.jpg "Lemon Lolly Stampin’ Blends Combo Pack [ 161673 ]")

