Each month I meet up with three demonstrator friends to eat, then craft, together. We each make a card and bring a box with all the supplies needed to make the card. Then we swap the boxes around and each make the other cards. We take it in turns to choose the topic and today’s was your favourite stash.
Well, where should I start? I looked at all my favourite stamp sets but couldn’t decide which to use. So I decided to base my card on my favourite colour, Highland Heather, along with a simple technique using masking paper to make a masked card suitable for any occasion.
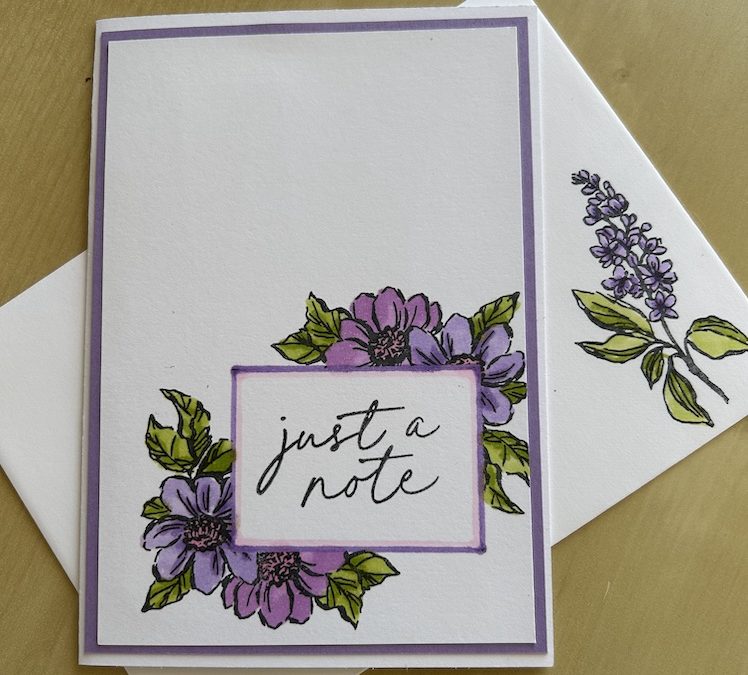
This masking tape technique allows you to cover your stamped sentiment to add your image(s) around the outside, finally highlighting the edges of your sentiment – a masked card. Why not have a go yourself?
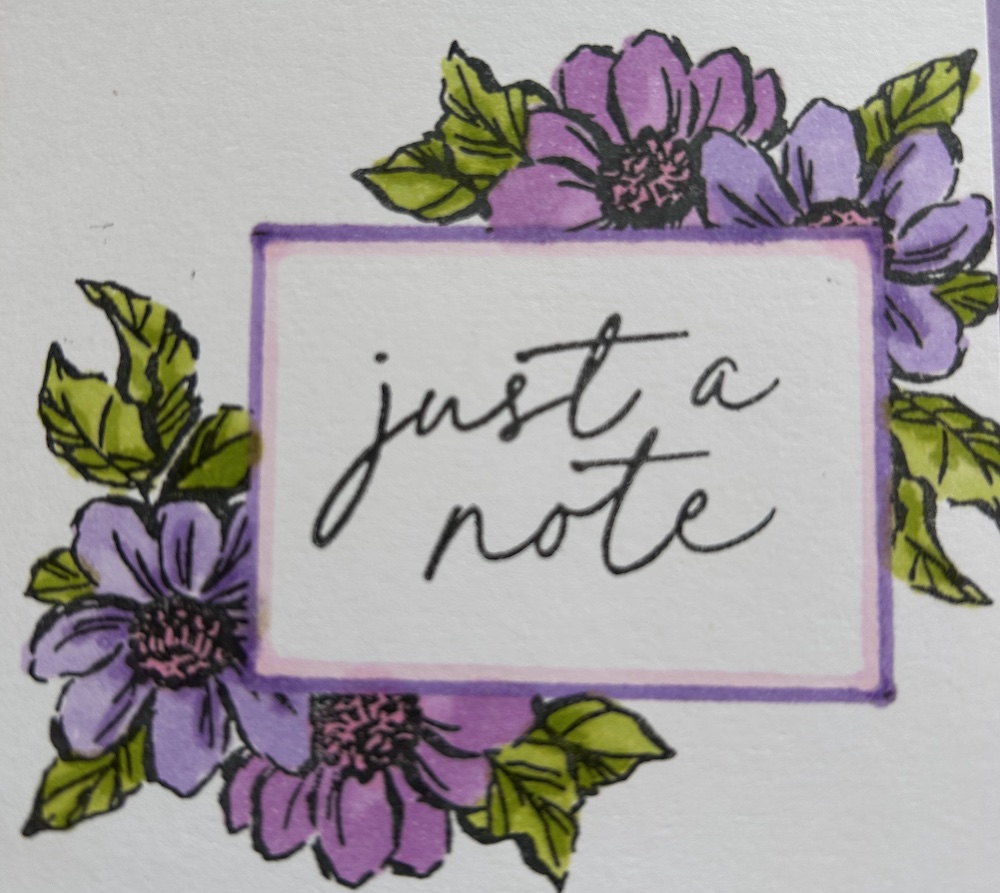
Here’s a closer view of my finished masked card:
You will need:
- Basic White card base 21cm x 14.8cm scored at 10.5cm (8½” x 5½” scored at 4¼”)
- Favourite colour cardstock layer 10cm x 14.3cm (4” x 5¼”)
- Basic White layer 9.5cm x 13.8cm (3¾” x 5”)
- Stampin Blends or Stampin Write markers in your favourite colour(s)
- A ruler
- Some masking tape or a scrap of copy paper and some temporary adhesive
For my masked card, I used a sentiment from the Note & Totes stamp set and images from the gorgeous Gallery Blooms stamp set. I coloured using Highland Heather, Fresh Freesia, Bubble Bath and Granny Apple Green blends. But you can make this card for any occasion and use any colours you want!
Stamp your chosen sentiment in Memento onto the Basic White layer. Measure the size of the sentiment area using your ruler, cut a piece of masking tape to that size and stick it over your stamped sentiment.
(NOTE: If you don’t have any craft masking paper you can use masking tape but press it a few times on your jeans/trousers to make it less sticky before using on your card. Alternatively, cut a piece of copy paper to that size and use some temporary adhesive to stick it on.)
Stamp your chosen image in Memento over the top of your masked sentiment. This works best if you stamp all the way around the sentiment – in my video (below) I only stamped on two sides so I then had to measure where the corner of my masking tape went to. I could have marked the corners before removing it, of course….!
Colour your image(s) using Stampin Blends, Stampin Write markers or watercolour pencils.
When complete, remove the masking paper.
Use a ruler and a blend or other marker to draw around the masked area to form a frame. If you wish, add a double line using a different colour, or leave it with just one colour. I used coordinating colours, but this technique also looks good using a contrast colour or dark colour.
Add some decoration inside the card and on the envelope and voila – you have a simple stamped masked card. Here is the inside of my masked card:

Here is the video of me making this card:
I hope you like this card and will have a go at making one – please show me what you come up with.
Thank you for taking the time to read my post.

Don’t forget – you get a FREE pdf when you place any order with me as your demonstrator. And, if your order is over £40, you will also get to choose stuff from my online shop to the value of your order!
Product List ![Stampin' Up! Masking Paper [ 155480 ]](https://assets1.tamsnetwork.com/images/EC042017NF/155480s.jpg "Stampin' Up! Masking Paper [ 155480 ]") | ![Basic White A4 Cardstock [ 166781 ]](https://assets1.tamsnetwork.com/images/EC042017NF/166781s.jpg "Basic White A4 Cardstock [ 166781 ]") | ![Highland Heather A4 Cardstock [ 147010 ]](https://assets1.tamsnetwork.com/images/EC042017NF/147010s.jpg "Highland Heather A4 Cardstock [ 147010 ]") | ||
![Tuxedo Black Memento Ink Pad [ 132708 ]](https://assets1.tamsnetwork.com/images/EC042017NF/132708s.jpg "Tuxedo Black Memento Ink Pad [ 132708 ]") |
![Gallery Blooms Photopolymer Stamp Set [ 165211 ]](https://assets1.tamsnetwork.com/images/EC042017NF/165211s.jpg "Gallery Blooms Photopolymer Stamp Set [ 165211 ]")
![Notes & Totes Photopolymer Stamp Set (English) [ 165239 ]](https://assets1.tamsnetwork.com/images/EC042017NF/165239s.jpg "Notes & Totes Photopolymer Stamp Set (English) [ 165239 ]")
![Highland Heather Stampin' Blends Combo Pack [ 154887 ]](https://assets1.tamsnetwork.com/images/EC042017NF/154887s.jpg "Highland Heather Stampin' Blends Combo Pack [ 154887 ]")
![Fresh Freesia Stampin' Blends Combo Pack [ 155518 ]](https://assets1.tamsnetwork.com/images/EC042017NF/155518s.jpg "Fresh Freesia Stampin' Blends Combo Pack [ 155518 ]")
![Bubble Bath Stampin’ Blends Combo Pack [ 161675 ]](https://assets1.tamsnetwork.com/images/EC042017NF/161675s.jpg "Bubble Bath Stampin’ Blends Combo Pack [ 161675 ]")
![Granny Apple Green Stampin' Blends Combo Pack [ 154885 ]](https://assets1.tamsnetwork.com/images/EC042017NF/154885s.jpg "Granny Apple Green Stampin' Blends Combo Pack [ 154885 ]")

