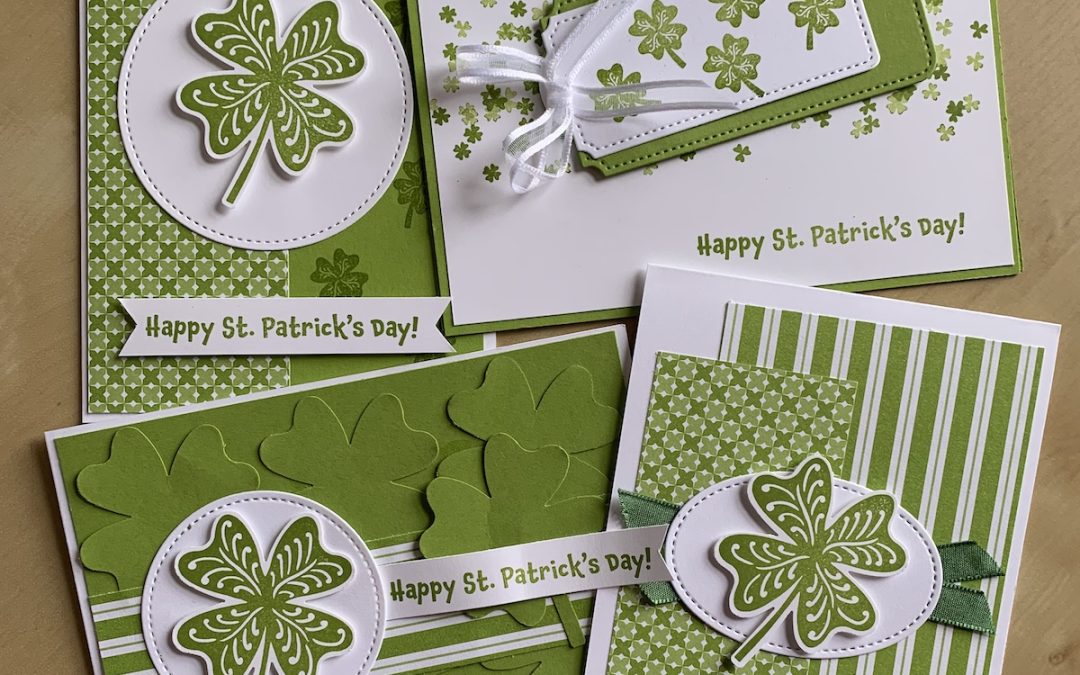
St Patricks Day is a big celebration here in Ireland. I love any excuse to send a card, so the celebration of our patron saint gives me that opportunity. I have used the gorgeous Stampin’ Up! Lucky Clover stamp set and punch bundle to make FOUR different St Patrick’s Day cards.
Full instructions and measurements for each card can be found below and you can watch how the cards are made in the video.
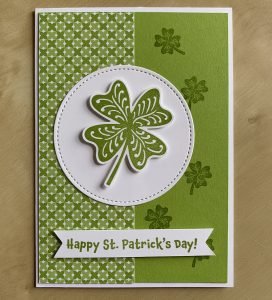
CARD 1
- Basic White card base 14.8cm x 21cm scored at 10.5cm
- Granny Apple Green layers (x2) 14.3cm X 10cm
- Coordinating Designer Series paper strip 5cm x 14.3cm
- Basic White inner layer 13.8cm x 9.5cm
- Basic White large Stylish Shapes circle plus scraps for stamping
 Stamp the inside Basic White layer in Granny Apple Green as you wish and stick onto one Granny Apple Green layer then adhere inside the card.
Stick the DSP panel onto the front Granny Apple Green layer. Stamp the small four leaf clover randomly on the plain green half panel. Adhere to front of card. Stick the stylish shapes circle flat to the front as shown.
Stamp the large four leaf clover onto Basic White and punch out. Stamp the sentiment onto a scrap of basic white and make into a banner shape as shown in the video.
Adhere these to the front of the card as shown using dimensionals.
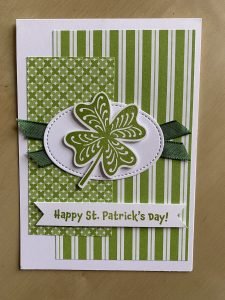
CARD 2
- Basic White card base 29.6cm x 10.5cm scored at 14.8cm
- Coordinating Designer Series paper pieces: 8cm x 13.5cm and 5cm x 10.5cm
- Basic White stitched circle or oval die cut
- Short length of green ribbon
- Basic White scraps for stamping
Stamp the inside of the card in Granny Apple Green as you wish.
Adhere the pieces of DSP as shown. Add one or two strips of green ribbon using tear’n’tape. Add the stitched shape on top.
Stamp a large clover and a sentiment on scraps and punch out. Add to the card using dimensionals.
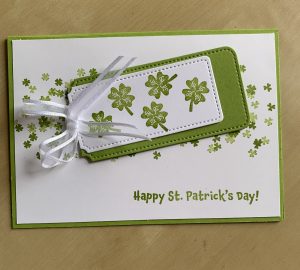
CARD 3
- Granny Apple Green card base 14.8cm x 21cm scored at 10.5cm
- Basic White layers (x2) 14.3cm X 10cm
- Granny Apple Green tag die cut with largest Tailor Made Tag
- Basic White tag cut with next size down Tailor Made Tag die
- Short length of white or green ribbon
Stamp the inner Basic White layer as desired and adhere to inside of card.
Using the small closers stamp, stamp randomly in Granny Apple Green across the front of the front Basic White layer as shown, stamping TWICE before re-inking.
Stamp the sentiment on the Botton right hand side. Adhere to card front.
Stamp the small four leaf clover onto the white tag. Stick this tag to the Green tag and adhere to card front.
Add a bow in white or green ribbon and stick to tags using a glue dot.
CARD 4
- Basic White card base 29.6cm x 10.5cm scored at 14.8cm
- Granny Apple Green layer 14.3cm X 10cm
- DSP strip 3.5cm x 14.3cm
- Approximately half an A4 sheet of Granny Apple Green for punching clovers
- Basic White large Stylish Shapes circle plus scraps for stamping
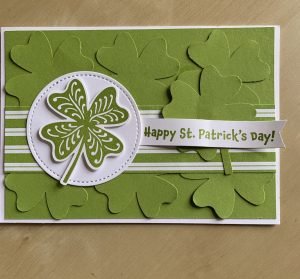
Stamp the inside of the card in Granny Apple Green as you wish. Stick the Granny Apple Green card layer to the front of the card.
Punch out seven clover shapes from Granny Apple Green card.Shape them in your palm (see video for details) and adhere in two rows of three to the card front as shown.
Add the strip of DSP as shown, using tear’n’tape.
Stamp the large clover and the sentiment onto scraps of Basic White. Punch out the clover and shape the end of the sentiment, Curl the sentiment strip as shown in the video.
Stick the sentiment strip under the edge of the stitched die cut circle and adhere to the card as shown. Add the punched-out stamped clover to the circle using dimensionals.
Stick your remaining punched-out green clover as you wish, under the sentiment, or leave it out, as you wish!
Don’t forget to decorate your envelopes, either using DSP as in the video or stamping on the front!
You can easily adapt these cards to other celebrations such as birthdays or good luck cards in particular. I hope you enjoy this video and post – and let me know what you make.
Product List
|
|
|
|
|
|
|
|
|
|||
|
|
|
|
")
")


 Designer Series Paper")


