I knew I wanted the Kintsugi suite as soon as I saw it in the annual catalogue. By the way, if you want any suites or suite products, buy this month (June 2025) as all 27 available suites and suite products from the 2025–2026 Annual Catalogue and Online Exclusives are buy one, get one 50% off!
The Kintsugi suite includes the beautiful Inspiring Imperfections stamp set and matching dies, gorgeous Kintsugi Inspirations Designer Series Paper, a lovely Joined Together 3D embossing folder and gold Flower Accents.
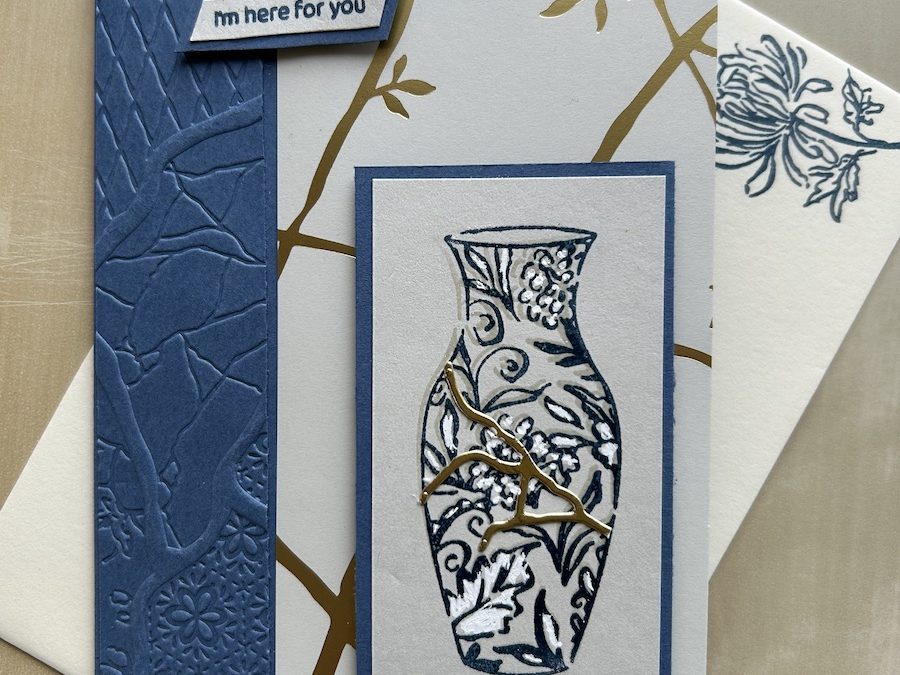
The Designer Series Paper is just gorgeous and this Kintsugi card makes the most of it, as you can see both sides of the DSP in the card. There is added detail from the embossed panels, stamped and embossed vase image and gold foil embellishment.
To make this Kintsugi card you will need:
- Misty Moonlight card base 21cm x 14.8cm scored at 10.5cm (8½” x 5½” scored at 4¼”)
- Basic Beige panel 7cm x 14.3cm (2¾” x 5¼”)
- DSP panel of your choice 7cm x 14.8cm (2¾” x 5½”)
- Basic Beige panel 4.5cm x 8.5cm (1¾” x 3¼”)
- Misty Moonlight panel 5cm x 9cm (2″ x 3½”)
- Clear embossing powder
- Misty Moonlight ink pad
- Scrap of Gold Foil for die-cutting the “crack”
- Scraps of Basic Beige and Misty Moonlight card stock for sentiment
- White gel pen
Cut two 3cm (1¼”) panels from the front of the base Kintsugi card, leaving the remaining 4.5cm (1¾”) uncut. Trim these two panels to 14.3cm (5¼”) long. Emboss with the 3D Joined Together embossing folder.
Add tear & tape to the edge of the remaining front and stick the DSP to it, lining it up carefully with the edge of the card.
Adhere the two embossed panels to the card, one on the front side panel and one on the inside right-hand side.
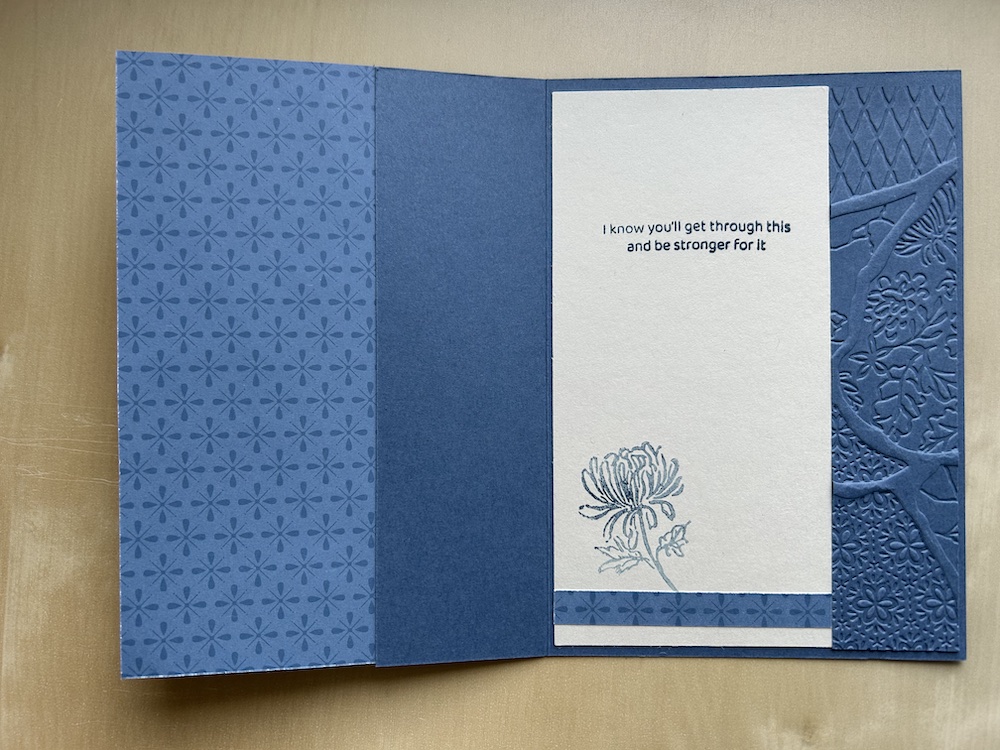
Stamp the greeting you want in Misty Moonlight on the Basic Beige panel and stick to the left-hand side inside the card. I stamped off the flower stamp and added a small strip of the DSP as additional decoration on this panel, as you can see.
Now, have your embossing powder ready. Stamp the tall vase in Misty Moonlight onto the Small Basic Beige panel and quickly add clear embossing powder. Set with your heat gun.
(Optional) I coloured the flowers and some leaves in white gel pen to add a little more interest.
Die-cut the small “crack” from gold foil – make sure you have added some adhesive sheet to the back of the gold foil before die-cutting, as these die-cut pieces are very thin. Adhere to the vase wherer you want. You may need to trim the edge with your scissors if it overlaps.
Stick the completed panel to the Misty Moonlight layer and add to your Kintsugi card using dimensionals.
Stamp your greeting in Misty Moonlight on the scrap of Basic Beige and trim. Layer onto a Misty Moonlight scrap then add to your card using mini-dimensionals.
Here is the video of how to make this Kintsugi card:
I hope you like this card and will have a go at making one – please show me what you come up with.
Thank you for taking the time to read my post.

Don’t forget – you get a FREE pdf when you place any order with me as your demonstrator. And, if your order is over £40, you will also get to choose stuff from my online shop to the value of your order!
Product List ![Misty Moonlight A4 Cardstock [ 153086 ]](https://assets1.tamsnetwork.com/images/EC042017NF/153086s.jpg "Misty Moonlight A4 Cardstock [ 153086 ]") | ![Basic Beige A4 Cardstock [ 164512 ]](https://assets1.tamsnetwork.com/images/EC042017NF/164512s.jpg "Basic Beige A4 Cardstock [ 164512 ]") | |||
![Basics Wow! Embossing Powder [ 165679 ]](https://assets1.tamsnetwork.com/images/EC042017NF/165679s.jpg "Basics Wow! Embossing Powder [ 165679 ]") | ![Gold Foil Sheets [ 132622 ]](https://assets1.tamsnetwork.com/images/EC042017NF/132622s.jpg "Gold Foil Sheets [ 132622 ]") | ![Heat Tool - Uk Plug [ 129054 ]](https://assets1.tamsnetwork.com/images/EC042017NF/129054s.jpg "Heat Tool - Uk Plug [ 129054 ]") |
![Kintsugi Inspirations Suite Collection (English) [ 165172 ]](https://assets1.tamsnetwork.com/images/EC042017NF/165172s.jpg "Kintsugi Inspirations Suite Collection (English) [ 165172 ]")
![Kintsugi Inspirations 12" X 12" (30.5 X 30.5 Cm) Specialty Designer Series Paper [ 165159 ]](https://assets1.tamsnetwork.com/images/EC042017NF/165159s.jpg "Kintsugi Inspirations 12\" X 12\" (30.5 X 30.5 Cm) Specialty Designer Series Paper [ 165159 ]")
![Inspiring Imperfections Bundle (English) [ 165167 ]](https://assets1.tamsnetwork.com/images/EC042017NF/165167s.jpg "Inspiring Imperfections Bundle (English) [ 165167 ]")
![Misty Moonlight Classic Stampin' Pad [ 153118 ]](https://assets1.tamsnetwork.com/images/EC042017NF/153118s.jpg "Misty Moonlight Classic Stampin' Pad [ 153118 ]")

