The In the Moment stamp set is a fabulous set that can make cards for all occasions and is ideal for making notecards sets. These cards use the paper piecing technique – ask me about this if you need.
MEASUREMENTS and SUPPLIES
In The Moment stamp set
DSP – one full piece of 12 x 12” DSP plus smaller black and white pieces
Simply marbellous DSP (blue and yellow) or other patterned paper of choice
Hippo Happiness, Stitched rectangle and Celebration label dies
Layering circle dies
Label punches
Balmy Blue ribbon – 16cm strip plus bow
Basic gems
Glitter enamel gems
Stampin Blends
Watercolour pencils
Basic White notecards and envelopes
Balmy Blue and Basic White cardstock
Night of Navy, Soft Suede and Basic Black cardstock scraps
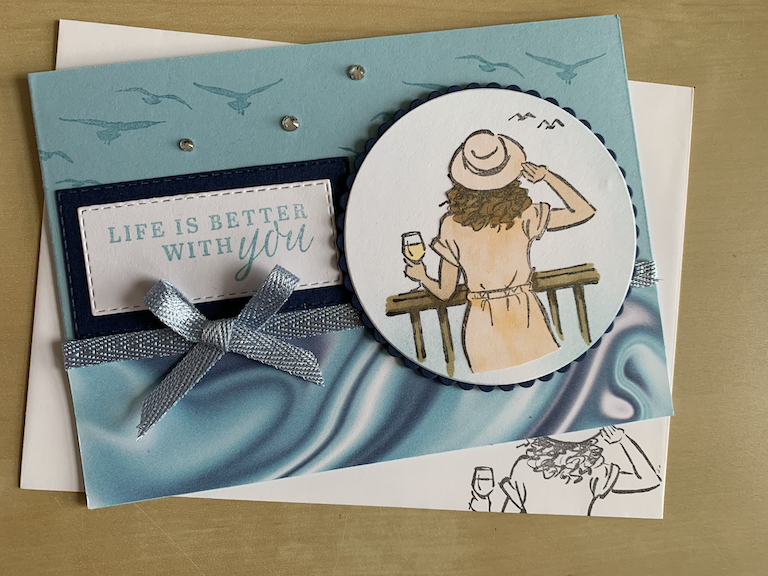
MEASUREMENTS
Base cardstock in Balmy Blue cut lengthways
Simply Marbellous balmy blue DSP 14.8cm x 7cm
Basic White circle cut using the largest plain layering circle die
Night of Navy scrap cut with largest scalloped layering circle die
Balmy Blue or other matching ribbon
Stampin blends
Basic rhinestones
Inks: Memento black, Balmy Blue, Soft Suede
Fold a Balmy Blue card base in half
Place tear and tape strip across top of Simply Marbellous paper (or other chosen DSP) and adhere a matching ribbon, sticking ends down at the back. (I used a retired balmy blue ribbon)
Stick completed DSP strip to bottom of card as shown.
Stamp chosen background stamp if wanted in Balmy Blue on top half of card
Stamp image on Basic White and on yellow Simply Marbellous paper using memento ink. Cut out dress and hat, including hair. Colour hair in brown then stick to original image. Colour remaining parts of image with Stampin Blends.
Stick to Night of Navy scalloped die cut then to card as shown.
Stamp sentiment in Balmy Blue, die cut out with chosen die and add to Night of Navy larger die cut.
Assemble card as shown, adding ribbon bow and gems.
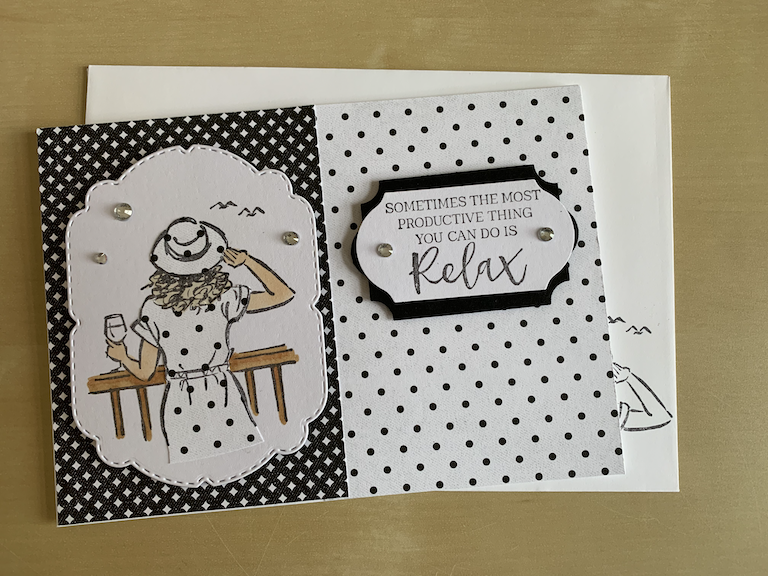
MEASUREMENTS
Base cardstock in white cut lengthways
Black & White DSP panels: 10.5cm x 7cm and 10.5cm x 8cm
Basic White piece approx 10cm x 8cm plus scrap for sentiment
Scrap basic Black
Basic rhinestones
Ink: Memento black
Use Basic White landscape card base
Add the two panels of black and white DSP as shown.
Stamp image on white card and on dotted white DSP scrap.
Cut out dress and hat, NOT including hair then stick to original image.
Colour remaining parts of image with Stampin Blends. Die cut with Celebration label or similar die and stick to left hand side of card
Stamp sentiment and punch or die cut out. Use slightly larger punch/die cut for black card layer.
Add to right hand panel with dimensionals
Add gems
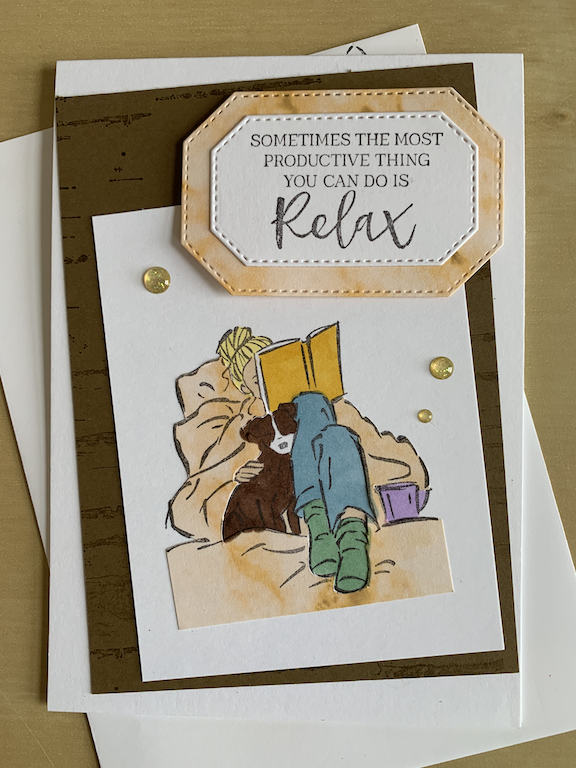
MEASUREMENTS
Base cardstock in basic white
Soft Suede panel: 13.5cm x 9.5cm
White panel layer 10cm x 8cm
Basic white and DSP scraps
Gems of choice
Stampin blends or watercolour pencils
Inks: Memento black, Balmy Blue, Soft Suede
Uses Basic White card base
Add Soft Suede front panel at an angle
Stamp image onto white panel and onto yellow DSP or DSP of choice. Cut out sheets and pillows and adhere to image.
Colour remaining parts of image with Stampin Blends.
Stamp sentiment on Basic White scrap and die cut with second smallest Hippo Happiness hexagonal die.
Stick to yellow Simply Marbellous DSP layer cut with next size die and stick to card using dimensionals
Assemble card as shown, adding three random gems
MEASUREMENTS
Basic white notecards and envelopes
12 x 12″ sheet of DSP with coordinating patterns/colours both sides
Memento ink
Watercolour pencils
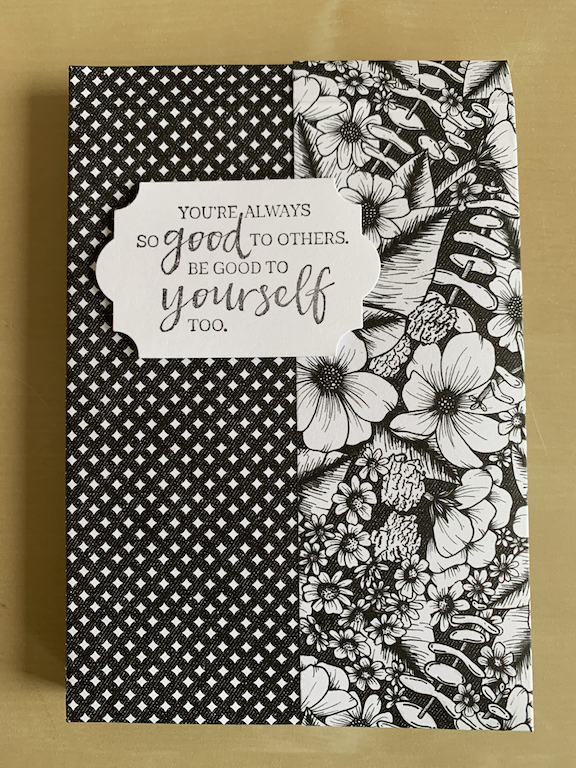
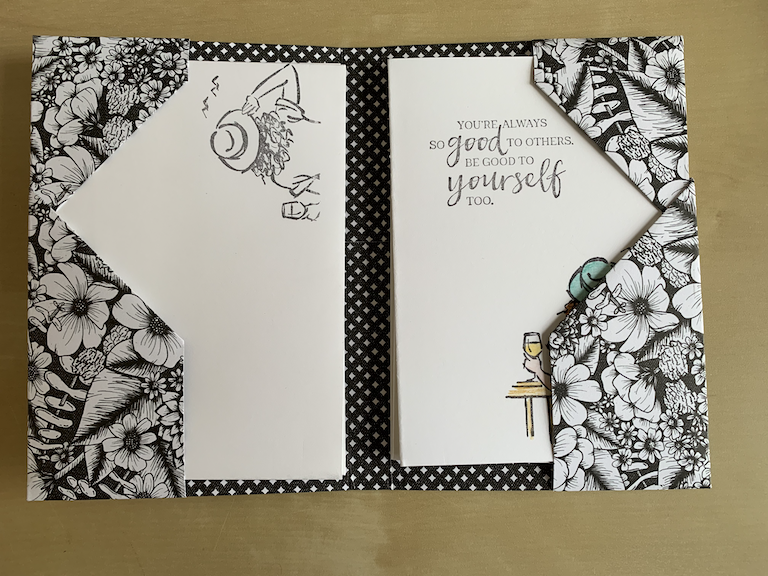
This notecard folder holds 3-4 notecards and envelopes.
NOTECARDS
Stamp images /sentiments on notecards as required.
Colour images with watercolour pencils then use Aqua painter to smooth colouring
Stamp envelopes and colour those if required.
NOTECARD FOLDER
Choose desired DSP – NB check any patterns and that the two sides coordinate well
A) Score DSP on reverse side (with any pattern upwards) at 1 7/8 “, 5 ¾ “, 6 ¼, and 10 1/8”
B) Turn DSP through 90 degrees and score at 2 ½” and 8 ¼”
Fold the original (A) two side folds inwards. Open out the paper again then turn each corner up and fold in to the edge of the score line – be careful not to go over it.
Flip your paper over and fold back on the two score lines (B). Tuck larger part into the smaller part (or vice versa!) to form the inner part of folder.
Fold the remaining centre score lines to form the spine of the pouch.
Decorate as required – I used the Decorative Label punch for the sentiment
Product List
|
|
|
|
||
|
|
|
|
||
|
|
|
|
|
|
|
|
|


