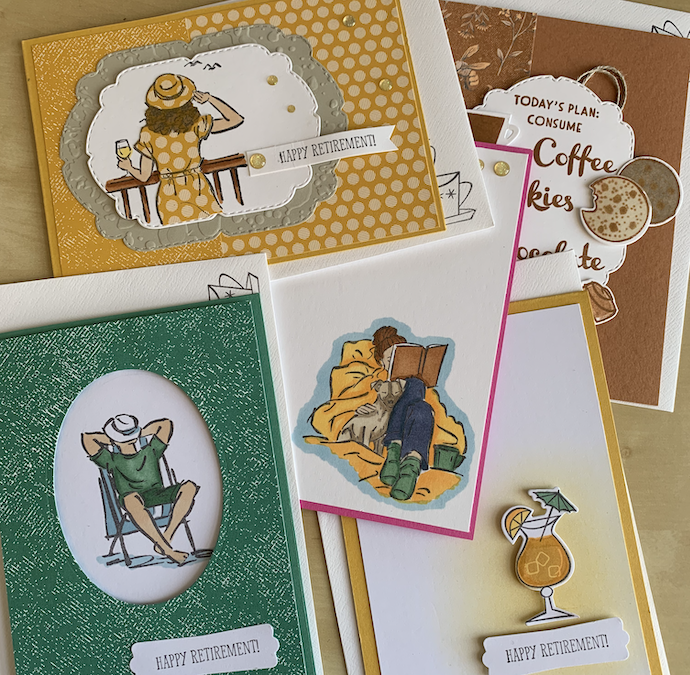
One of my lovely clients asked me for ideas for retirement cards. It’s an appropriate time of year, as next week is the launch of the new catalogue. So it gave me the chance to use and celebrate some retiring products as well as use some that are continuing. For the card bases, I used the five retiring 2020-2022 In Colors, three of which I will be very sad to see go.
Most card designs can be adapted for other purposes. Many birthday cards can also be used for retirement greetings, for example. The difficulty can be finding sentiments that fit. That’s why I will be keeping one of the retiring sets I used – Senior Years – as it has marvellous retirement sentiments. However, if you don’t have an appropriate sentiment, you could print out a greeting on your computer.
Don’t forget to decorate the insides of the cards and decorate your envelopes!

INSTRUCTIONS
Cut a Just Jade card base 21cm x 14.8cm and score in half lengthways
Cut your matching Designer Series Paper to fit portrait style 10cm x 14.3cm. Cut one piece of Basic White the same size for the inside of your card
Cut another Basic White piece 9.5cm x 13.8cm
Die cut the DSP using a (retired) layering Oval die. Carefully mark the frame position centrally on your white card piece using light pencil marks (see the video post or on YouTube to see how to do this.) Stamp and colour your image.
Rub out your pencil marks then adhere this panel centrally to the card front.
Add the DSP frame with dimensionals
Stamp the sentiment and punch out (I used a retired punch). Adhere flat to card.
INSTRUCTIONS
Cut a Magenta Madness card base 10.5cm x 29.6cm, scored in half at 14.8cm
Basic White panel 10cm x 14.3cm
Stamp your image in the bottom right hand corner and colour as desired. I used the In the Moment stamp set and coloured it with blends.
To make it stand out, use a Balmy Blue marker around the edge of the image.
Adhere panel to card base
Stamp your sentiment and punch out. Punch out a coloured card piece, cut in half and place behind your sentiment. Add to your card with dimensionals. Add gems as you wish.


INSTRUCTIONS
Cut a Bumblebee card base 29.6cm x 10.5cm, scored in half at 14.8cm
Cut two pieces of matching DSP, one 6x10cm, the other 8.3x10cm and adhere to card base as shown.
Using Celebrations dies, cut out a Crumb Cake larger piece and a next size Basic White piece.
Emboss the larger piece with the Splatters embossing folder (or one of your choice) and adhere to card.
Stamp your image on the smaller die cut piece and colour. Add to card using dimensionals.
Add your sentiment and gems as shown
Blended Background card (also see video):
Bumblebee card base
Basic White panel 9.8 x 13.9cm
Using a blending brush, add Bumblebee colour to the lower right hand side of your panel (see video)
Stamp your image on a scrap of Basic White. I’ve used one from the lovely Nothings Better Than stamp set, which has matching Love You More Than dies. Die cut then adhere to the card front with dimensionals as shown.
Stamp the sentiment and punch out (I used a retired punch) and stick to card with dimensionals.
Add gems or other decoration as required.

Product List
|
|
|
|||
|
|
|
|||
|
|
|

 Designer Series Paper")


")
")

")


