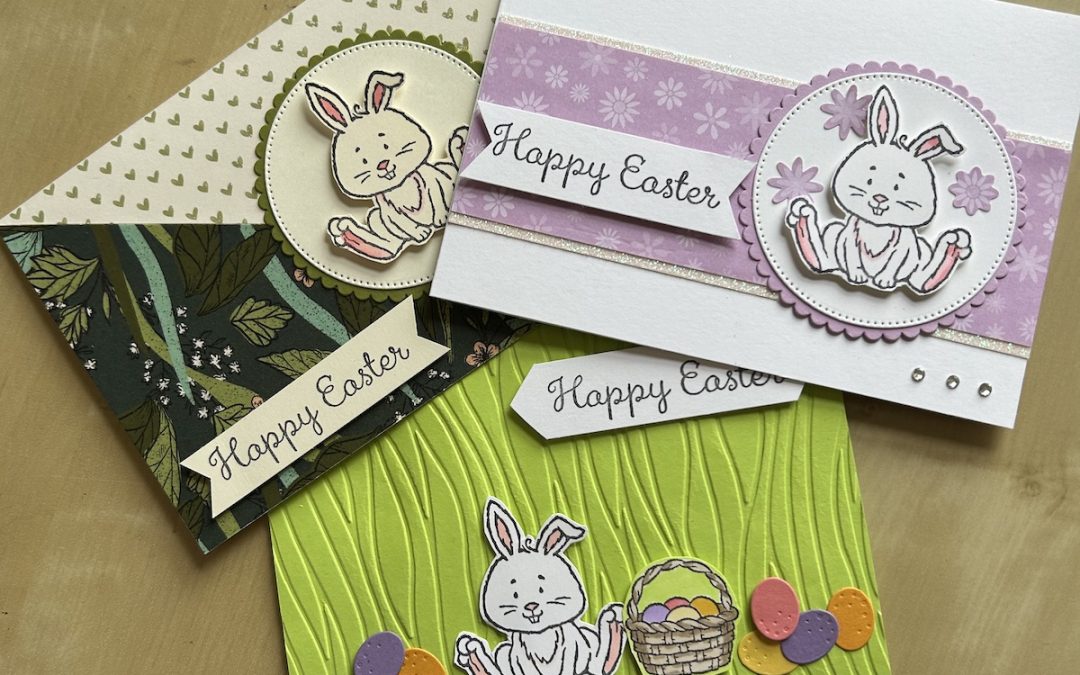
I have two aims for this blog post. First, to give you ideas for three different cards that use simple layouts you can adapt for your own use. Second, to encourage you to use retired items from your stash!
For these cards I’ve used a retired stamp set, Welcome Easter, and Designer Series Paper from two retired packs, Daffodil Daydream and Dandy Designs, but I really want to encourage you to take the layouts for the cards and use different stamps and paper you may already own.
In the video, I show the three cards and take you through how to make two of them. Detailed instructions are below.
Card 1
- Coloured cardstock 14.8cm x 21cm scored in half at 10.5cm
- Inside Basic White panel 13.8cm x 9.5cm
- Cute animal image (or use flowers) plus other decoration as required
 This card uses a coloured cardstock base. I used Parakeet Party, cut to the usual size and used in landscape. I used a retired embossing folder (Seashore) to emboss the front of the card.
I stamped my images which are from two sets – the rabbit from Welcome Easter and the basket from Springtime Joy, both retired sets – and coloured them with Stampin’ Blends. The mini eggs were cut from scraps of coloured cardstock using a die from the Hey Chick matching die set, also retired.
The images were placed across the card front and the Happy Easter sentiment (again from Welcome Easter) was added to the trip right of the card using dimensionals.
Card 2
- Base cardstock 14.8cm x 21cm scored in half at 10.5cm (I used Very Vanilla to match my DSP)
- DSP of your choice (2 pieces) 14.8cm x 10.5cm (I used Daffodil Daydream)
- Die-cut the second-size scalloped circle from the Layering Circle dies in a coordinating colour (I used Old Olive)
- Cut the second size Stylish Shapes stitched circle die from your base colour
- Cute animal image (or use flowers)
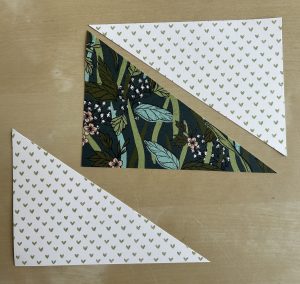 The DSP will lie landscape across the card. You need two pieces to be able to reverse one half.
Cut the first piece of DSP from top left to bottom right then cut the second piece turned the opposite way to get the two pieces you need. (The remaining pieces can be used to make a second card.)
Watch the video to see how I did the cut without damaging the pointy tips! (Clue – it’s all about how you place the blade to start your cut.)
 Stick the stitched circle to the scalloped colour cardstock circle. Stick these to your card base off centre to the right. Add your stamped and coloured cut-out image to the circle using dimensionals.
Stamp your chosen sentiment into a scrap of cardstock and cut the ends as you want – I cut flag type ends – see the video for how I did that in the third card.
Add the sentiment to the bottom left of the card using dimensionals.
Card 3
- Basic White cardstock 29.6cm x 10.5cm, scored in half at 14.8cm
- DSP strip 14.8cm x 5cm (I used Fresh Freesia from Danny Designs)
- Glitter or glimmer paper 14.8cm x 5.5cm (or 6 cm if you prefer a wider panel)
- Die-cut the second-size scalloped circle from the Layering Circle dies in a coordinating colour (I used Fresh Freesia)
- Cut the second size Stylish Shapes stitched circle die from Basic White
- Iridescent Gems to decorate
This card uses a simple strip of DSP which is given added glitz by sticking it to a piece of glitter or glimmer paper. If you did not have any glitter or glimmer paper, you could use coordinating or tone on tone cardstock or foil – something to “edge” the DSP.
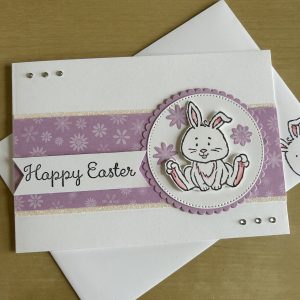 Stick the DSP to the glimmer /glitter/ foil/ cardstock strip. Use plenty of glue if using glitter card and hold the DSP down to make sure it sticks. Then stick this prepared penal to your cardstock base. Never stock such a panel to the centre of the card, place it either above or below the centre. I personally prefer to have it in the lower half of the card.
Stick the stitched Basic White circle to the scalloped colour cardstock circle. Stick this to the card on the right of the strip. Add your chosen coloured and cut-out image using dimensionals.
Stamp your chosen sentiment into a scrap of cardstock and cut the ends as you want – I cut flag type ends – see the video for how I did that. Add this to the left of your circle using dimensionals. Add gems as shown.
Decorate the inside of all the cards with a sentiment and image. And don’t forget to decorate your envelopes!
The same layouts can be used for many different occasions including birthdays, anniversaries, baby cards, sympathy cards and much more. Please let me know how you have used these ideas and adapted them to use your own stash.
Product List
|
|
|
|
|
|
|
|
|
|


