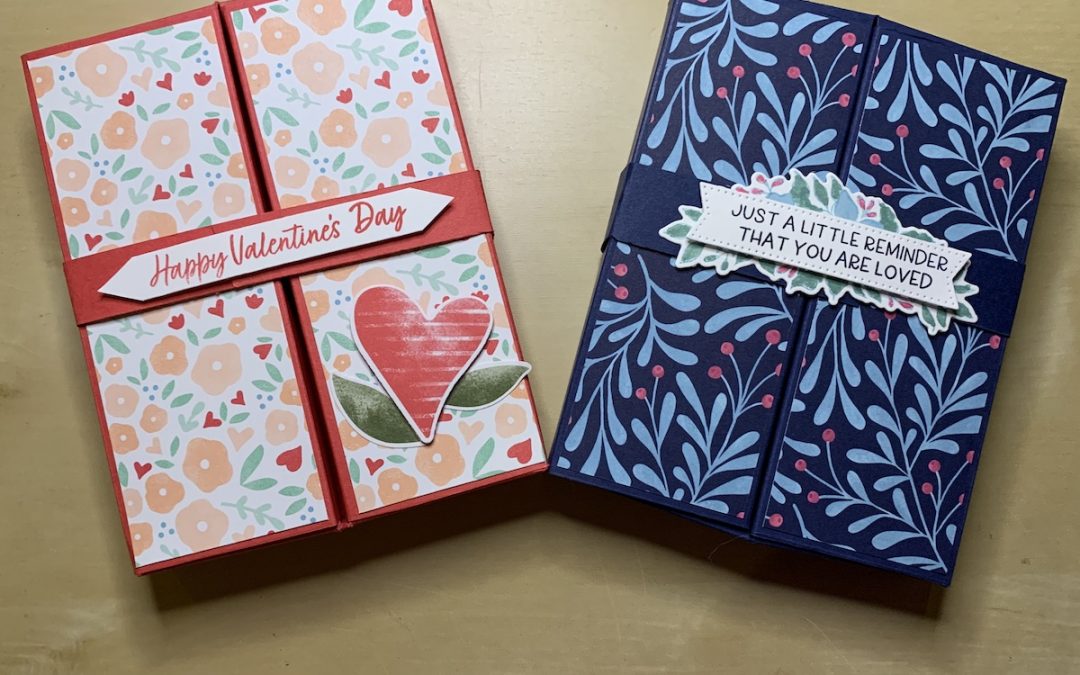
I wasn’t sure what to call this box but a friend said it looked like a wardrobe, so wardrobe treat box it is! It opens both sides and fits coffee or hot chocolate sachets and small biscuit or chocolate packets. The finished size is 10cm x 13cm x 2cm (4″ x 5 1/8″ x 3/4″).
You can use any cardstock to match any patterned or Designer Series Paper you have. I used the gorgeous Country Floral Lane DSP in the new mini catalogue for the Valentine wardrobe treat box. (Please ask me if you’d like a catalogue.) The box I made in the video uses some now retired Fitting Florets DSP. Full instructions are below.
To make the wardrobe treat box you need:
- Coordinating colour cardstock 21cm x 28cm
- DSP: 2 pieces 4.6cm x 12.6.cm
- Belly band cardstock 26cm x 1.5-2cm
- Stamp set for decoration and sentiment if required
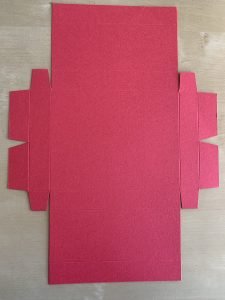
On the short side of your main cardstock piece, score at 2cm, 4cm, 17cm and 19cm. On the long side, score at 2cm, 7cm, 9cm, 19cm, 21cm and 26cm. Move the cardstock to the 14cm mark and score down to the first transverse scoreline. Turn the cardstock 180 degrees and score again at 14cm down to the first score line.
 Cut out the corner pieces and form four tabs as shown in this picture. Mitre the tabs by taking off a tiny triangle – see the video to watch how that is done.
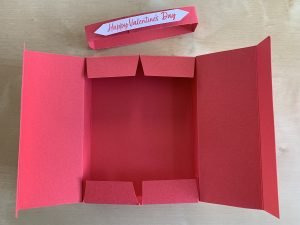
Cut on either side of the 14cm score lines to form the V notches as shown in the picture, which allows the two side wardrobe “door” pieces to close neatly into the box.
Add glue to each of the tabs. Carefully bring the corners together neatly and stick the tabs down firmly so they are inside the box. Stampin’ Seal is best but you can use liquid glue – just make sure you hold the tabs closed until they have stuck firmly.
Stick the two pieces of DSP to each front “door”.
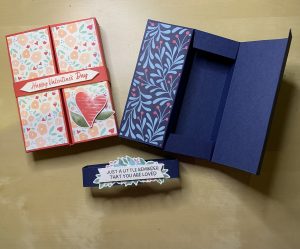
The picture opposite shows a completed box with the sides open to show how the notched end tabs work.
To make the belly band, wrap the cardstock strip around your completed and closed box so that the pieces overlap in the front. Use your fingers to pinch the band at each corner, then use tape or liquid glue to stick the belly band together. Make sure it slides on and off easily.
 Decorate the belly band and/or box as you wish. For the Valentine box, I simply added a sentiment strip to the belly band and added a punched-out heart and leaves to the box itself.
For the blue box, I added a stamped and coloured flower image to the belly band then added a sentiment on top.
It’s your choice!
This is the project I made last week in my online Craftalong. Why not join me on Thursdays online? Details on the shop/book classes page on this website, or sign up for my email list to get a weekly update of news, activities and future classes. In-person classes are held once or twice a month.
Product List
|
|
|
|
||
|
|
|
|
|
|


