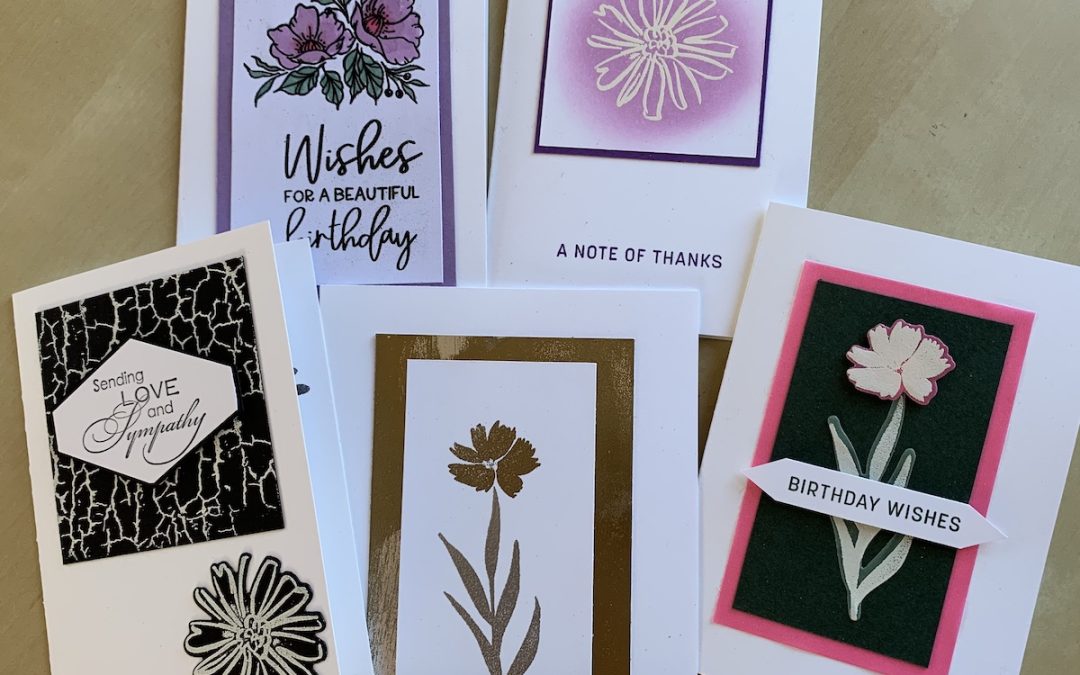
Here are five more ideas for using heat embossing to make beautiful cards. Instructions for all the cards can be found below and/or you can watch the video to see me use the techniques in action. As a special bonus, there is one technique and card that is not shown in the video but you can find as an extra (eleventh) technique at the end of this post
Please get in touch and show me what you’ve made using heat embossing. I hope I can enthuse you about this wonderful technique.
Note: The first five techniques and cards can be found in the previous post.
Tips: Don’t forget to use an embossing buddy (or used tumble dryer sheet) on your cardstock or vellum before stamping with Versamark and adding embossing powder. However, if you do get embossing powder where it isn’t wanted, use a small paintbrush to brush any excess away.
 6. In the first part of this two part series of posts, I covered embossing an image outline.
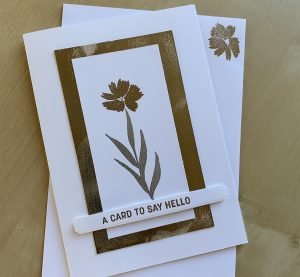
This card uses a solid embossed image using the gorgeous Sending Smiles stamp set. The solid flowers and leaves in the set are perfect for embossing.
Here I stamped the leave first and added silver embossing powder. once I had heat-set that I stamped the flower and used gold embossing powder on that. You could make this card using any colour you want – see how best to use coloured ink and clear embossing powder below.
I mounted the flower image on a silver foil panel. This time I brushed the foil lightly with the Versamark pad then added gold embossing powder. Before heating it I took off any excess from areas I did not want covered using a soft paintbrush. See the video for more details.
It’s easy to produce many different backgrounds by mixing and matching different cardstock and different embossing powders. Experiment! Why not try adding more than one colour to each panel in patches or stripes? Try tings out to work out what effects you like best.
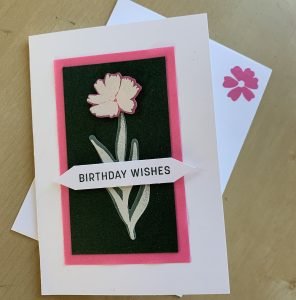 7. Heat embossing doesn’t always have to be used on cardstock. You can also emboss on vellum. Here I used white embossing powder having stamped the leaves and the flower on different shimmer papers from the 2021-2023 In Color Shimmer Vellum pack.
I cut the embossed images out using the Sending dies that are part of the Sending Smiles bundle. Using the Basic White notecards as a base, I mounted these vellum embossed pieces on black cardstock with a layer of Polished Pink vellum behind, then added the sentiment across the middle. The flower head is raised on dimensionals.
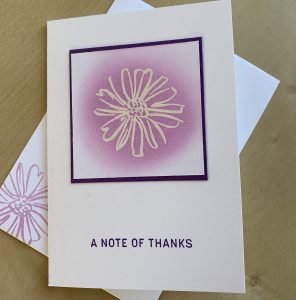 8. One of the most effective uses for heat embossing is to use it on an outline image. Here, I used the flower from the Color and Contour set stamped onto white cardstock and embossed using white embossing powder.
I then used a blending brush and Highland Heather ink to gently add colour over and around the image. Remember to dab the brush off on some scrap paper before using it in a circular motion over the embossed image. keep adding colour until you are satisfied with the result.
Rubbing the image with a soft cloth or tissue will remove any excess ink that has remained on any embossed area.
I mounted the completed image onto a Gorgeous Grape layer then onto a notecard, and added a sentiment stamped in Gorgeous Grape ink.
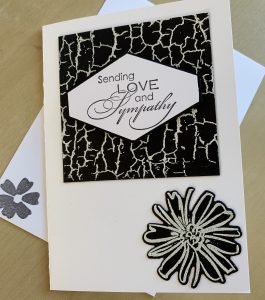 Probably my favourite way to use monochrome embossing is to use white embossing on black cardstock.
9. For my ninth idea, I showed you how to use a background stamp to emboss a background area. Our background stamps are HUGE and can be difficult to use normally, so in the video you’ll see how I inked up the stamp with Versamark then placed the cardstock over the stamp, pressing down firmly but gently to make sure the cardstock picks up the ink.
Then add the white embossing powder and heat to produce the effect you can see in the finished card. I used the retired Crackle Paint background stamp but the same technique can be used with any other background stamp you may have.
I also stamped the flower from Color and Contour and embossed it in the same way then added it as a focal point on my card together with a sentiment.
10. The secret to embossing with coloured ink is to use the Stamparatus. This wonderful tool allows you to stamp any image more than once and be certain it will always stamp in the same place. Watch the video to see how to use it.
When embossing with coloured ink, set up your stamp on the Stamparatus. Stamp your image first with Versamark, then with your chosen ink colour. This allows the ink to stay sticky so it will take up the clear embossing powder well – you can see the results in the video. This is a great way to add a focal point in a stamped background.
BONUS IDEA: I wanted to give you, my loyal blog readers, a bonus, so here is an extra heat embossing idea that is not in the video. I’ve already mentioned I love white on black, but I also love black on white!
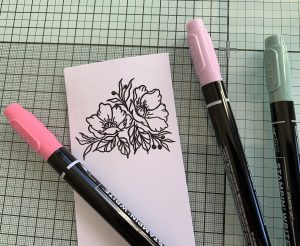 For this card, I stamped a flower group image from the gorgeous Framed Florets stamp set in Versamark onto white card (after using my embossing buddy) then added black embossing powder and heat set it.
I used my Stampin’ Write markers to colour the image, but you can use Stamping Blends or watercolour pencils, whatever you want.
The great benefit of colouring an embossed image is that it makes it easy to stay within the lines!
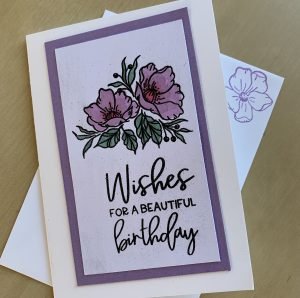
I added the sentiment from the same stamp set again stamped in Versamark then embossed with black embossing powder. I mounted the completed card front on Highland Heather cardstock onto a notecard.
Finally, don’t forget to decorate your envelopes too!
I hope you have gained some ideas form these tips and I’d love to see any cards you make.
Experiment and enjoy!
Product List
|
|
|
|
|
|
|
|
|
|
||
|
|
|
|
|

