One of my swaps from Rotterdam was a decorated pin for unblocking glue and it came with a link to instructions for making a fold flat glue holder box for our Tombow glue. Then one of our lovely demos, Liz Shannon, also shared instructions for making a craft desk fold flat box for holding your Tombow.
We made these as personalised boxes at our April Craft’n’Chat in-person class and my ladies loved them. So I shared how to make them in my Live Craft with Carol earlier today (join me live every Tuesday at 2pm LIVE on Facebook and YouTube) using different colours and various DSP.
To make the box you need:
- Thick Basic White (or your chosen colour cardstock) base: 29 cm x 5cm (11 1/2″ x 2″)
- Thick Basic White (or your chosen colour cardstock) insert: 15cm x 5cm (6″ x 2″)
- Coordinating DSP 2 pieces: 5cm x 5cm (2″x2″)
- Coordinating DSP 1 piece: approx 10.5cm x 5cm (4 1/8″ x 2″)
- Elegant Edge or similar tag topper punch
- Circle punches or dies (eg Layering circles, Stylish shapes or Beautiful Shapes) 1 1/4″ and 1″
- Circle punch or die 1 3/4″
Score the long base piece at 1.5cm, 6.5cm, 11.5cm and 16.5cm (1/2″, 2 1/2″, 4 1/2″ and 6 1/2″). Fold all score lines and burnish, making sure they are straight with the edge.
Stick the two 5cm (2″) square panels to the two scored panels at the end. If using a directional DSP, make sure the pattern faces away from the tab end.
Punch or die-cut a 1 1/4″ circle in the end panel. To make sure it was central, I made myself a template of a 5cm x 5cm scrap. I drew lines diagonally across from each corner which gave me a cross in the centre to allow me to centre my punch. I used this template to draw a circle where I needed to punch on my glue holder card piece.
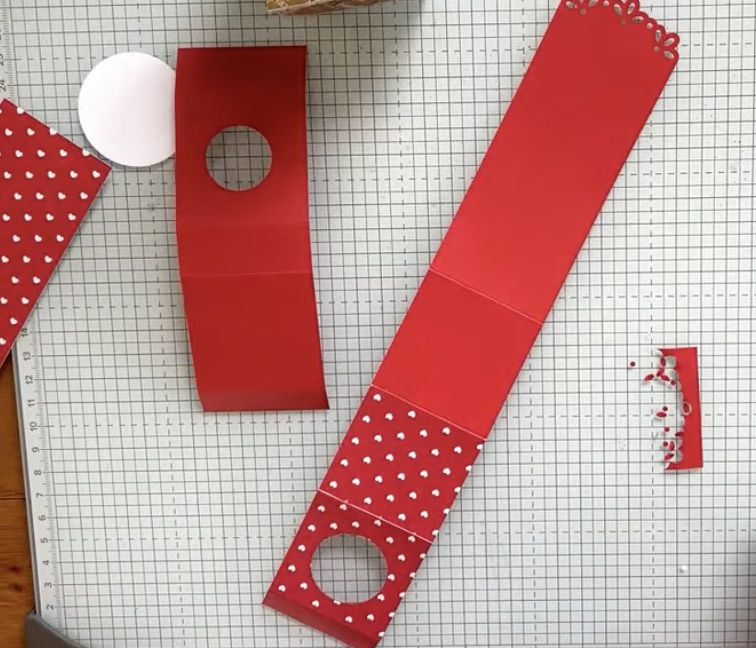
Score the insert at 2cm, 7cm, 9cm and 14cm (3/4″, 2 3/4″, 3 1/2″ and 5 1/2″). Use a second template to punch or die-cut a 1″ circle in one end panel. Your pieces should look like those in the picture below:

I punched the long end of the glue holder using my Elegant Edge topper punch. Any topper punch would do, or shape using your trimmer, a punch or die. Add your DSP to the front of the piece, either before punching or shaping the top as you wish – my video shows the two ways (even though the punch misbehaved in the first one!) (NOTE: if adding the DSP before punching, make sure you add it to the reverse of the card strip, not the front, so that it faces forward when the glue holder is made up.)
Form the main piece of the glue holder by adding tear & tape to the tab, tucking it under then folding the glue holder together at the third fold to stick – see the video if you are unsure about this. Doing it this way ensures the glue holder will fold flat for storage.
Use tear & tape to stick the shorter tab under the longer tab on the insert to form a box shape. Add liquid glue to the sides and bottom of the insert then place it into the main body of the glue holder and stick down, Make sure the glue holder still folds flat.
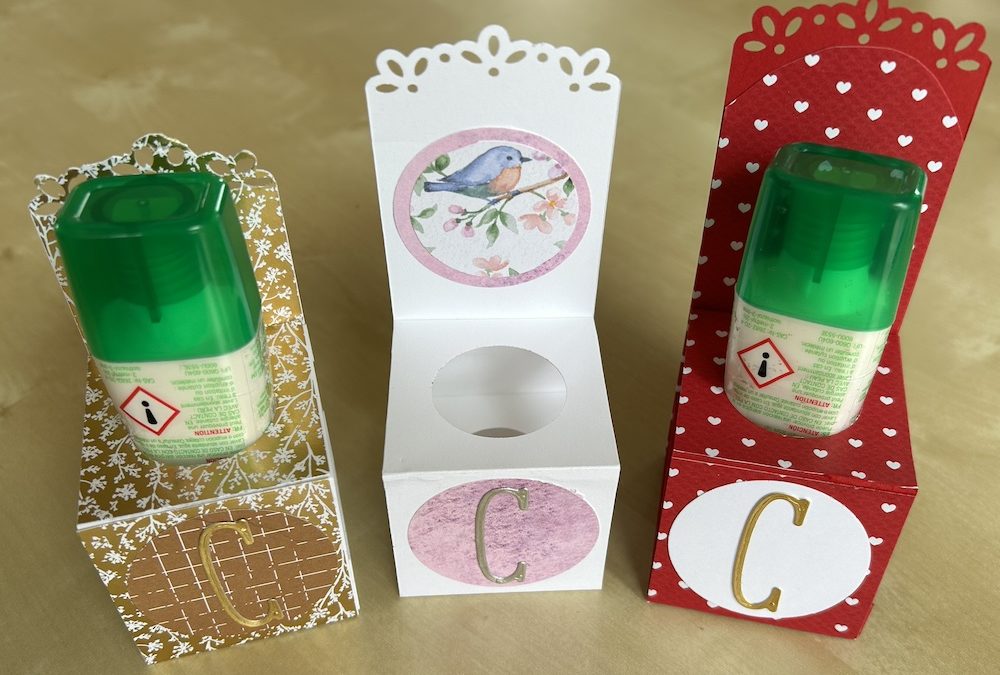
I decorated the plain white version using punched DSP circles and a die-cut “C” cut from gold foil using the Alphabet a la Mode dies. I had added an adhesive sheet to the back of the foil before cutting to make it easy to adhere the initial letter. For the gold version, I pushed out a 1 3/4″ circle of a Pecan Pie pattern from the Nature’s Sweetness DSP I had used for the main glue holder then added an initial C I decorated the red heart version using a 1 3/4″ circle punched from Basic White, then added the die-cut initial.
Here is the video of how to make the glue holder:
Thank you for taking the time to read my post.

Don’t forget – you get a FREE tutorial of eight cards when you place an order with me. There’s a different set every month. And, if your order is over £40, you will also get to choose stuff from my online shop to the value of your order!
Product List


Hi Carol,
Thank you for these instructions, I will definitely be trying this glue stand, adapted to my fave glue of the moment.
I made 6 x Mini Exploding Boxes yesterday using your guide and I love them. I had no cream eggs [Booo] but I conveniently had 6 x Pom Poms that I’d made a few months ago, which I popped googly eyes onto, and added them to the boxes; now they’re ready for me to send out to people to make them smile.
I’m not on IG or Facebook as I am very wary of too much social media these days and it’s influence, so I can’t tag you there, however I can tag you if I pop a little project share on my YT channel.
Em.
x
That would be great! Thanks Em
Thank you for the video on how to make the Tom Bow glue holder.
Pauline from Sydney, Australia
You are welcome Pauline