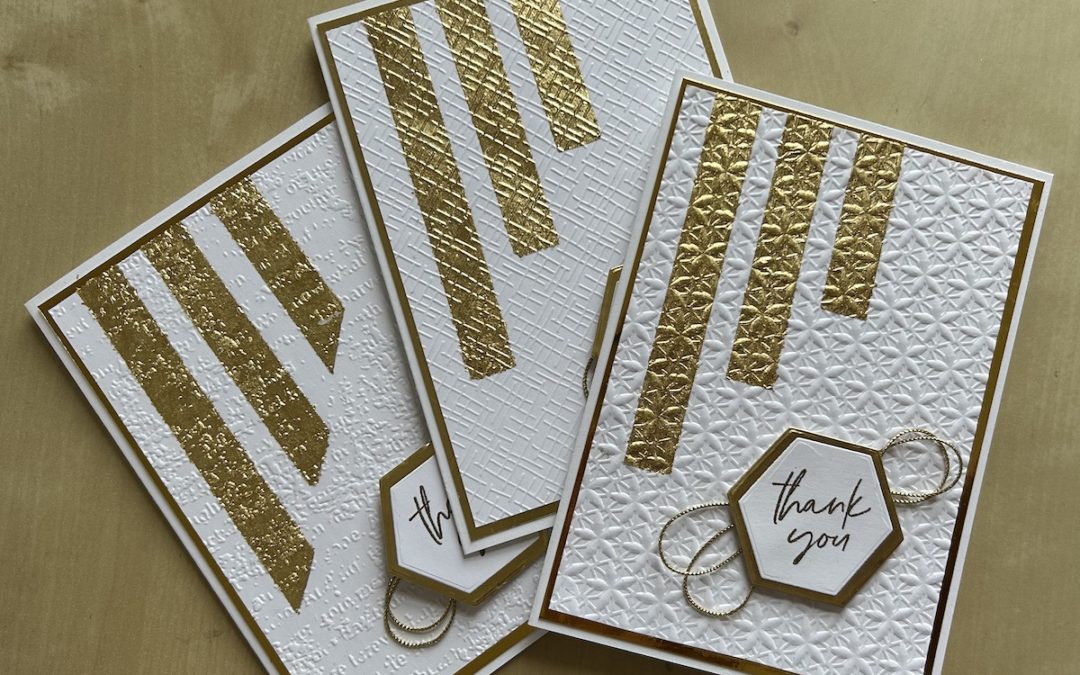
For this project, I wanted to use an item that is too often overlooked – the gilded leafing embellishment on page 141 of the current annual catalogue. It comes as a tub of beautiful gold flakes weighing just 3gm. This might not seem a lot, but believe me, it goes a long way!
The gilded leafing is very, very light so make sure you use it in a draught-free area as any breeze will waft those gilded leafing flakes all round your craft room.
To make the card you need:
- Basic White card base 21cm x 14.8cm scored in half at 10.5cm
- Gold foil layer 14.3cm x 10cm
- Basic White layer 13.8cm x 9.5cm
- Gilded leafing embellishment
- Basics embossing folders (available as an online exclusive product) or another embossing folder of your chocie
- Scrap of Basic White for the sentiment
- Gold embossing powder and Versamark inked
- Gold twine
I used a wider (1.2cm) tear ‘n’ tape as the base to stick the gilded leafing to the card – you could use a double strip of our normal tear ‘n’ tape (which is 0.6cm) if you don’t have any wider tape. The video shows you how to make the card, or you can follow the instructions below.
Instructions
Use your trimmer to mark your Basic White layer as follows:
- With the short edge upwards, place the edge of the layer at 5.5cm.
- Use a pencil in the score/cut channel to make at the top of the layer and mark a dot at the 2″ mark on your trimmer guide
- Move the layer to 3.5cm and use your pencil to mark the top and add a dot at 3″ down
- Move finally to 1.5cm, mark the top and add a dot at 4″ down
Place a strip of tape from each dot up to the top of the layer, using the pencil mark to make sure it is straight. (Use a double length of tear ‘n’ tape if you don’t have any wider tape.) Trim the tape each time to make sure it is a straight edge. Or you can angle it if you feel brave, as I did in one of the cards shown.
Using a tray or scrap piece of paper, rub the gilded leafing onto each piece of tape. Use a sponge to burnish the strips, removing all excess gilded leafing which can then go back into your container.
Run the whole piece through your cut ‘n’ emboss machine using your choice of embossing folder. (I used two of the Basic embossing folders and also the Timeworn Type in the cards in the picture.)
Emboss your chosen sentiment onto a scrap piece of Basic White cardstock, remembering to use your embossing buddy before stamping. I used gold embossing powder and the “Thank you” sentiment from the Something Fancy stamp set.
Cut out your sentiment with a suitable die. Add a layer of gold foil using a die or free cut a layer of gold foil then stick your sentiment on top. (To save foil you can use the centre of your panel layer piece.)
Stick the gold foil panel to your card base. Add the embossed gilded leafing panel on top.
Stick a piece of tear ‘n’ tape where you want your sentiment to sit. Use the gold twine from the Simply Elegant Trim set to form double loops that will show behind your sentiment – see the video for how I did this.
Add your sentiment using dimensionals.
Don’t forget to decorate your envelope! I used some gold stars punched from a scrap of gold foil, or you could use the same embossing folder to decorate the envelope flap.
I hope you enjoyed this project and will have a go at using the beautiful gilded leafing.
Product List
|
|
|
|
|
|
|
|
|
|
|
|
|
|
|
|
|
|


