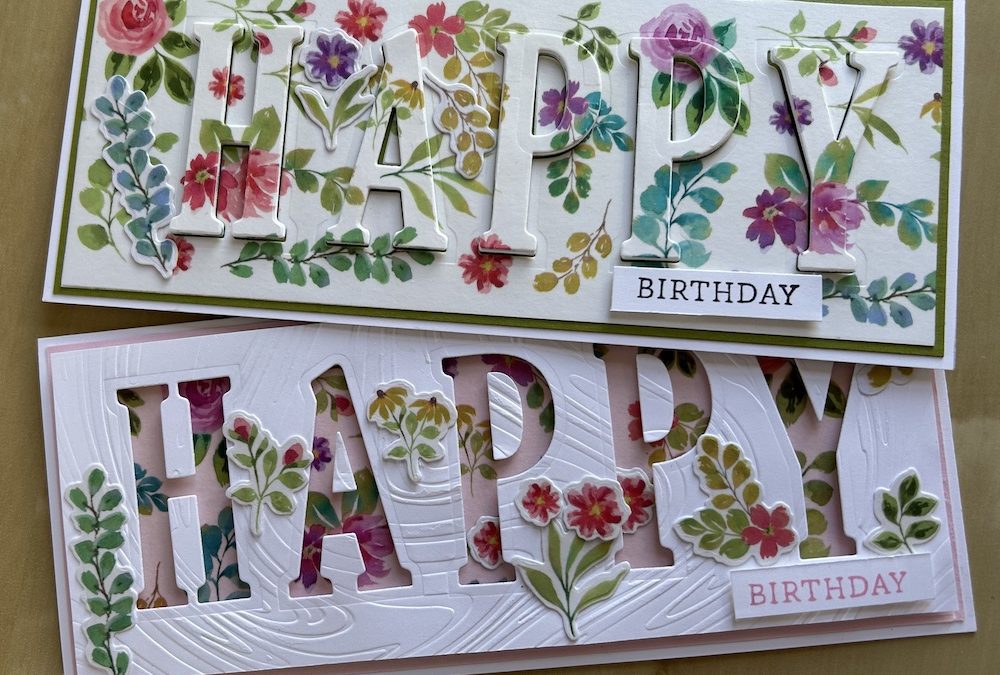
It’s a while since I made a slimline card, but as I had some slimline envelopes and because the Flora washi tape fits a slimline card so well, I made two slimline cards in my Live today.
The first card is an eclipse card, where the die-cut letters are raised above the surface of the slimline card within the same pattern. The second card is a negative card, where the die-cut letter panel is raised above the card and the pattern underneath shows through.
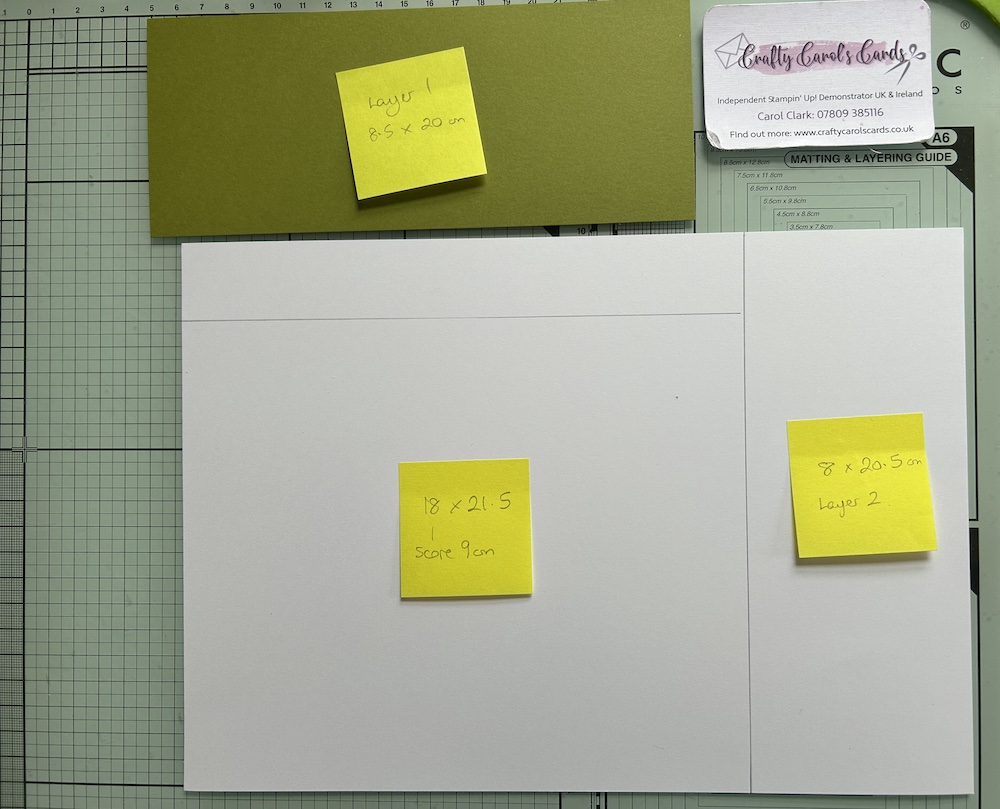
The measurements for a slimline card are:
- Card base 18cm x 21.5cm scored in half at 9cm (8¾“ x 7½“ (score at 3¾“)
- Layer 1 (colour cardstock): 8.5cm x 20cm (8¼“ x 3¼“)
- Layer 2: 8cm x 20.5cm (8″ x 3″)
I die-cut a length of Flora washi tape using the Extraordinary Flora die for additional decoration for my cards.
You can get the card base and a layer 2 out of one sheet of A4 cardstock as shown in the photo below. The strip at the top is scrap – useful for sentiments!
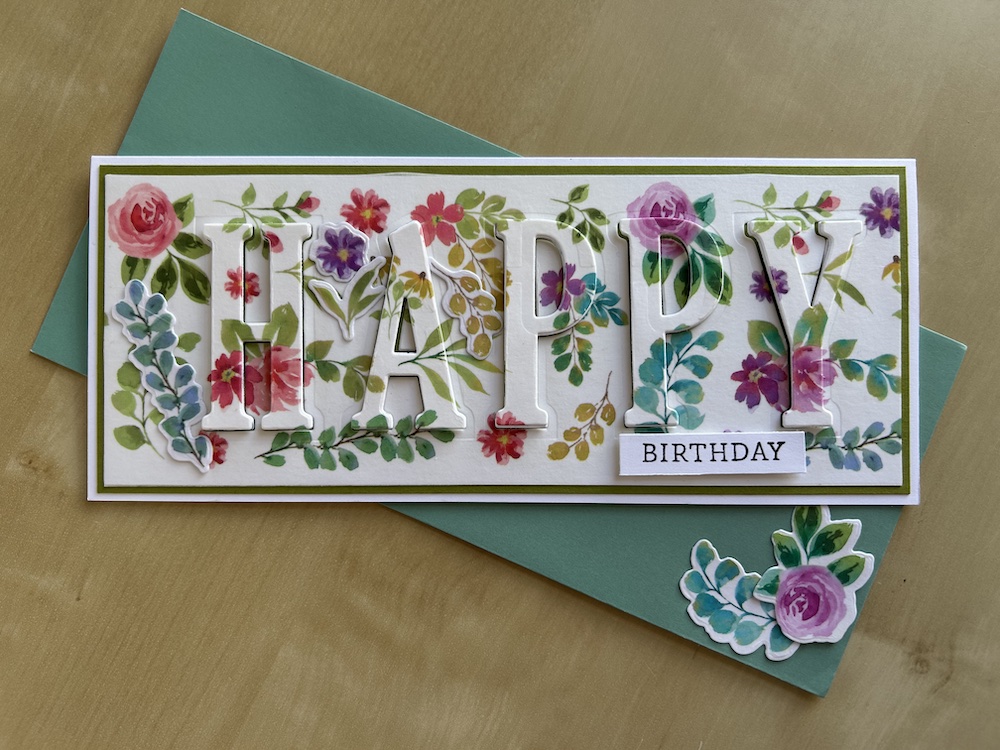
Eclipse slimline card
I used a Basic White cardbase and layer 2 with an Old Olive layer 1.
Score and burnish your cardstock base. Add the colour card layer 1 to the front of the card.
Stretch the Flora washi tape right across the Basic White layer 2, using your bone folder to smooth out any air bubbles. You can wrap it around the edges at the sides if you need or want.
Use large alphabet dies to cut out the letters for the word you want. I used the retired alphabet dies to fit “Happy”. (The new Party Alphabet dies will fit, but they are quite wide. They would be better for “Love” or “You” for example.) Lay out the dies across your card to check the spacing is correct as shown in the video. Use some low tack tape to hold them down while you die-cut them. NB Keep the tiny cut outs from the A and Ps.
Adhere the Flora layer 2 flat to your slimline card front. Stick the tiny cut-outs for the A and Ps in the correct places – use the dies to position them if you need.
Make up stacks of die-cut letters, sticking them together to provide more depth – watch the video to see how I did that. I added the die-cut letters from my first “mistake” card and from the second negative slimline card to add additional depth, or you can die-cut more letters if you prefer to stack for further depth. Two or three layers is about right.
Add dimensionals to the back of your die-cut letter stacks and stick them on your card so they are raised up above the main layers.
Stamp “Birthday” on a scrap of Basic White and add to the bottom right of your card. I used the Simply Said stamp set for this.
Add some additional die-cut Flora decorations to your card if you want. You can also use these to decorate your envelope.
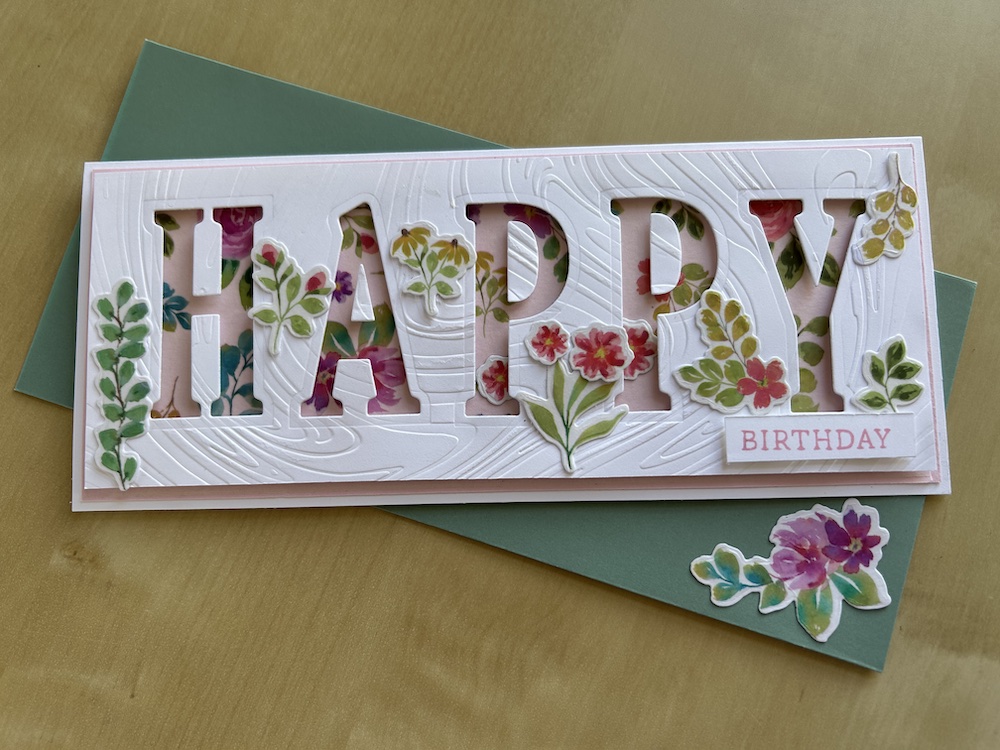
Negative slimline card
Score and burnish the slimline card base.
Stick a length of Flora washi tape to the colour cardstock layer (I used Bubble Bath). Make sure it doesn’t quite reach to the edge on each side – you need 0.5cm clear at each side. Adhere this completed panel to your card front.
Emboss the Basic White layer 2 – I used the So Swirly embossing folder.
Lay out the dies across your layer to check the spacing is correct as shown in the video. Use some low tack tape to hold them down while you die-cut them. Remember to keep the centres of the A and the Ps.
Add adhesive strips or dimensionals to the back of this die-cut layer 2 then stick to the card front. Add dimensionals to the cut out bits from the A and Ps and add these too.
Stamp “Birthday” on a scrap of Basic White and add to the bottom right of your card. I used the Simply Said stamp set for this.
Add some additional die-cut Flora decorations to your slimline card if you want. You can also use these to decorate your envelope.
You can also watch the video below to see how to make these slimline cards.
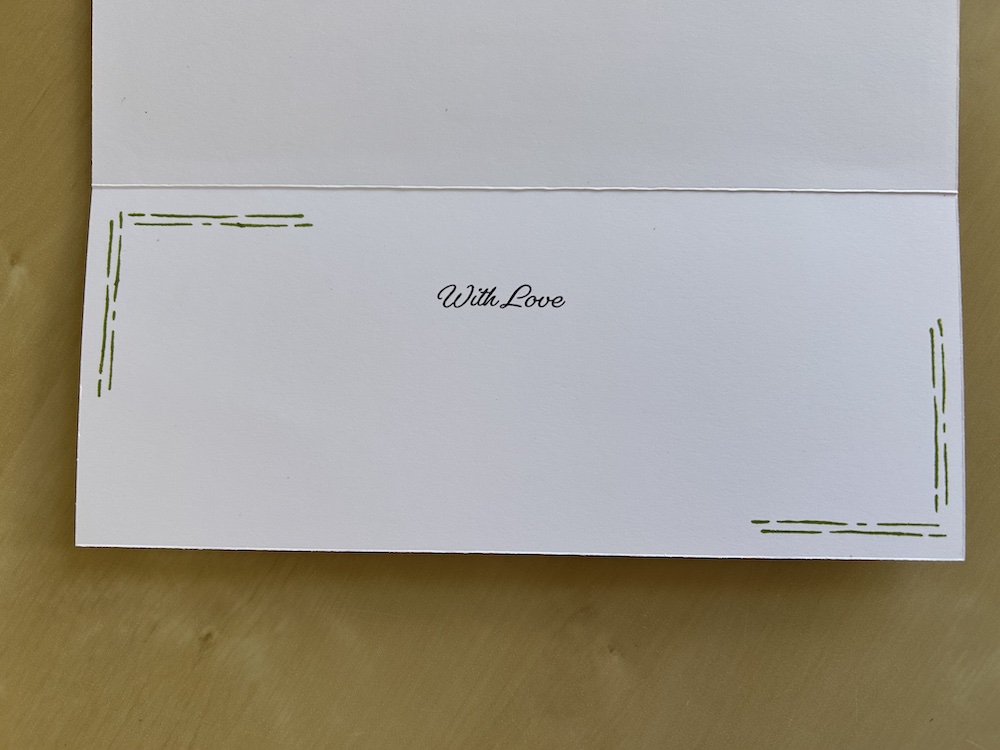
Don’t forget to decorate the inside of your card. Here is what I did with mine:
I hope you like this card and will have a go at making one – please show me what you come up with.
Thank you for taking the time to read my post.

Don’t forget – you get a FREE pdf when you place any order with me as your demonstrator. And, if your order is over £40, you will also get to choose stuff from my online shop to the value of your order!
Product List ![Extraordinary Flora Washi Tape [ 165269 ]](https://assets1.tamsnetwork.com/images/EC042017NF/165269s.jpg "Extraordinary Flora Washi Tape [ 165269 ]") | ![Extraordinary Flora Die [ 165244 ]](https://assets1.tamsnetwork.com/images/EC042017NF/165244s.jpg "Extraordinary Flora Die [ 165244 ]") | ![Basic White A4 Cardstock [ 166781 ]](https://assets1.tamsnetwork.com/images/EC042017NF/166781s.jpg "Basic White A4 Cardstock [ 166781 ]") | ![Bubble Bath A4 Cardstock [ 161727 ]](https://assets1.tamsnetwork.com/images/EC042017NF/161727s.jpg "Bubble Bath A4 Cardstock [ 161727 ]") | ![Old Olive A4 Card Stock [ 106576 ]](https://assets1.tamsnetwork.com/images/EC042017NF/106576s.jpg "Old Olive A4 Card Stock [ 106576 ]") |
![Slimline Envelopes [ 157981 ]](https://assets1.tamsnetwork.com/images/EC042017NF/157981s.jpg "Slimline Envelopes [ 157981 ]") | ![Foam Adhesive Strips [ 141825 ]](https://assets1.tamsnetwork.com/images/EC042017NF/141825s.jpg "Foam Adhesive Strips [ 141825 ]") | ![Party Alphabet Dies [ 165263 ]](https://assets1.tamsnetwork.com/images/EC042017NF/165263s.jpg "Party Alphabet Dies [ 165263 ]") | ![Stampin' Cut & Emboss Machine [ 149653 ]](https://assets1.tamsnetwork.com/images/EC042017NF/149653s.jpg "Stampin' Cut & Emboss Machine [ 149653 ]") |
![Simply Said Mix & Match Photopolymer Stamp Set (English) [ 163756 ]](https://assets1.tamsnetwork.com/images/EC042017NF/163756s.jpg "Simply Said Mix & Match Photopolymer Stamp Set (English) [ 163756 ]")

