I first saw this flip fun fold card made by an American demo, Stamp with Melissa. It took a few attempts to get the measurements correct for us here in the UK, but I think I’ve done it! I demonstrated this card at my Craftalong with Carol LIVE on Zoom today – I’d love you to join me next time. We meet every month, normally on the first Thursday at 11am. Just sign up for my emails and you’ll get all the details and the Zoom link.
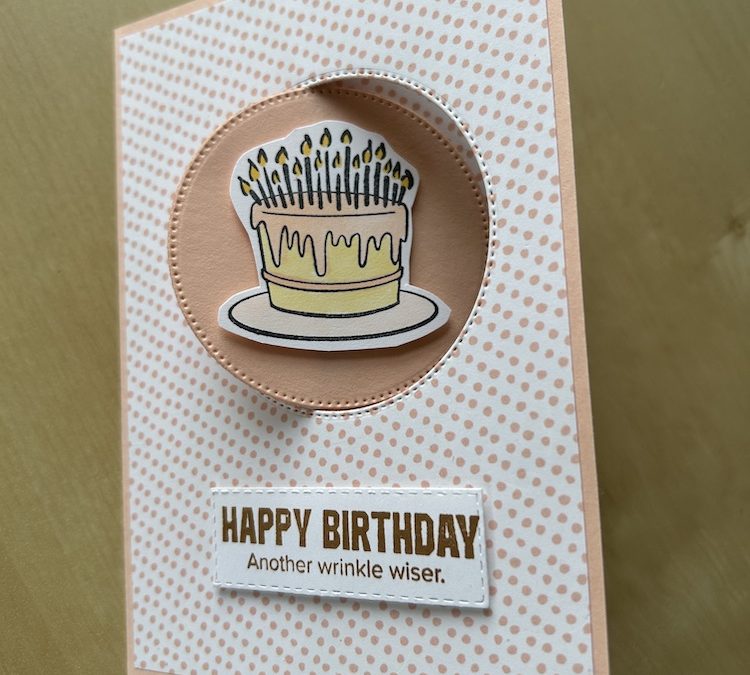
This card uses a folded inside panel to create the flip front image. It is easy to make (once you have the right measurements!). Choose your cardstock to coordinate with your chosen DSP. I’ve used the One More Year stamp set, Petal Pink cardstock and Fruit Salad DSP, free with a £55 order during Saleabration until the end of February.
You will need:
- Card base 21cm x 14.8cm (8½” x 5½”)
- DSP (front) 14.3cm x 10cm (5¼” x 4″)
- Basic White cardstock 14.3cm x 19cm (8″ x 5″)
- DSP (panel 1) 13.8cm x 3.5cm (1¼” x 4¾”)
- DSP (panel 2) 13.8cm x 4.5cm (1¾” x 4¾”)
- Scraps of Basic White for image and sentiment
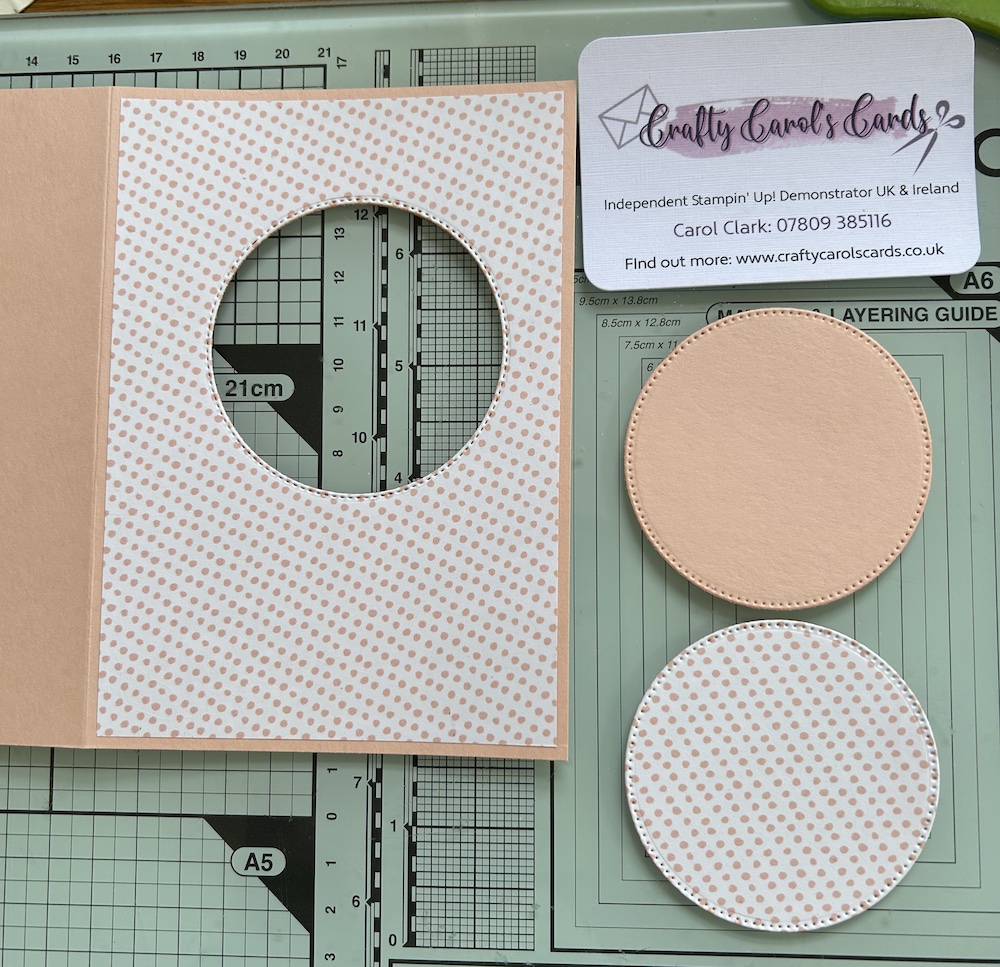
- Stitched Shapes dies or circle punch (approx 2½”)
Score the card base at 10.5cm (4¼”). Burnish well.
On the reverse of the DSP front piece, draw round the second largest Stitched Shape circle die in the centre towards the top as shown below.
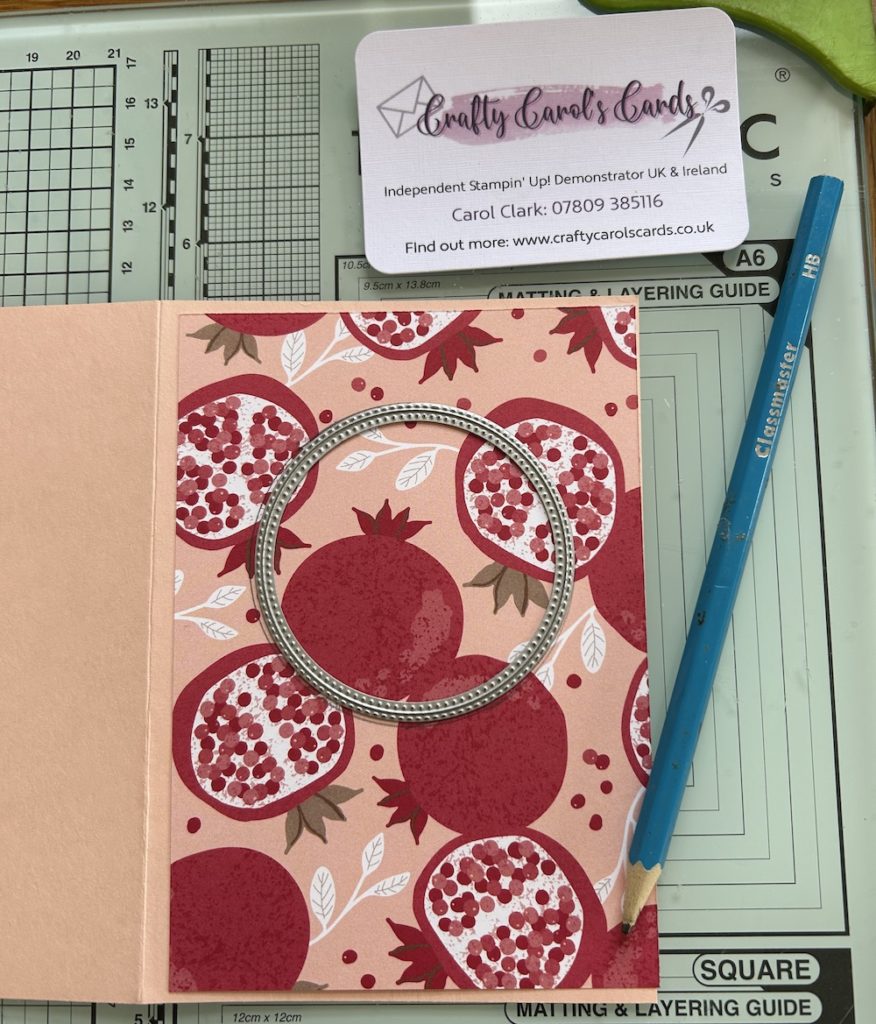
Add glue well outside the drawn line and stick the DSP to the front of your card.
Die cut (or punch) the circle from the upper centre of your card front. Keep both cut-out circle pieces!
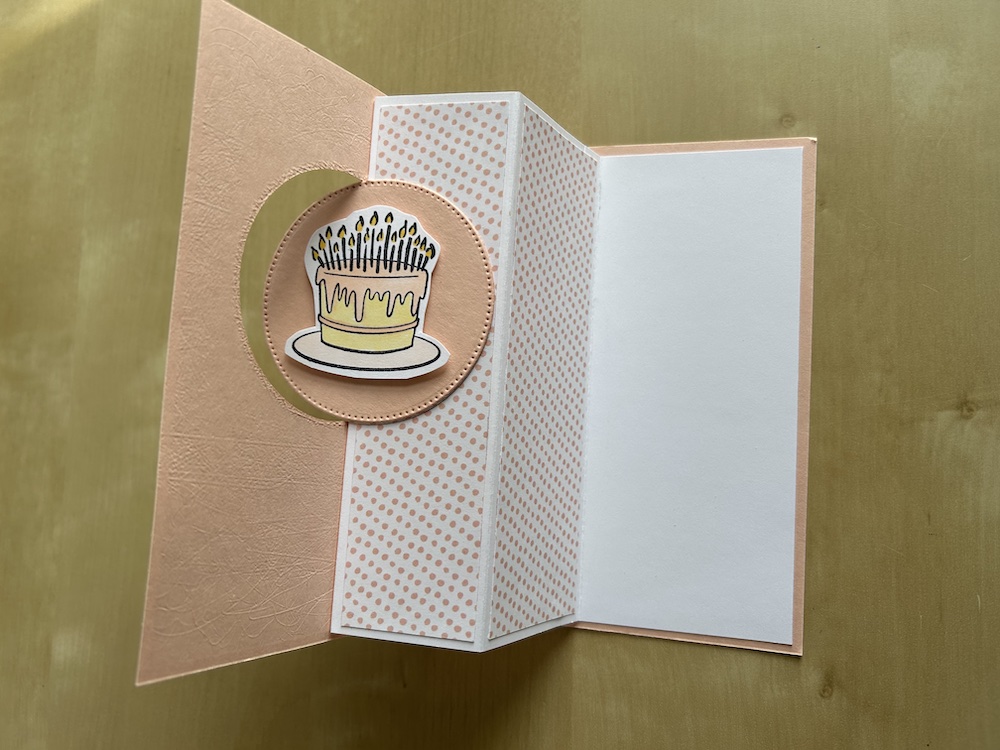
Score the Basic White flip fun fold insert at 6cm, 11cm and 15cm (2″, 3½” and 5½”). Fold as valley, mountain and mountain and burnish well.
Adhere the two pieces of DSP for the panels to the centre two panels.

Stick the reverse of the flip fun fold wider panel to the inside of your card, aiming for the same margin at the side, top and bottom. (If you wish, stamp a sentiment onto this panel before sticking it down.)
Fold the flip fun fold insert closed over on itself and add glue to the front of the remaining blank panel (the left hand panel in the picture above). Fold your card closed to stick down.
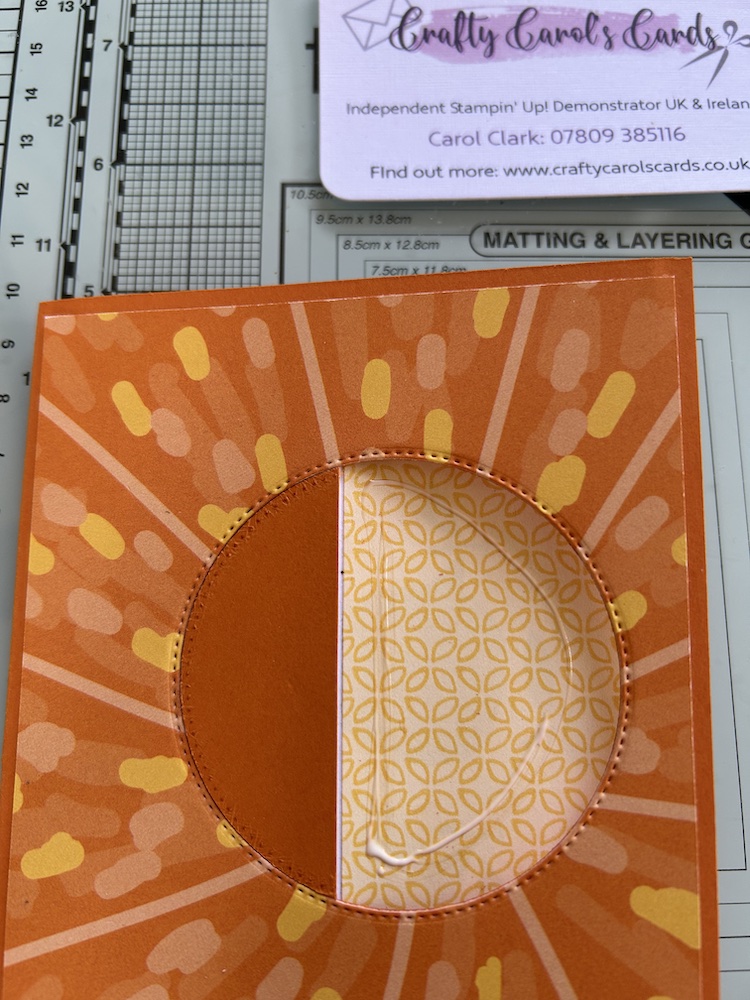
You will see part of this panel with glue showing through the front of the card (the LEFT hand side part). Use the spare die-cut DSP piece to trim a section to cover that area, remembering to match the pattern if necessary! (In the picture below of another card I used a cardstock piece.)
Add glue ONLY to the right-hand panel area that shows through the front of the card as shown and stick down the cardstock die-cut circle to it. Make sure not to put any glue on the left-hand side or the flip fun fold will not work!
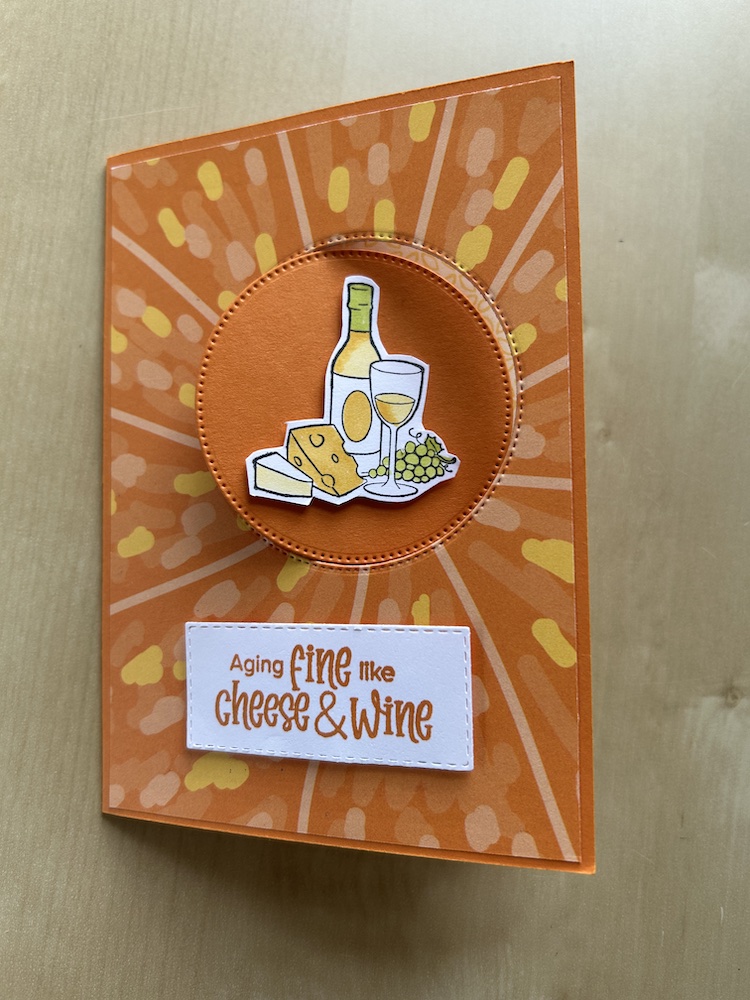
Stamp your image in Memento ink onto a scrap of Basic White and use your Stampin Blends to colour it. I’ve used images from the One More Year stamp set in both these cards. I fussy cut these images, but if you don’t want to fussy cut, die-cut the size smaller Stitched Shape circle and stamp your image onto that.
Add to the front of the main die-cut flip fun fold circle using dimensionals.
To finish the card, stamp your sentiment using a coordinating colour ink pad onto a scrap of Basic White and either trim to size or use a die. Add to the centre bottom of your card front using dimensionals.
Here’s the other flip fun fold card I made:
You can add a stamped sentiment inside your card if you wish, or leave it blank.
I hope you like this card – the ladies at my Craftalong certainly did! Why not join us next month on 6th March? Make sure you are signed up to my emails to receive the supply list!
Thank you for taking the time to read my post.

Don’t forget – you get a FREE tutorial of eight cards when you place an order with me. There’s a different set every month. And, if your order is over £40, you will also get to choose stuff from my online shop to the value of your order!
Product List  |  | |||
 |  |  |
")
 Designer Series Paper")


