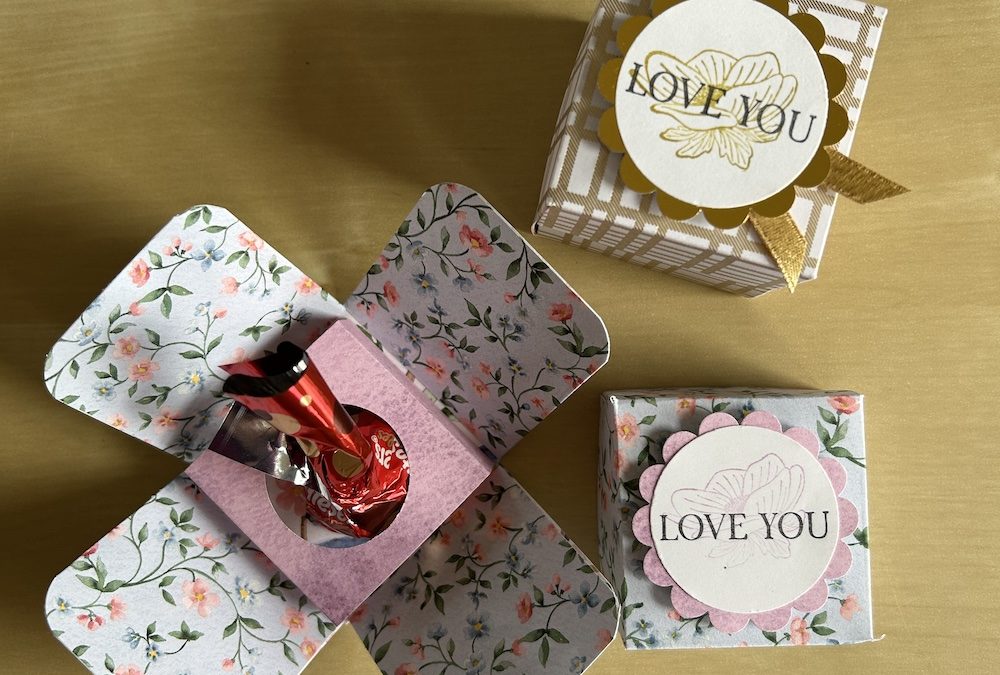
I love making small gifts. My best friend had to have her cat put to sleep recently so I gave her one of these boxes with her card.
These explosion gift boxes are so easy to make and if, like me, you have an enormous stash of old Designer Series Paper then this is a great way to use some up! Each box uses either two sheets of 6″x 6″ DSP or half a sheet of 12″ x 12″ DSP.
Although made only with DSP, the box is quite sturdy as it is made up using a double layer for the base. It fits a Malteser truffle sweet, Lindor, or small candle or similar. (You can make it bigger using a larger piece of DSP – but that post is for another day!)
You will need:
- One 6″ x 6″ piece of DSP (box base)
- One 4″ x 4″ piece of DSP (box lid)
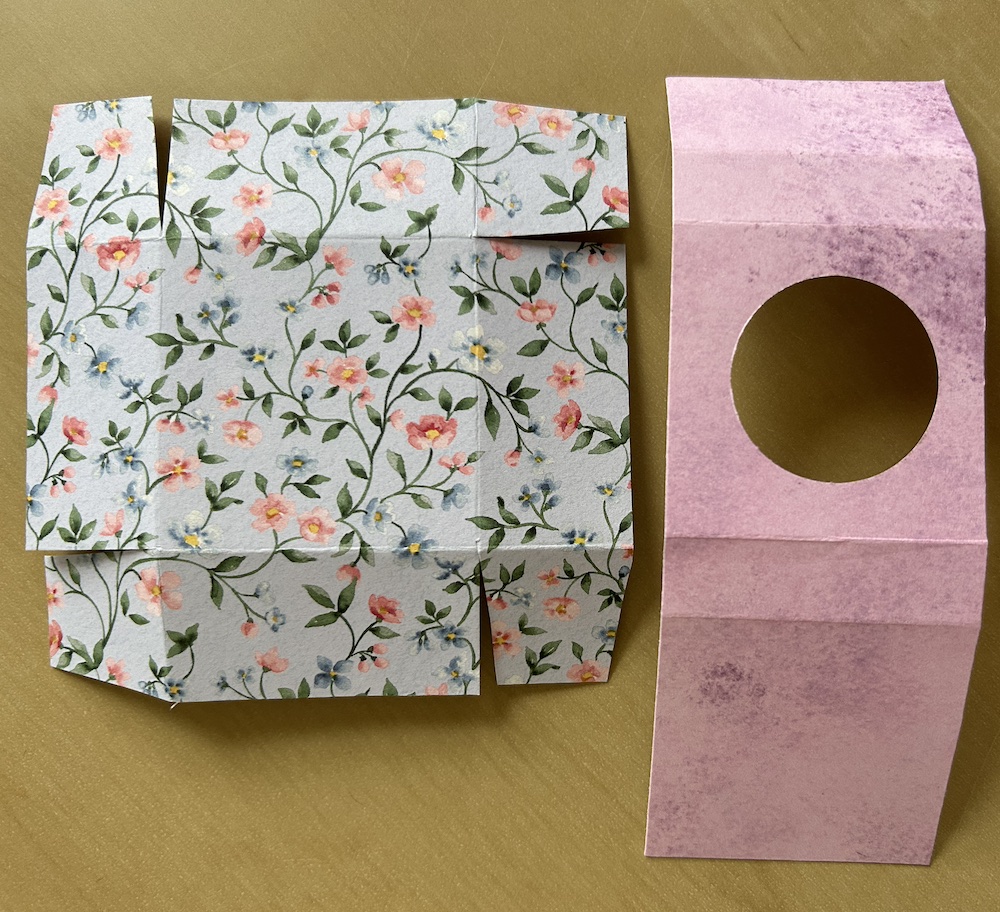
- A strip of DSP 1 7/8″ x 5 1/2″ (box insert)
- Small circle punch or die approx 1 1/4″
You can watch how to make the box in the video here or full instructions are given below.
Using your scoreboard or paper trimmer, score the large 6″ square piece (box base) of DSP at 2″ and 4″ on two sides.
Score the smaller 4″ square (box lid) piece at 1″ and 3″ on two sides.
Score the strip of DSP on the long side at 1 7/8″, 2 3/8″, 4 1/4″ and 4 3/4″
Fold and burnish all the score lines (I forgot to do this in the video!)
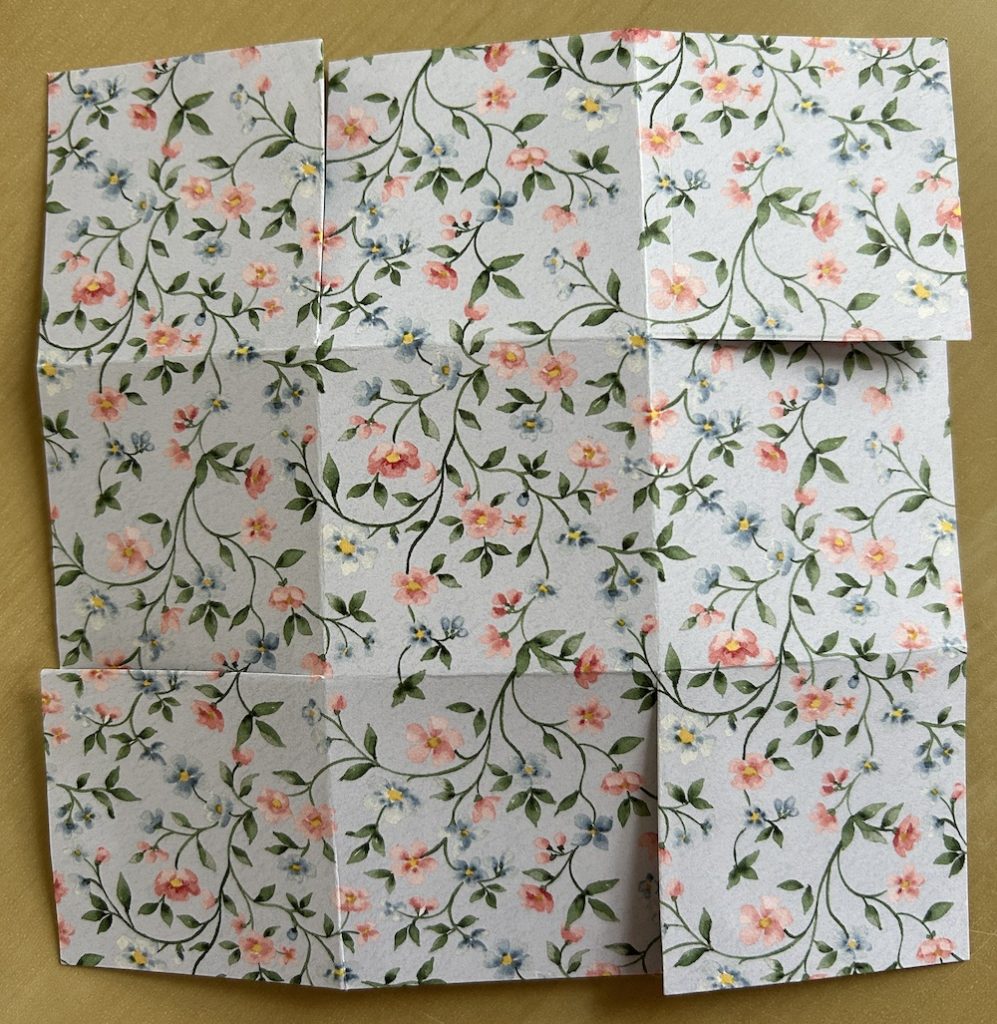
To make the lid, cut a tab at each corner, taking a triangular sliver off each edge of the tab. For square boxes, I cut these like a Catherine wheel (the same at each corner) to equalise where the tabs stick down as in the picture below. Stick each tab to the next long side to form the lid, making sure to check your corners are square.

Make the insert by folding and burnishing all score lines, then use a 1 1/4″ circle punch or small die (or size of punch or die that fits your proposed gift!) to punch out a hole from the middle of the section between the two pairs of folds as in the picture above. Stick the end tab to the outside of the end square piece to form the insert.
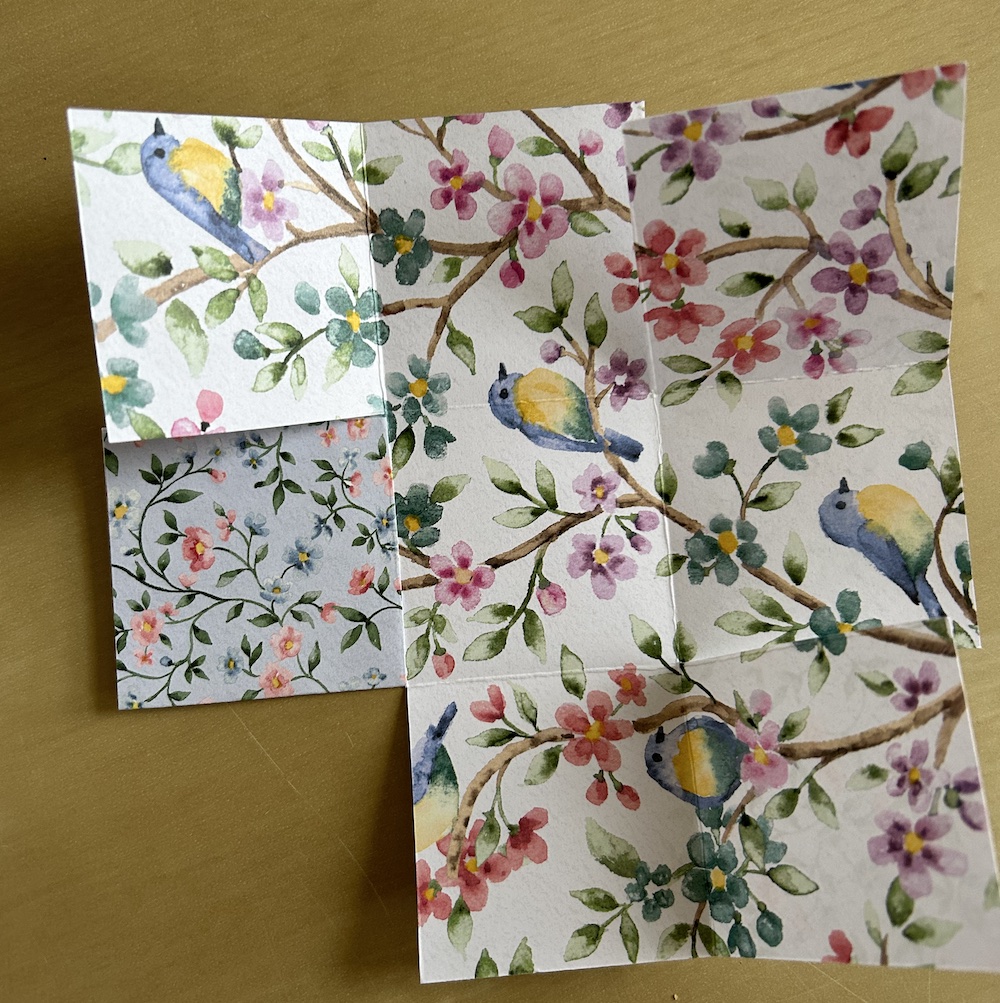
The box base is created by cutting up the right-hand score line on each side as far as the next horizontal scoreline as in the left-hand picture below. Do NOT angle these pieces! Making sure you have the pattern that will be on the outside of your box facing downwards, fold each corner square across its neighbouring square and stick down as in the picture on the right below. Repeat on all four sides.


It makes it easier to close the explosion gift box if you round all the corners of each side tab either by eye using scissors or using a corner rounder punch, which hopefully works better than mine in the video!
Stick your completed insert to the centre of the inside of your box base. Add your sweet of other gift and lift all the sides to put the lid on.
Decorate the explosion gift box lid as you wish. I used an old retired 1 3/4″ scalloped circle punch to punch out a circle of a contrast colour DSP. Then I stamped my sentiment and added a stamped off small flower from the Lifetime of Love stamp set. I punched this out using a 1 1/2″ inch and added it to the scalloped circle using dimensionals. In the video, I also added a short piece of ribbon folded over beneath my circles to give more interest and colour.
I hope you have a go at this quick and easy explosion gift box. They are great fun to make!
Thank you for taking the time to read my post.

Don’t forget – you get a FREE tutorial of eight cards when you place an order with me. There’s a different set every month. And, if your order is over £40, you will also get to choose stuff from my online shop to the value of your order!
Product List


