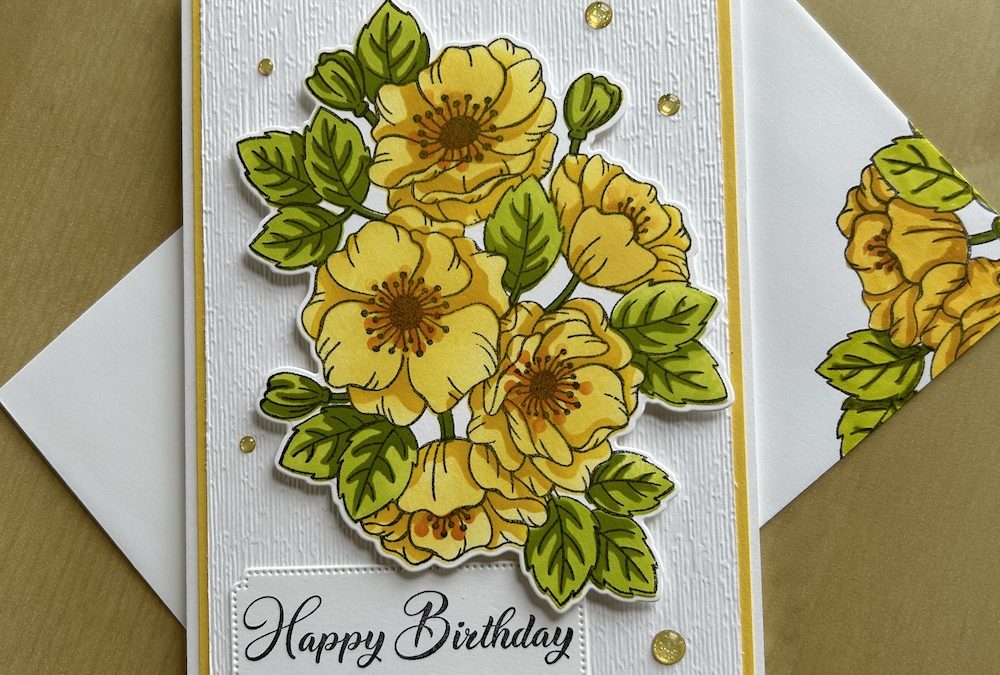
The Enduring Beauty bundle has not just stamps and coordinating dies, but also a THIRD part – the decorative masks. (Buying the bundle before the end of February will also get you a FREE Saleabration item.)
The masks are designed to help you colour the large flower image that is the centrepiece of the stamp set. There are five masks, three to colour the flower heads and two for the leaves. And they are so simple to use. My key tips are:
- Use removable adhesive* to stick your stamped image down to your work surface.
- Line up the stamps to the image making sure the notch is always to the top left.
- Use low tack tape to hold the masks in position as you colour
- Use blending brushes to colour.
- If you work from a lighter colour to a darker shade of the same colour you don’t need to swap your brushes, so two brushes will colour all five masks.
(*Here is a link to the removable adhesive I use)
You will need:
- Basic White card base 21cm x 14.cm (8 1/2″ x 5 1/2″) scored in half at 10,5cm (4 1/4″)
- Colour layer 14.3cm x 10cm (5 1/4″ x 4″)
- Basic White layer 13.8cm x 9.5cm (5″ X 3 3/4″)
- Basic White piece for stamping flower image minimum 8.5cm x 12 cm (3 1/2″ x 4 3/4″) plus scrap for sentiment
- Gold gems for decoration
Here’s the video of how to use the decorative masks:
Stamp your image onto the piece of Basic White using Memento. Adhere this piece to your work surface using removable adhesive (or some tape you have removed some of the sticky from) on the back of your card.
The masks are numbered and have a notch which should be at the top left and helps you line up the masks. In future I will make a mark on my work surface at the notch to help me – I forgot in the video!
This is the order I found best to use when colouring with the masks.
Line mask number 1 up with your image. Stick down using low tack tape. Choose your preferred main colour – I used Daffodil Delight. Apply this using a blending brush as shown in the video.
Line up mask number 3 and stick down. Apply a darker shade of the same colour (I used Crushed Curry) using the same blending brush.
Then line up mask number 5 and colour the centre of the flowers in your darkest shade – I used Pumpkin Pie.
Now line up mask 2 and stick down. Change to a new blending brush and your lighter leaf colour. I used Lemon Lime Twist.
Finally, line up mask 4 and colour using your darker leaf colour, using the same blending brush as for mask 2. I used Old Olive for this.
All the masks can be cleaned easily using a damp cloth then left to dry.
To complete the card, stick the coloured layer to your card base. Either stick the Basic White layer down flat or emboss, if you wish, before adding it to your card. I used the retired Subtles 3D embossing folder.
Stamp your chosen sentiment onto a scrap of Basic White and die cut. Die cut your coloured flower image. Stick the sentiment flat to the boots left then add the flower images using dimensionals.
Add a few gold gems to finish your card.
You can use either the tiny flower stamps or a corner of the large flower stamp to decorate the inside of your card and your envelope and colour using Stampin Write markers to finish a card anyone would be delighted to receive.
There are several other things you can do with your masks – more on that in another post soon!
I loved the simplicity of colouring using the masks. What do you think?
Product List


