Another month flies by! So it is time for another Tech4Stampers blog hop. This month the theme is Vellum. Well, that’s easy for me – my favourite way to use vellum is embossing, both dry and heat embossing and I’ve used both in this card. Plus I have an extra (and very easy) embossed vellum card to share – read on!

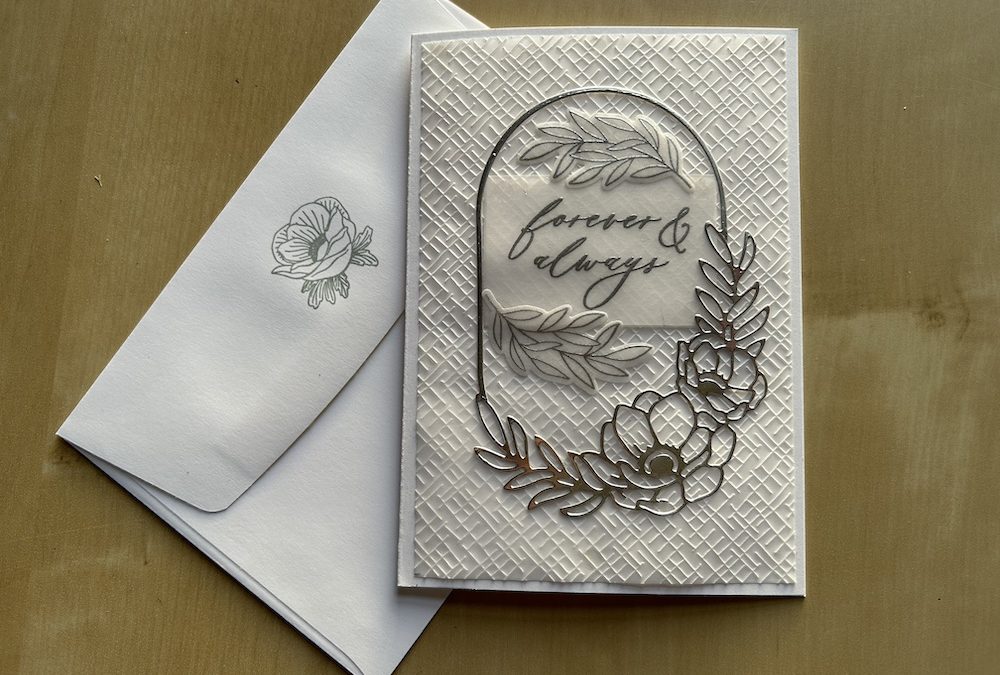
My first embossed vellum card shown above is a wedding card but can easily be used as an anniversary or simple love greeting card. You will need:
- Basic White cardstock 21cm x 14.8cm (8 ½” x 5 ½”)
- Vellum piece 10cm x 14.3cm (4″ x 5 1/4″)
- Vellum sentiment piece 6cm x 4cm (2 1/4″ x 1 1/2″)
- Silver foil approx 12cm x 8cm (4 3/4″ x 3 1/4″)
- Scraps of vellum for the embossed leaves
Score the card base in half at 10.5cm (4 1/4″), fold and burnish.
Dry emboss the large piece of vellum using the hatched basic embossing folder (or another folder of your choice). Stick to the front of your base card using glue dots.
Rub your embossing buddy over the sentiment piece of vellum and the scrap pieces. Stamp the sentiment onto the main piece using Versamark and cover in silver embossing powder. Stamp two leaves on the scraps using Versamark. Add silver embossing powder. Heat set these pieces using your heat gun. NOTE: it is best to heat from beneath as this gives a smoother finish – and remember to keep your heat gun moving!
Stick your sentiment to the centre front of your card using glue dots, approximately 4cm (1 1/2″) from the top of your card.
Use the large frame die from the Lifetime of Love bundle to cut out a frame from the silver foil. If you have an adhesive sheet, stick this to the foil before you die cut. Alternatively, add liquid glue adhesive by putting a few drops onto a small piece of sponge then dabbing it over the back of your die cut. Stick around your sentiment.
Die cut your two leaves with the Lifetime of Love die. Add one above and one below your sentiment piece – or wherever you think they look best – using glue dots.
Stamp a sentiment and image of your choice inside your card using Smoky Slate ink as shown below. Don’t forget to decorate your envelope!

I also made a similar card in my live last week (2pm Tuesdays on my Facebook page and YouTube channel) which you can see below:
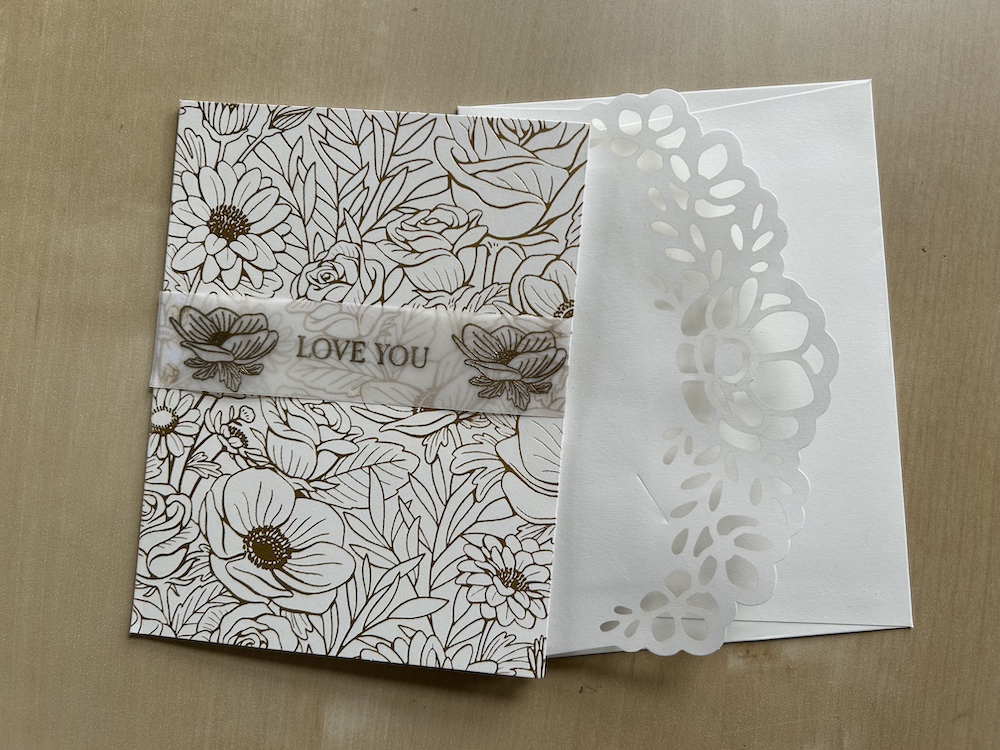
Last week I also decided to use one of the Gold Foiled Flower cards and envelopes that are part of the gorgeous Forever Love suite. It can be difficult to decide how, or whether, to decorate such highly decorated cards.
So I decided to use vellum to add a little something! I had a strip of vellum left over measuring 11cm x 2.5cm (4 1/4″ x 1″). I rubbed it with my embossing buddy then stamped the “Love you” sentiment in the centre with Versamark.
I added two small flowers from the set either side in Versamark then covered them in gold embossing powder. Once heat set, I stuck the strip across the centre of the card using glue dots.

How easy was that? I think it adds to the card. What do you think?
I hope you like my cards. Now please go and visit my clever Tech 4 Stampers friends to see what they have made by clicking on the list below.
Product List


Great card Carol!
Such an elegantly simple card Carol. I love it!
Beautifully crafted wedding card, Carol – love it!
Beautiful card Carol. Love the white and silver, very elegant. Xx
Thanks everyone!
Just watched your video on this card. Fantastic idea about using a sponge to put the glue on the frame. Will definitely adopt this idea for future projects. Also loved the idea of using the velum. Again another project I will definitely be using – always stuck for using the velum.
Thank you Carol
Wow, what a great card!
Wow what an amazing wedding card. Thank you for sharing.